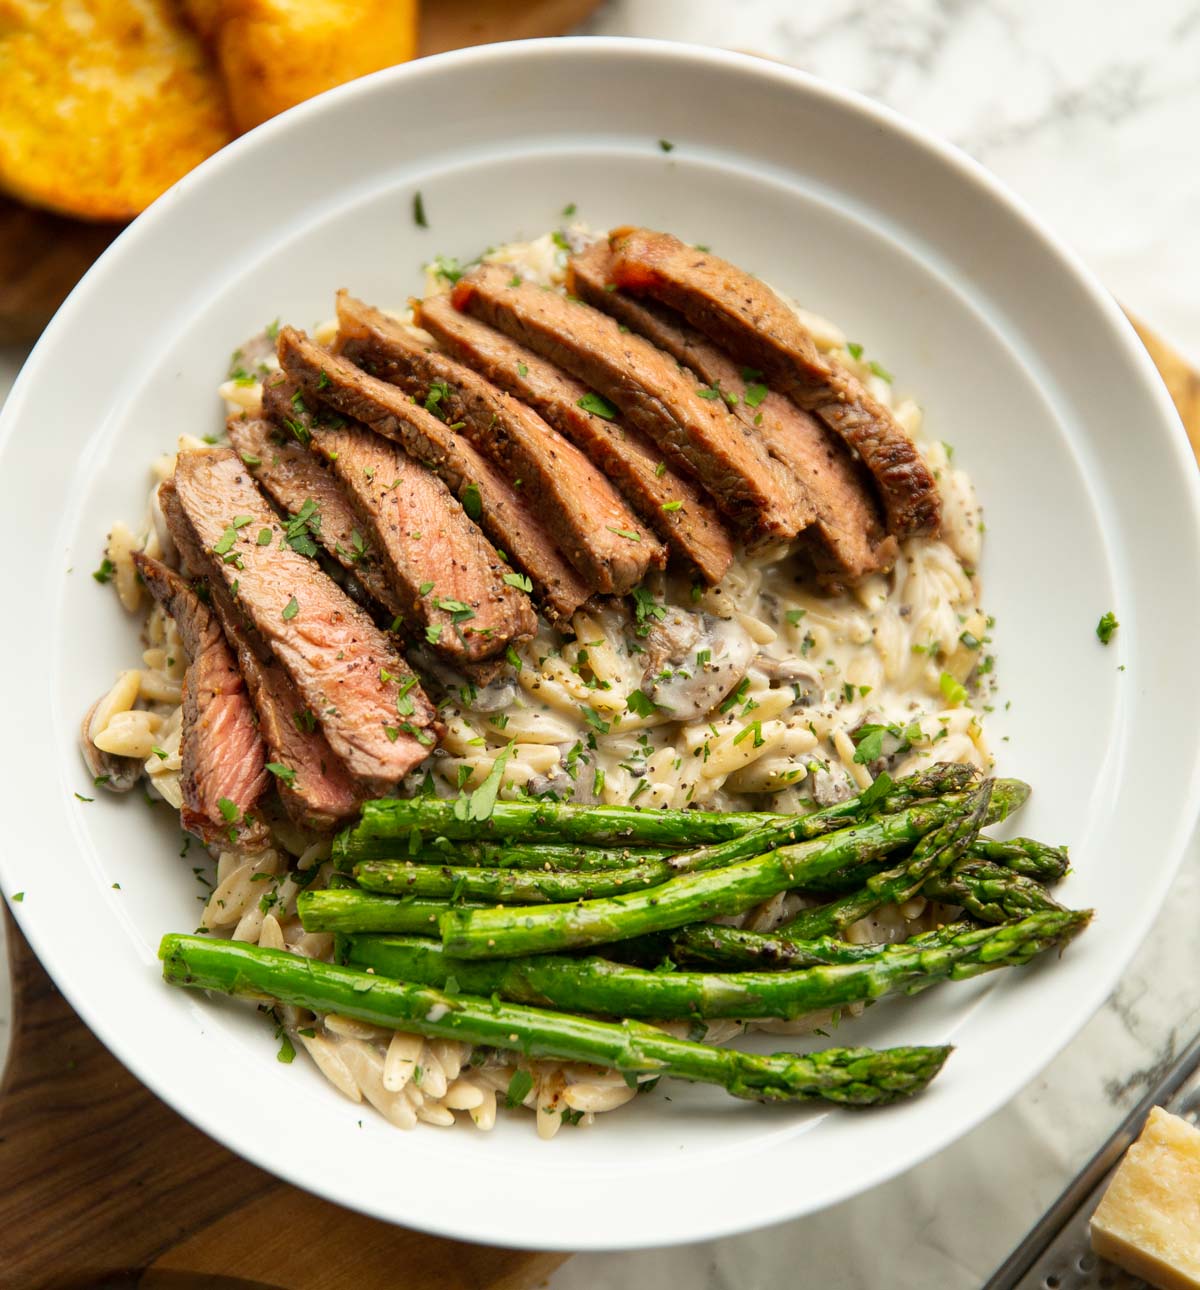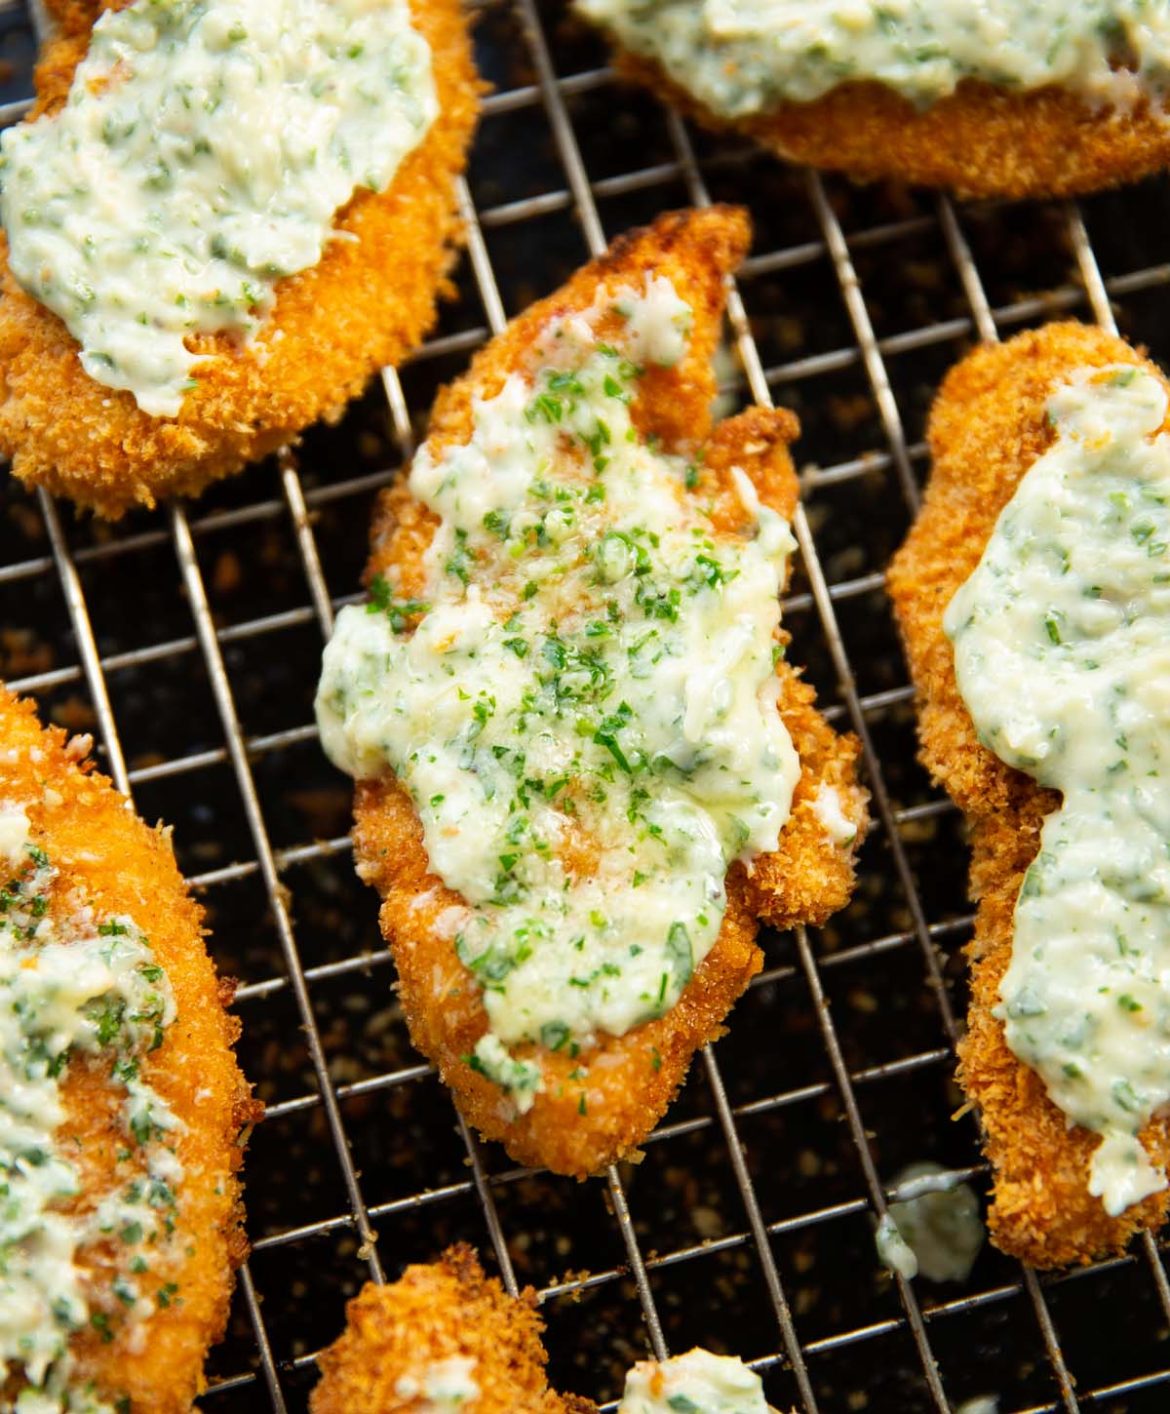
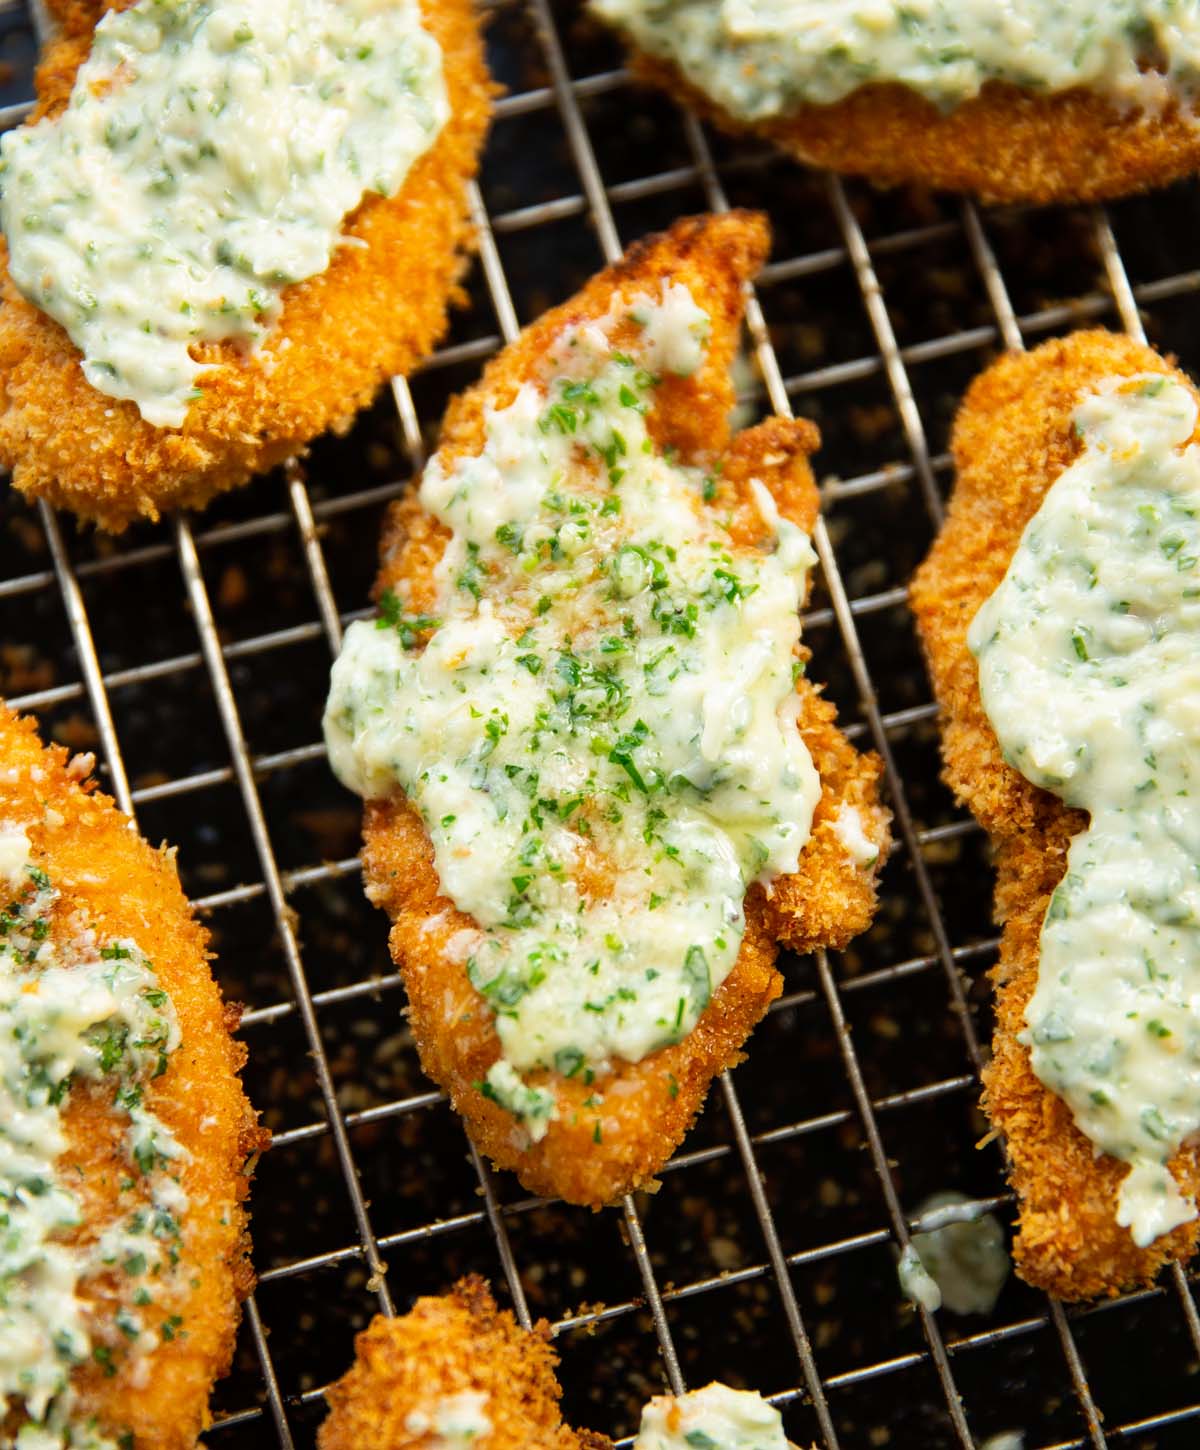
These chicken tenders are baked until golden and crisp, then coated in the most irresistible garlic parmesan butter.
I really wanted to create some gorgeous garlic parmesan chicken without the need for deep frying and well, here we are. Crispy and loaded with flavour by using just the oven! Follow me…
Panko Breadcrumbs
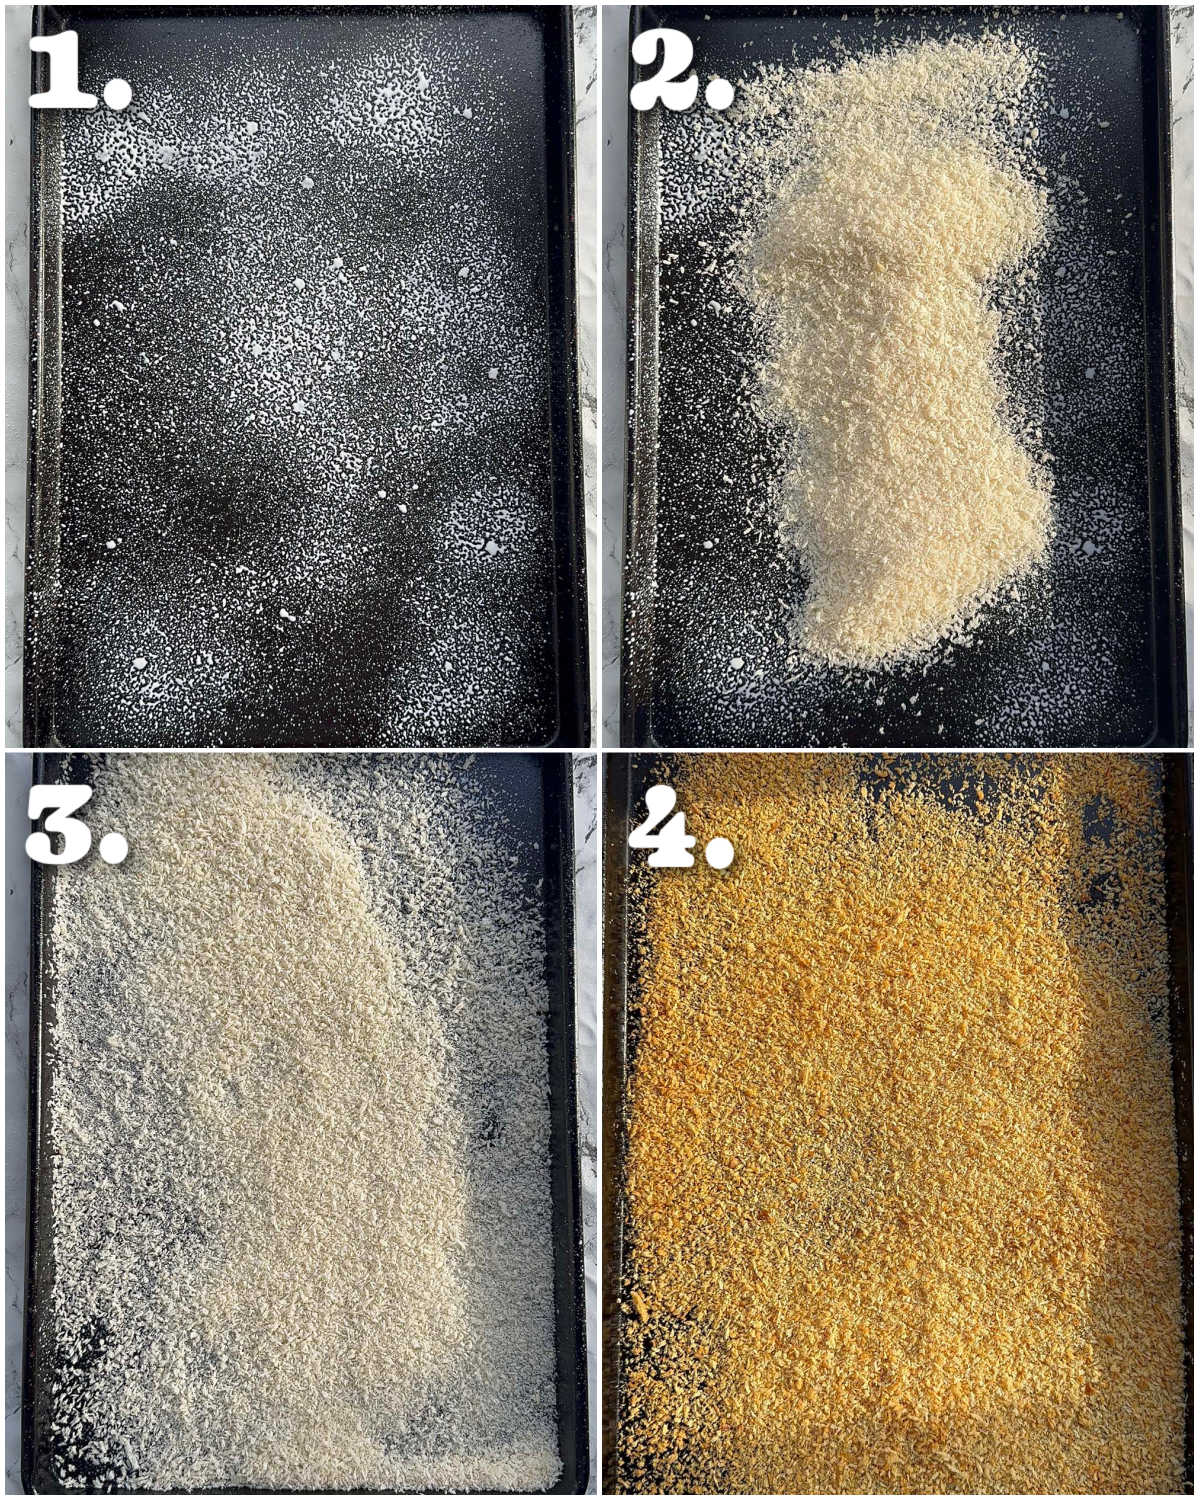
One of the keys to these tenders being so crispy is the use of Panko. These are Japanese breadcrumbs and they’re perfect because they’re big and airy, meaning they come out super crisp once cooked.
Pre-toasting the breadcrumbs
Because we’re not frying the breadcrumbs, we want to give them a head start before coating the chicken in them. By giving them a quick bake beforehand, they’ll already be light golden before they go back in the oven with the chicken, meaning they’ll be perfectly golden by the time the chicken is cooked.
Did you know?
You’ll find Panko in most major supermarkets in the Asian section.
Process shots: spray baking tray with oil (photo 1), add breadcrumbs (photo 2), shake (photo 3), bake (photo 4).
Crispy Baked Parmesan Tenders
We’re going to be working the parmesan into the tenders in 3 different layers:
- Layer 1 – Mixed in with the breadcrumbs. This will offer a good amount of flavour and also help them crisp up.
- Layer 2 – Mixed in with the garlic butter. The residual heat from the cooked tenders will lightly melt the butter/parmesan.
- Layer 3 – Sprinkled over the top at the end. This is optional, but I typically sprinkle over a handful at the end, just for good measure!
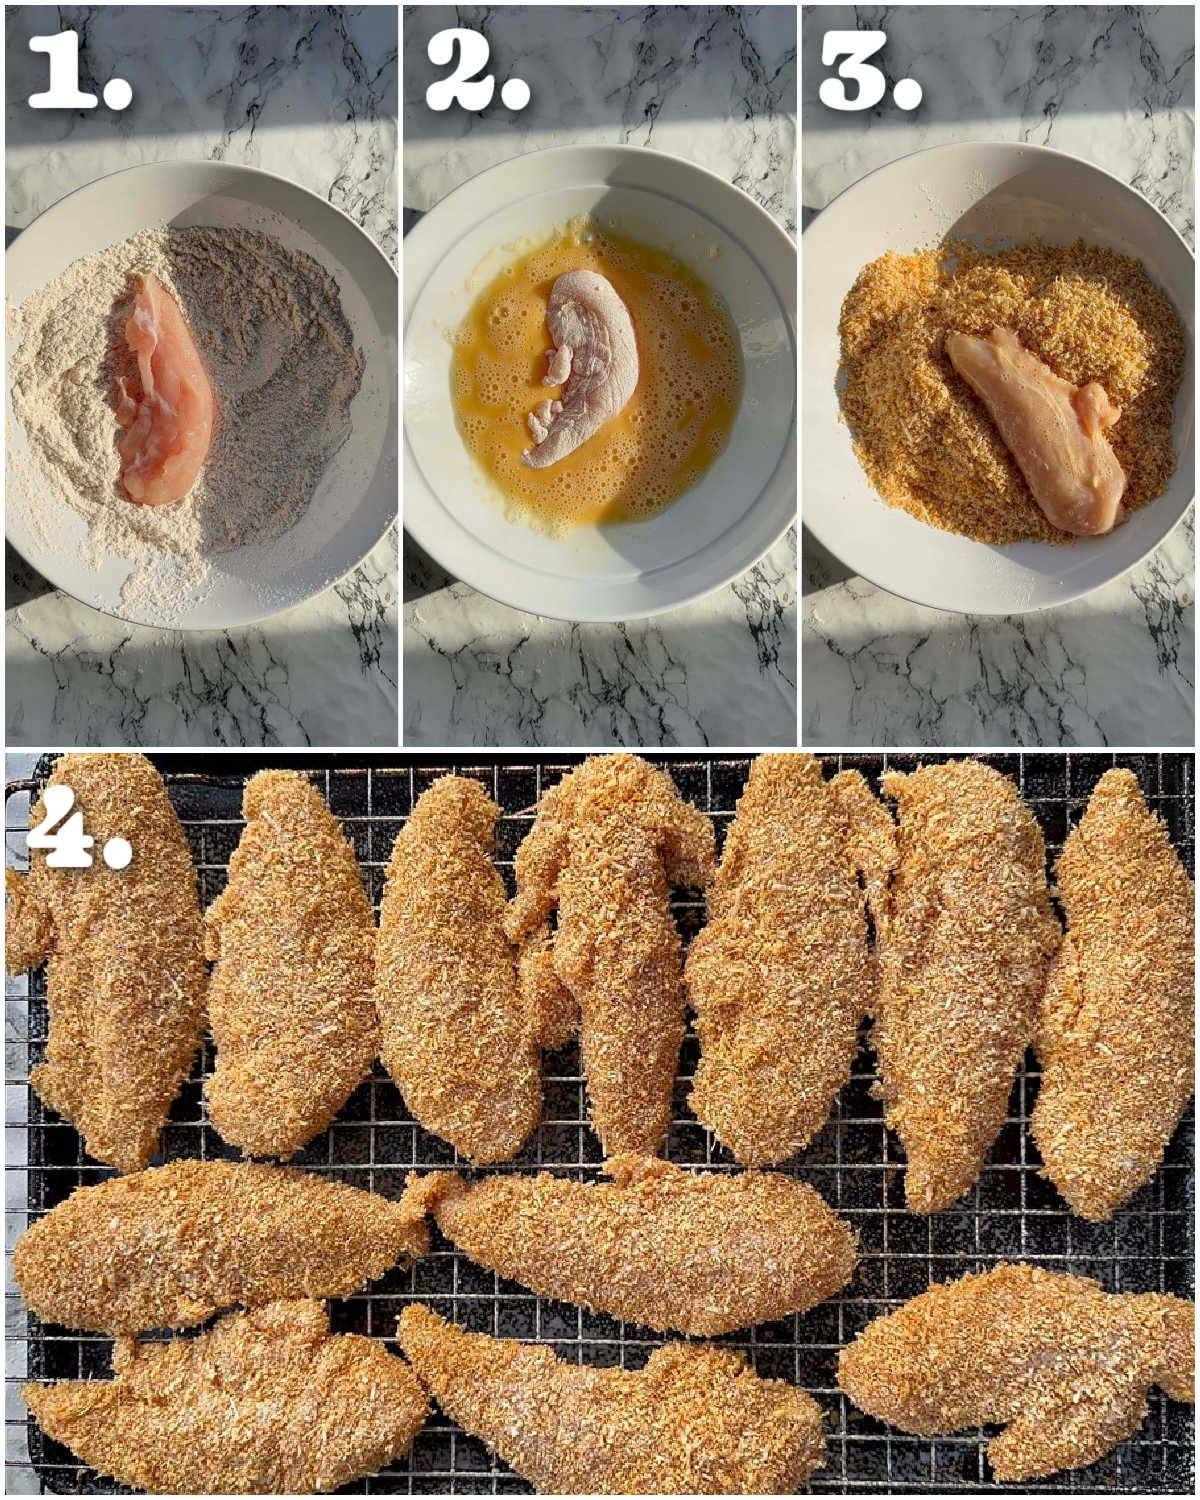
When it comes to coating the tenders, we’re going for the classic flour, egg and breadcrumbs. Just make sure you thoroughly coat the tenders at each stage and work one by one (tedious, I know, but worth it).
Top Tip!
Place the tenders on a wire rack on top of the tray. This will help the air circulate around the chicken and help the tenders crisp up more efficiently.
Process shots: coat chicken in seasoned flour (photo 1), coat in beaten egg (photo 2), coat in seasoned parmesan breadcrumbs (photo 3), bake on wire rack (photo 4).
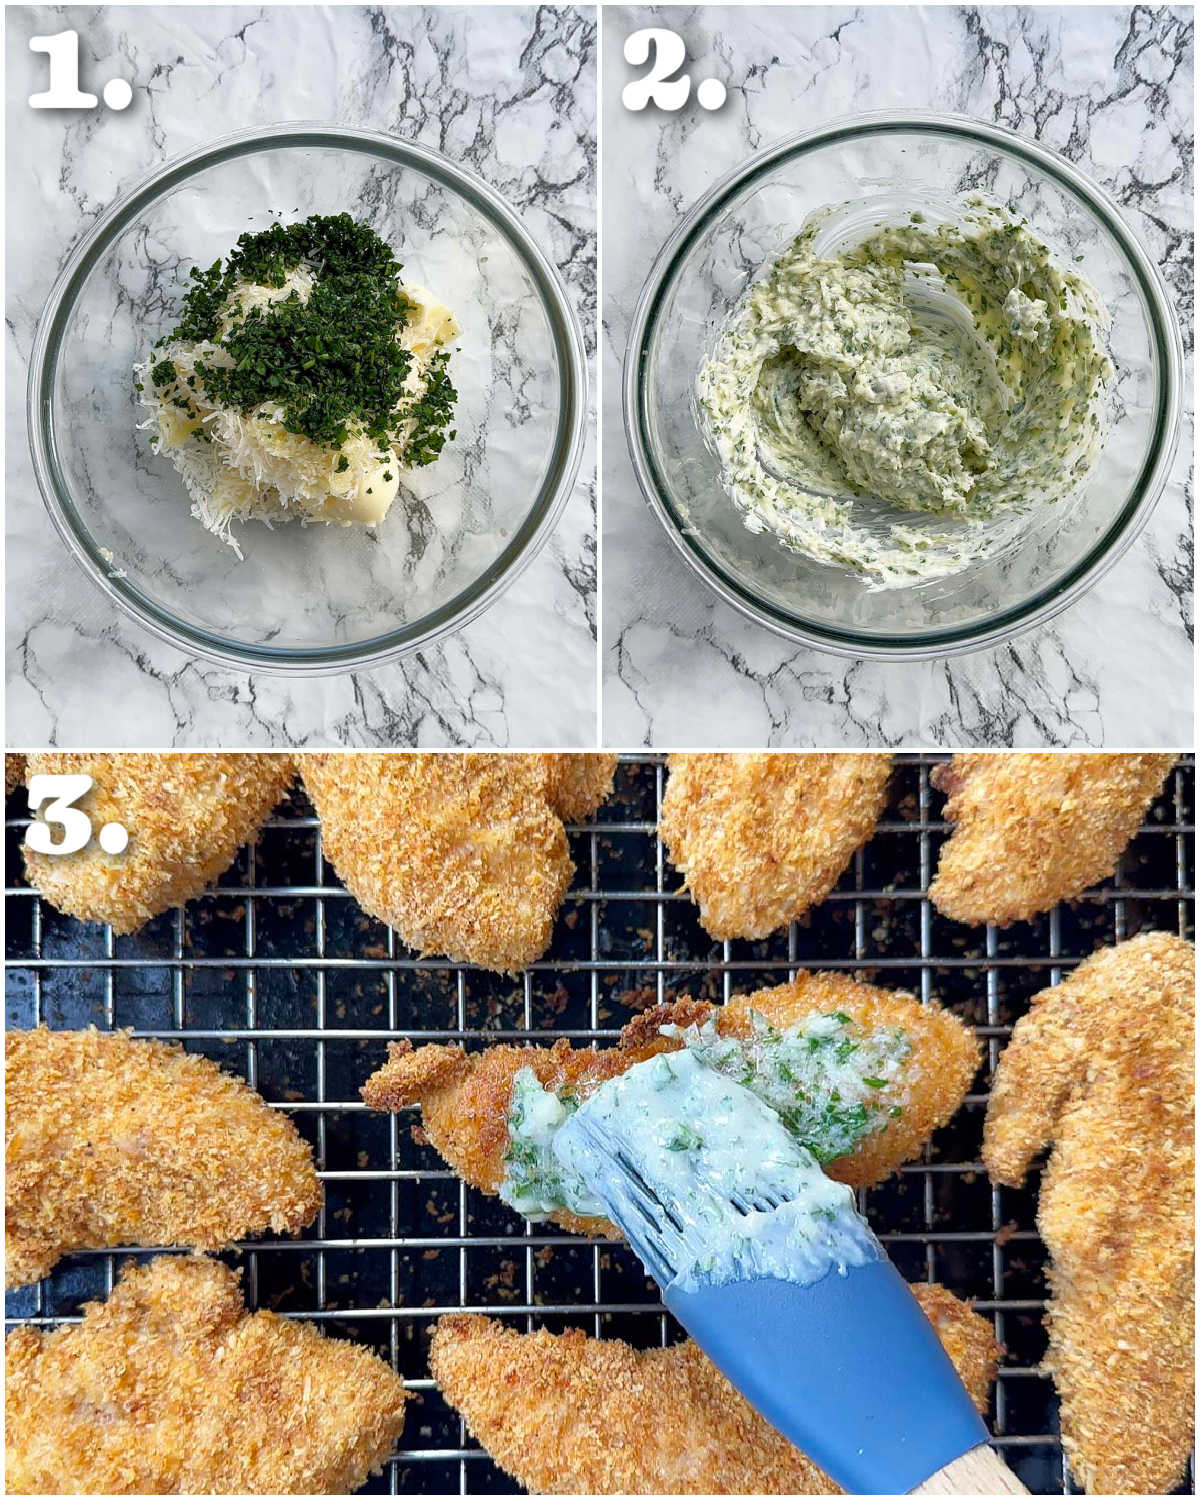
Garlic Parmesan Butter
The butter is simply made with garlic, parsley and parmesan. I recommend getting the butter to a point where it’s softened, but not completely melted. A little creamy if you will. I find this to be the perfect texture to coat the tenders.
Coating the tenders
A lot of recipes completely melt the butter and then toss the tenders with it in a bowl. However, I find that not only does this risk the breading coming off, but tenders completely lose their crispiness. Plus, you don’t really get a great coverage.
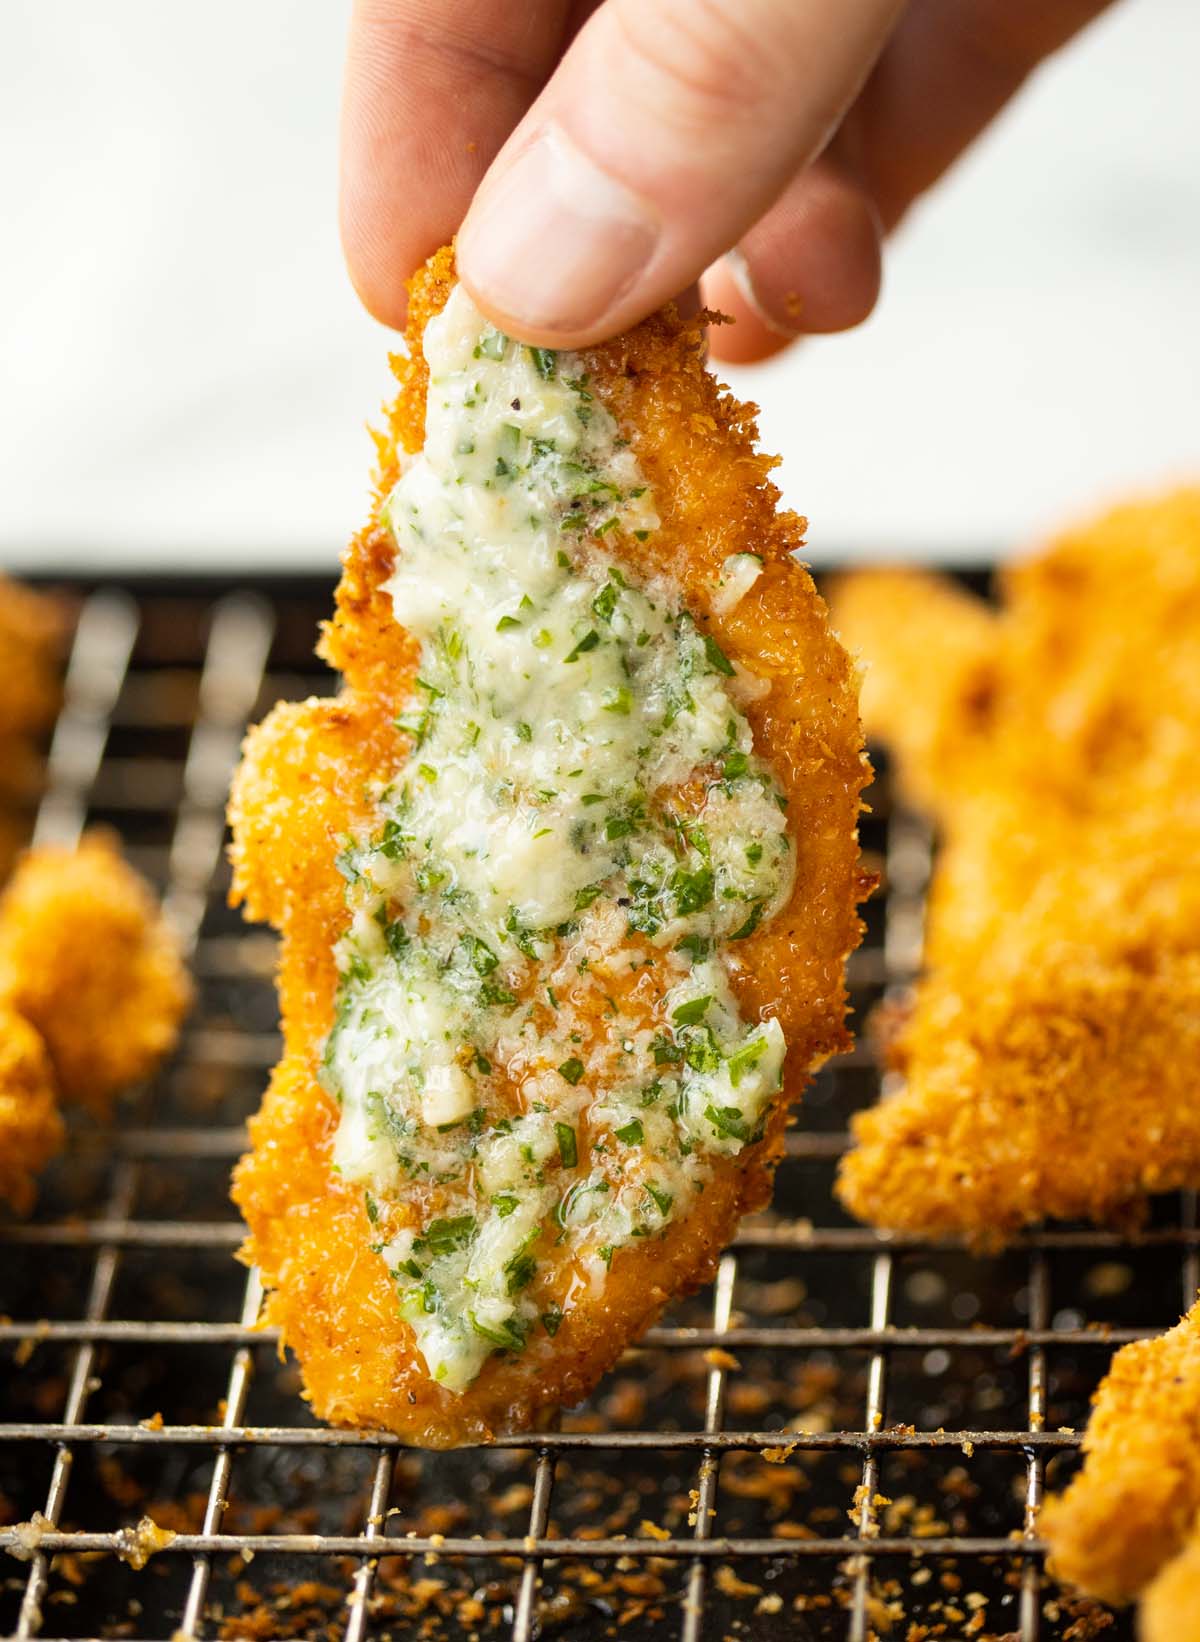
Instead, I like to ‘dab’ the butter on top of the tenders once fresh out of the oven. This means the breading stays on, the majority of the tender is still crisp and you get a perfect layer of garlic parmesan butter across the top of each tender.
Process shots: add butter, parmesan, parsley and garlic to bowl (photo 1), mix (photo 2), coat tenders (photo 3).
Garlic Parmesan Chicken Tenders FAQ
You could make the butter and tenders separately, then brush the butter on upon reheating the tenders.
There are 3 cloves of garlic in the butter, but because they’re raw and finely grated the tenders do come out pretty garlicky. If you know you love garlic, try with 3 and do more next time if you want to.
Yes! Don’t use pickled garlic or garlic powder, it’ll throw off the flavour.
Serving Garlic Parmesan Chicken Tenders
To serve I love finishing with more parmesan and parsley, just for good measure. These make the perfect Finger Food or even as a Dinner with a Side!
After more garlic parmesan goodness? Check out my Air Fryer Garlic Parmesan Chicken Skewers!
Alrighty, let’s tuck into the full recipe for these garlic parmesan chicken tenders shall we?!

How to make Garlic Parmesan Chicken Tenders (Full Recipe & Video)

Garlic Parmesan Chicken Tenders
#wprm-recipe-user-rating-7 .wprm-rating-star.wprm-rating-star-full svg * { fill: #343434; }#wprm-recipe-user-rating-7 .wprm-rating-star.wprm-rating-star-33 svg * { fill: url(#wprm-recipe-user-rating-7-33); }#wprm-recipe-user-rating-7 .wprm-rating-star.wprm-rating-star-50 svg * { fill: url(#wprm-recipe-user-rating-7-50); }#wprm-recipe-user-rating-7 .wprm-rating-star.wprm-rating-star-66 svg * { fill: url(#wprm-recipe-user-rating-7-66); }linearGradient#wprm-recipe-user-rating-7-33 stop { stop-color: #343434; }linearGradient#wprm-recipe-user-rating-7-50 stop { stop-color: #343434; }linearGradient#wprm-recipe-user-rating-7-66 stop { stop-color: #343434; }
Equipment
-
Large Baking Tray & Wire Rack
-
3 Large Shallow Dishes (for coating chicken)
-
Fine Cheese Grater (for parmesan)
-
Sharp Knife & Chopping Board
-
Small Bowl & Brush (for butter)
Ingredients
Tenders
- 600g / 1.3lb Chicken Tenders (see notes)
- 75g / 1 1/4 cups Panko Breadcrumbs (see notes)
- 30g / 1/3 cup freshly grated Parmesan
- 50g / 1/3 cup Plain Flour
- 2 Eggs, beaten
- 1 tsp EACH: Salt, Paprika
- 1/2 tsp Garlic Powder
- 1/4 tsp EACH: Onion Powder, Black Pepper
- Oil Spray, as needed
Butter
- 100g / 7 tbsp Butter, softened
- 20g / 1/4 cup freshly grated Parmesan, plus more to serve
- 1 tbsp very finely diced Fresh Parsley, plus more to serve
- 3 cloves of Garlic, very finely grated then mashed into a paste with the side of your knife (see notes)
- Salt & Black Pepper, to taste
Instructions
-
Preheat the oven to 180C/350F.
-
Lightly spray a large baking tray then sprinkle over the breadcrumbs. Give the tray a shake so they're evenly dispersed, then spray the top. Bake in the oven for 5-8 minutes, or until the breadcrumbs are golden (please be vigilant as they'll burn quickly). Remove from the oven and place in one of the shallow dishes. Raise the oven temp to 200C/400F.
-
In a small pot or bowl combine 1 tsp salt and paprika, 1/2 tsp garlic powder and 1/4 tsp onion powder and black pepper.
-
Line up 3 large shallow dishes: the first with the flour and half of the seasoning mix, the second with 2 beaten eggs and the third with the breadcrumbs, parmesan and the rest of the seasoning. Place the baking tray at the end with an oiled wire rack on top.
-
Take a tender and coat it in the flour, then egg, then in the breadcrumbs and place on the wire rack. Make sure you thoroughly coat at each stage (especially the last). Repeat with all the tenders then spray them with oil. Bake in the oven for 15-20 minutes until golden and crisp and white/piping hot through the centre (smaller ones typically 15 minutes, very large ones more like 20 minutes – just be careful you don't overcook them).
-
Meanwhile, combine all of the garlic butter ingredients in a small bowl. You want the butter to be soft enough to brush, but not completely melted. A little creamy if you will. Pop in the microwave for 5 second blasts until you reach this consistency. Season with a pinch of salt and pepper (to taste).
-
Once the tenders are cooked, use a brush to dab the butter over the top side of all of the tenders. Serve with extra parmesan and parsley (measure with love). Enjoy!
Video
Notes
b) Panko – These are Japanese breadcrumbs, which you’ll find in most supermarkets. They’re perfect because they’re big and airy, meaning they crisp up really nicely. It’s important to give them a pre-bake in the oven. This gives them a head start and results in them being perfectly crisp by the time the tenders are cooked.
c) Garlic – This must be fresh – don’t use pre-diced pickled garlic. It’ll throw off the flavour. If you don’t have a microplane or fine grater, just dice it as finely as you can, then use the side of your knife to spread/mash it into a paste as best you can. This will help the garlic evenly distribute through the butter and ensure there are no big lumps. The garlic will very lightly ‘cook’ from the residual heat of the tenders, but 3 cloves will still result in the tenders being pretty garlicky. Even if you love lots of garlic, try 3 the first time around then increase next time if you want to.
d) Calories – Slight overestimate as not all the flour, egg and breadcrumbs are used.
Nutrition
For more similar recipes check out these beauties:
Delicious Chicken Tender Recipes
- Spicy Chicken Tenders
- Nashville Chicken Tenders
- Baked Chicken Tenders
- Dorito Chicken Tenders
- Cornflake Chicken Tenders
The post Garlic Parmesan Chicken Tenders appeared first on Don't Go Bacon My Heart.