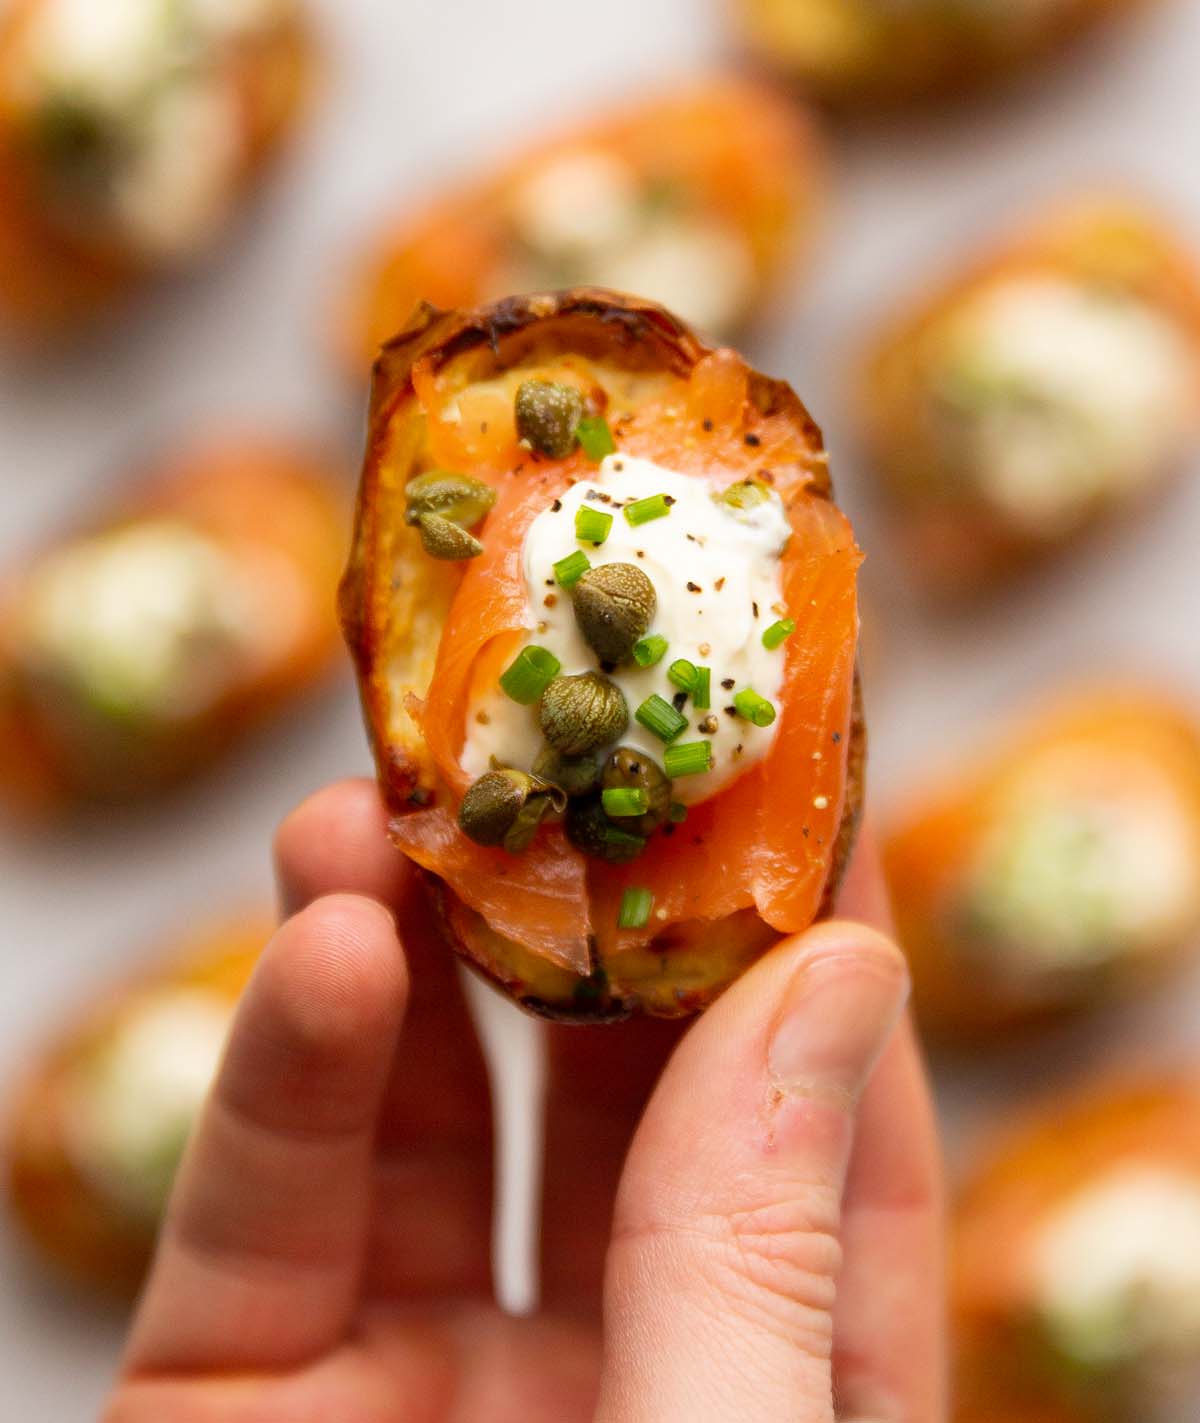
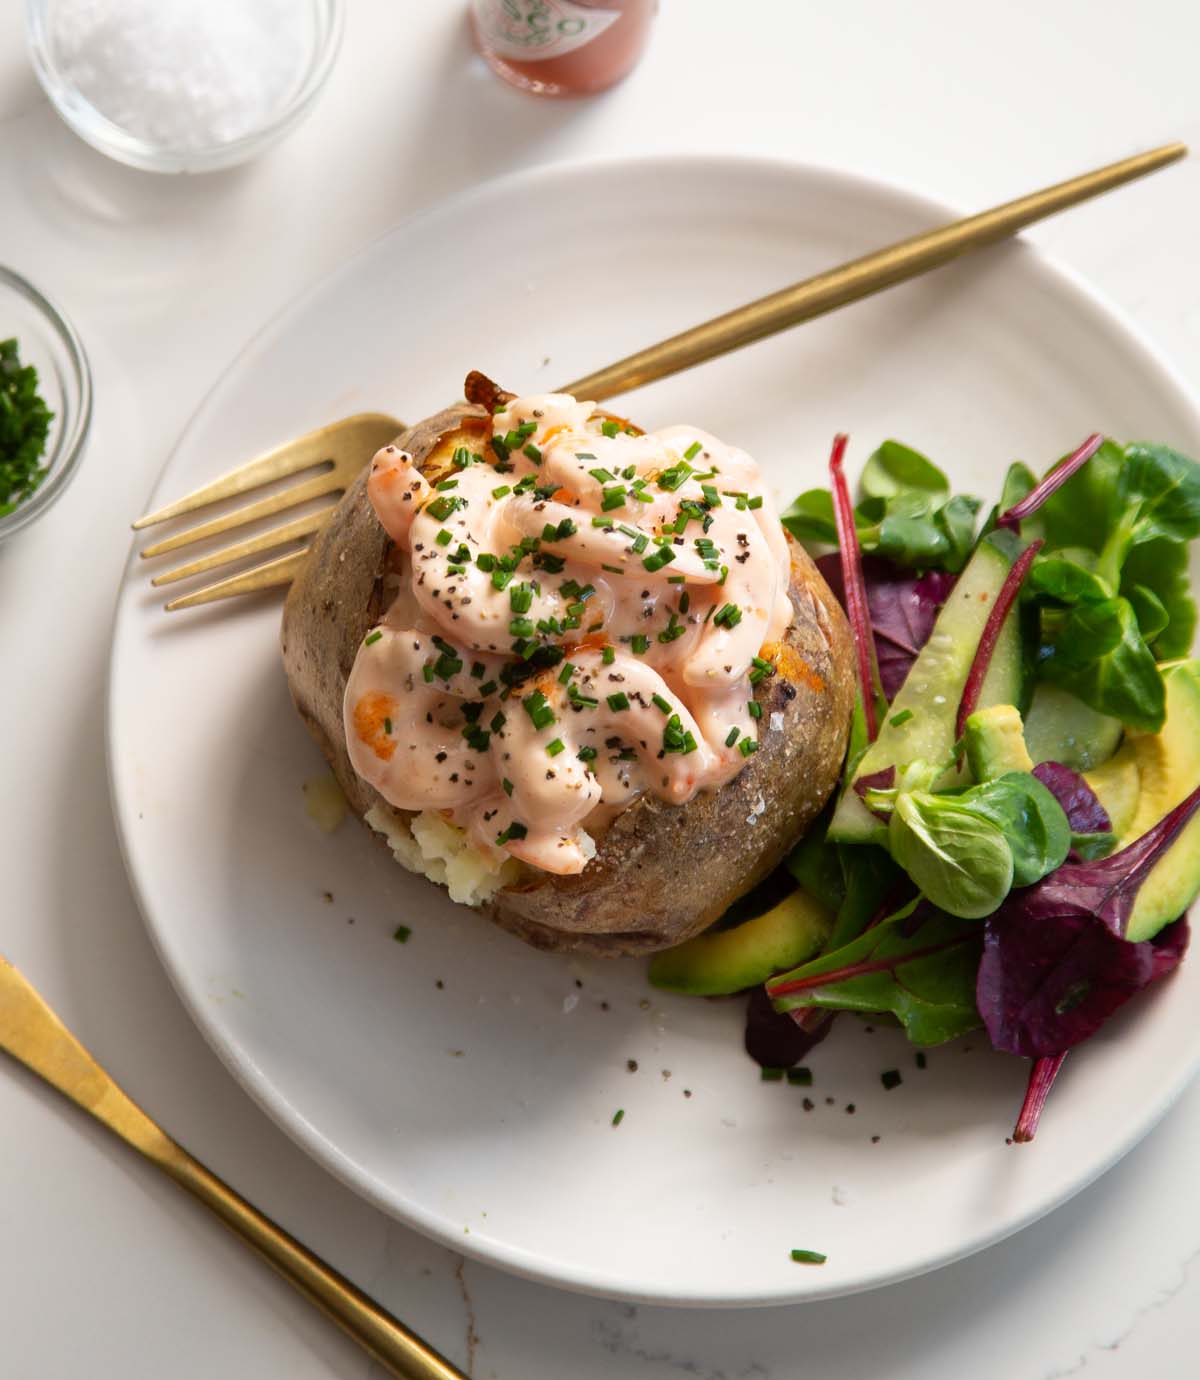
Juicy prawns wrapped in a classic Marie Rose sauce plonked on a crispy and fluffy baked potato.
Of all the baked potato toppings out there, this one definitely has to be one of the most underrated. If you’ve never tried prawns (shrimp) on a jacket potato before, you’re in for a treat. Follow me…
Baked Potatoes
Whilst the topping is the star of the show, let us not overlook the importance of a cracking baked potato to bring the dish to life. Just a note as well, in the UK we often refer to baked potatoes as ‘jacket’ potatoes. Same thing.
Realistically, you can bake any variety of potato. But the best for a dish like this is an all-rounder baking potato like a Maris Piper (UK) or a Russet (US). Some supermarkets will literally have ‘baking potatoes’ too, which obviously work perfectly.
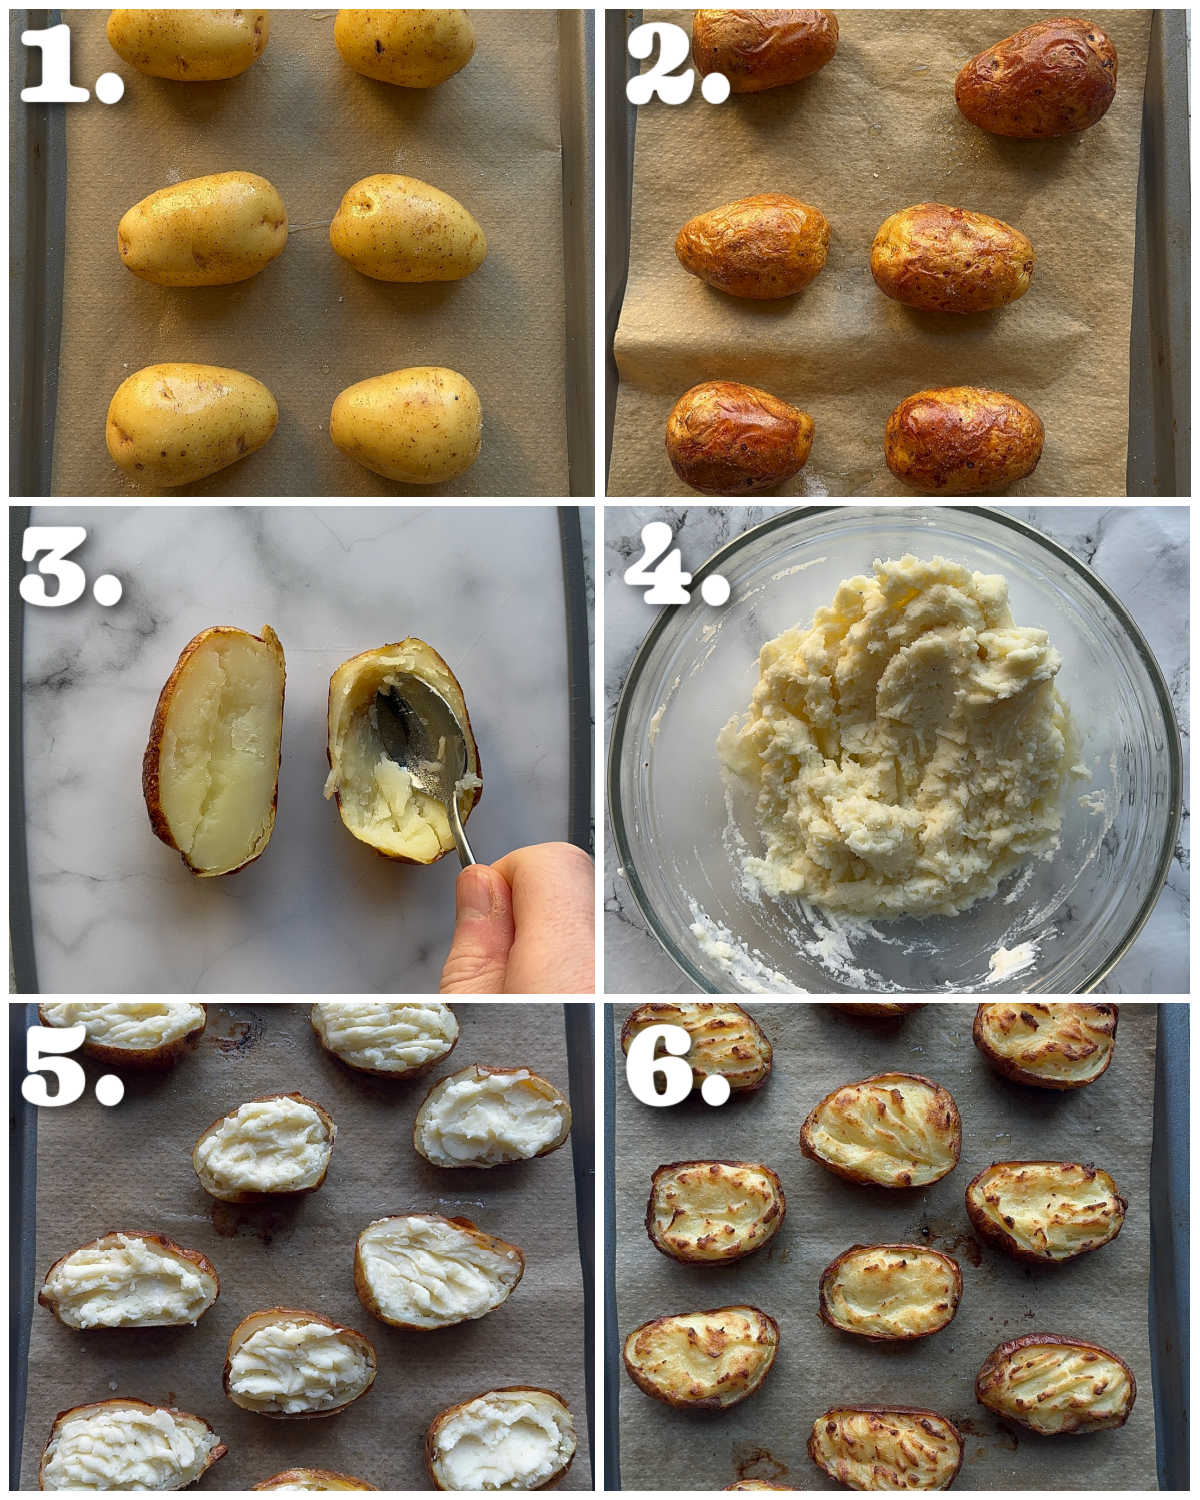
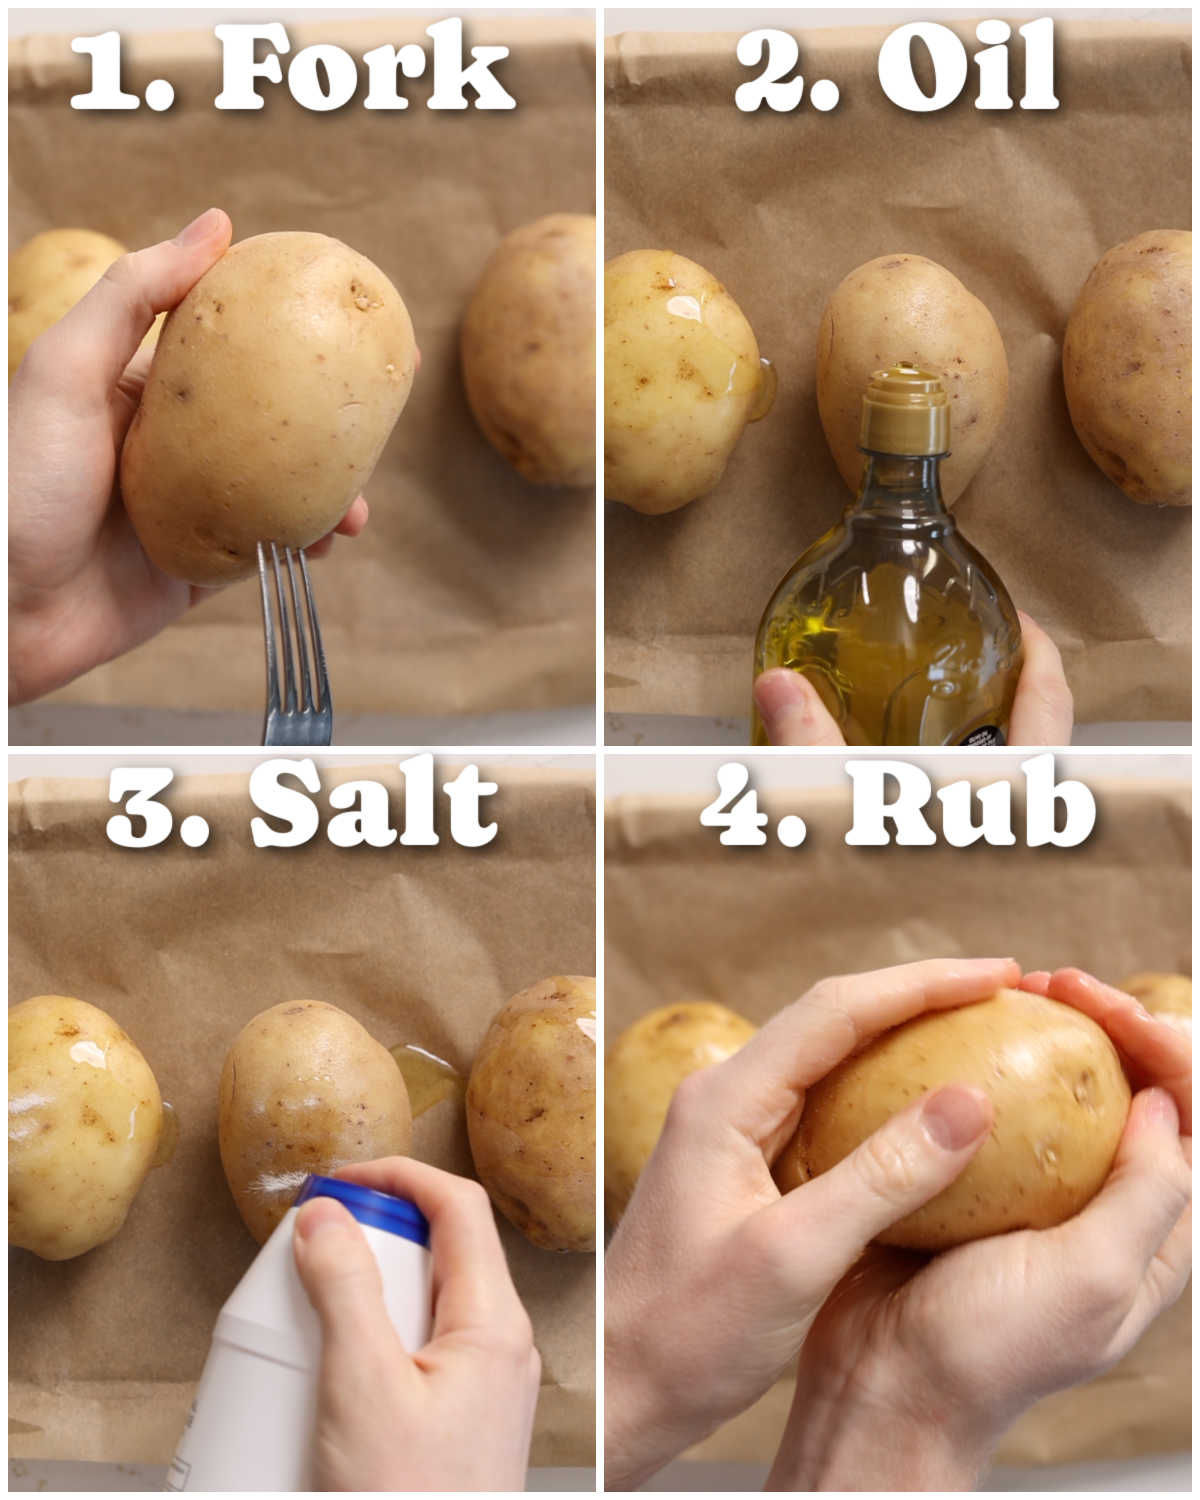
In terms of the prep, here’s what we’ve got going on:
- Fork – pricking the potato a few times will help the moisture leave the potato as it bakes, which, in turn, helps create a nice, fluffy centre.
- Oil – this is to create a crispy skin without it drying out.
- Salt – since we’ll be eating the whole potato (skin and all), it’s important to generously season the outside.
- Rub – ensure everything is evenly distributed then bake away!
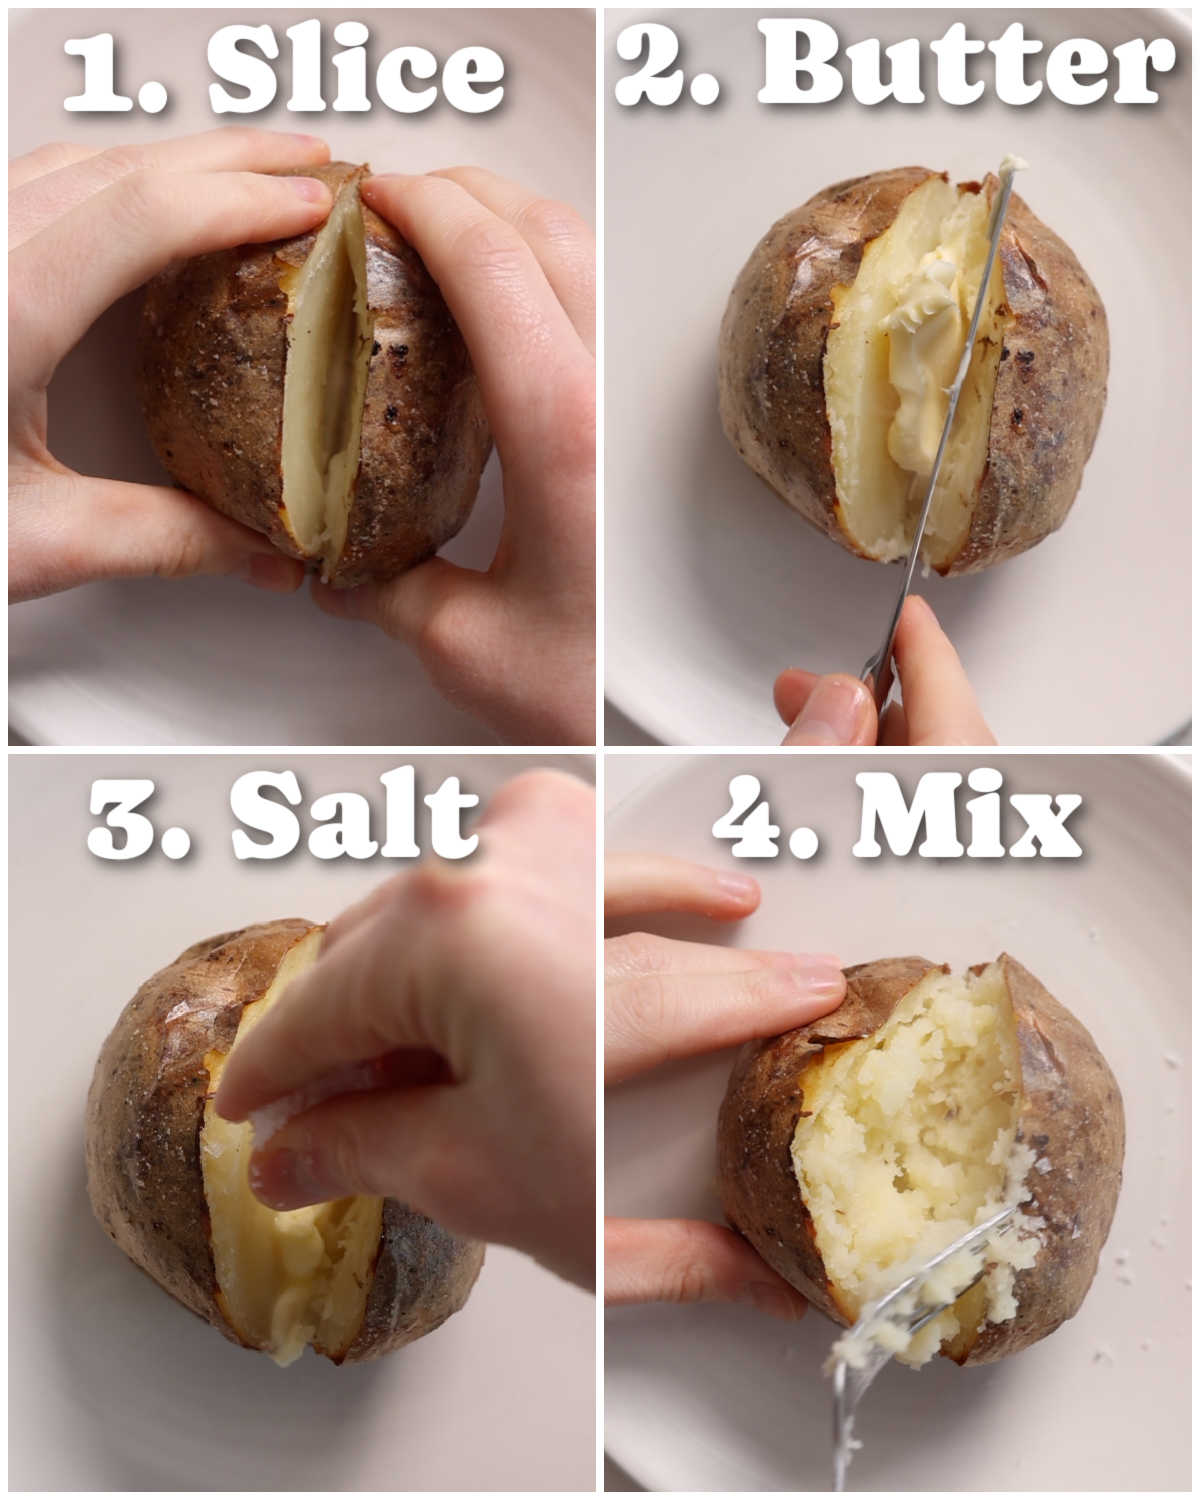
Once the spuds are crispy on the outside and fluffy through the centre, it’s time to properly prepare our platform.
The worst thing you can do is slice open the potato and plonk on the topping. The potato NEEDS to be seasoned properly with lots of salt (remember, potato sucks in salt like no other). I also highly recommend a good dollop of butter too.
Marie Rose Prawns
For this recipe, we’ll be using cooked king prawns. You can of course use raw prawns, cook them up, then allow them to completely cool if you’d prefer. Further, you could use frozen prawns, just thaw them first, then cook/cool as needed.
We’ll be wrapping the prawns in a classic prawn cocktail sauce, which consists of mayonnaise, ketchup, Worcestershire sauce and lemon juice.
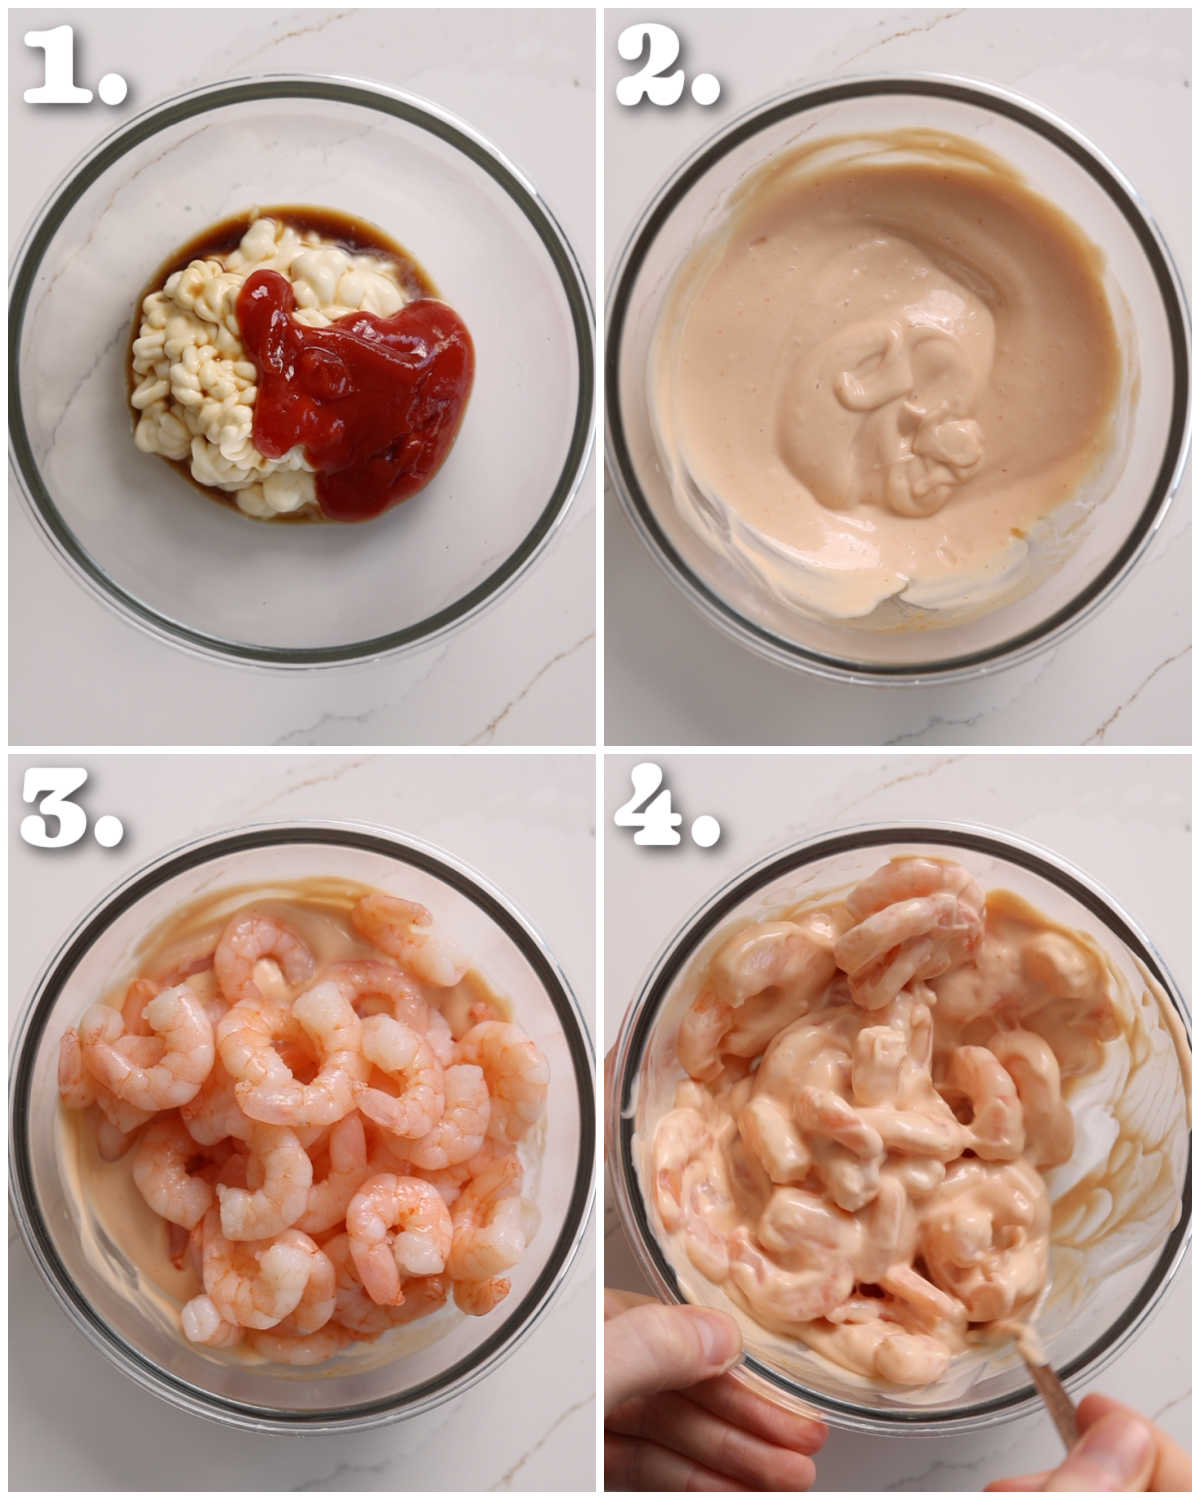
Recipe Tip
I recommend mixing the prawns just before needed, otherwise the salt/lemon juice can firm them up a little.
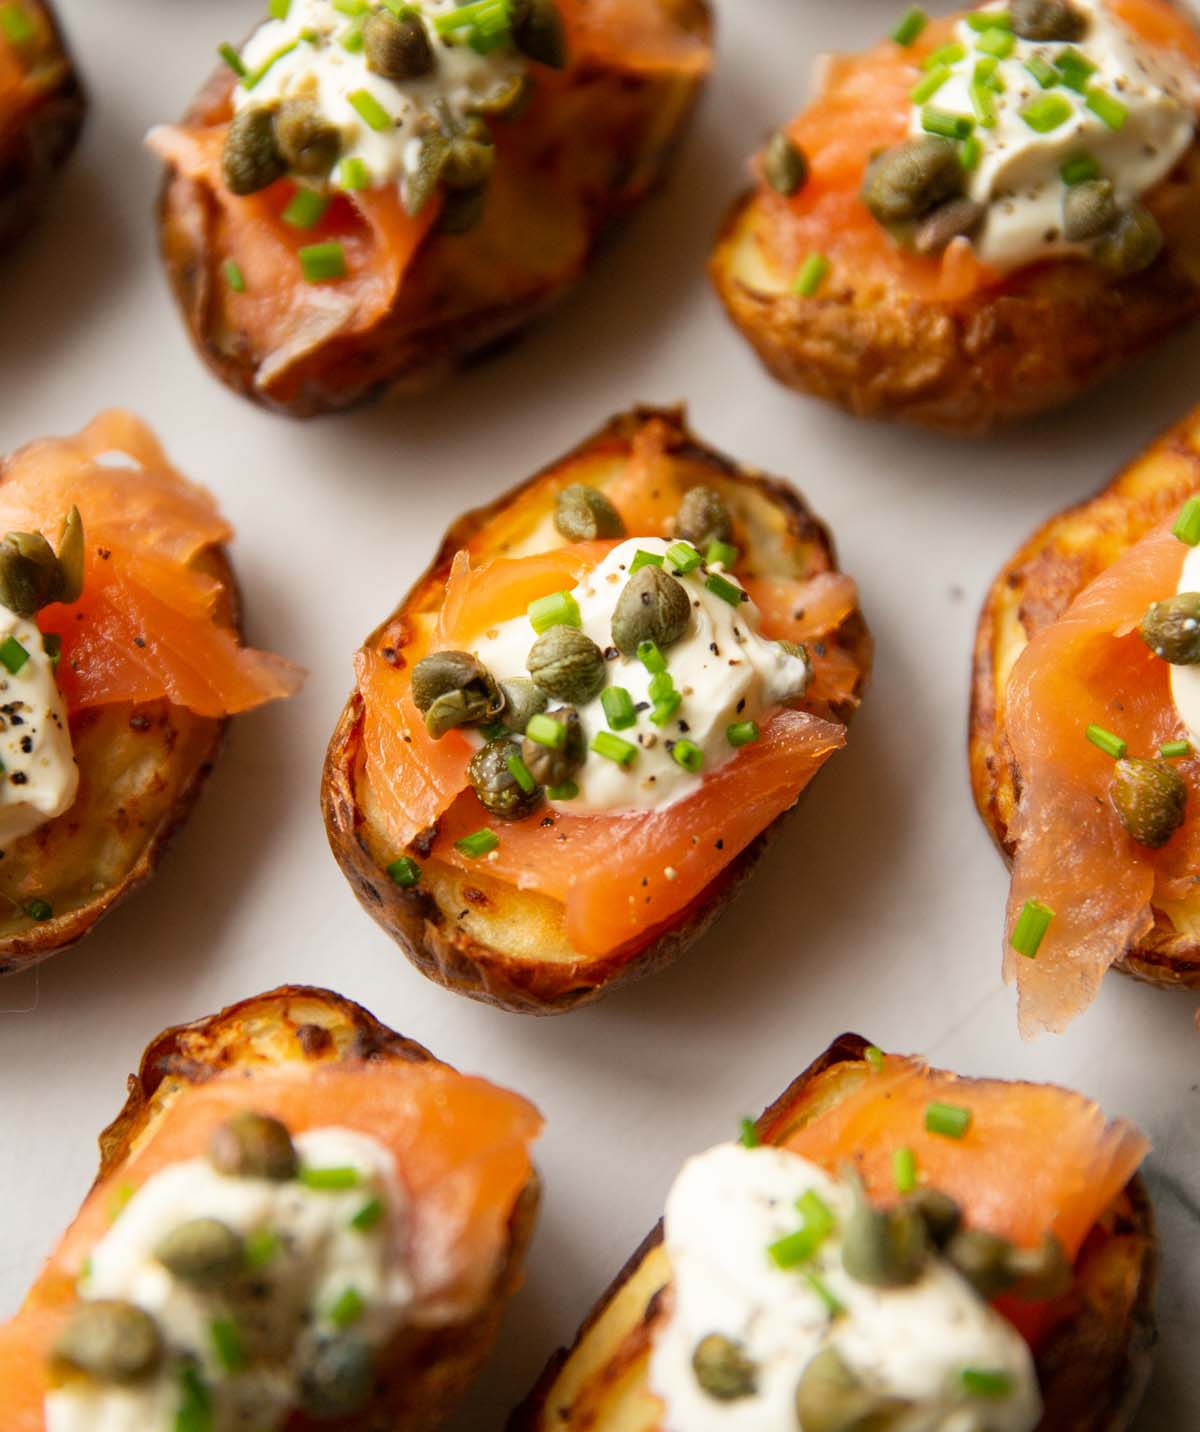
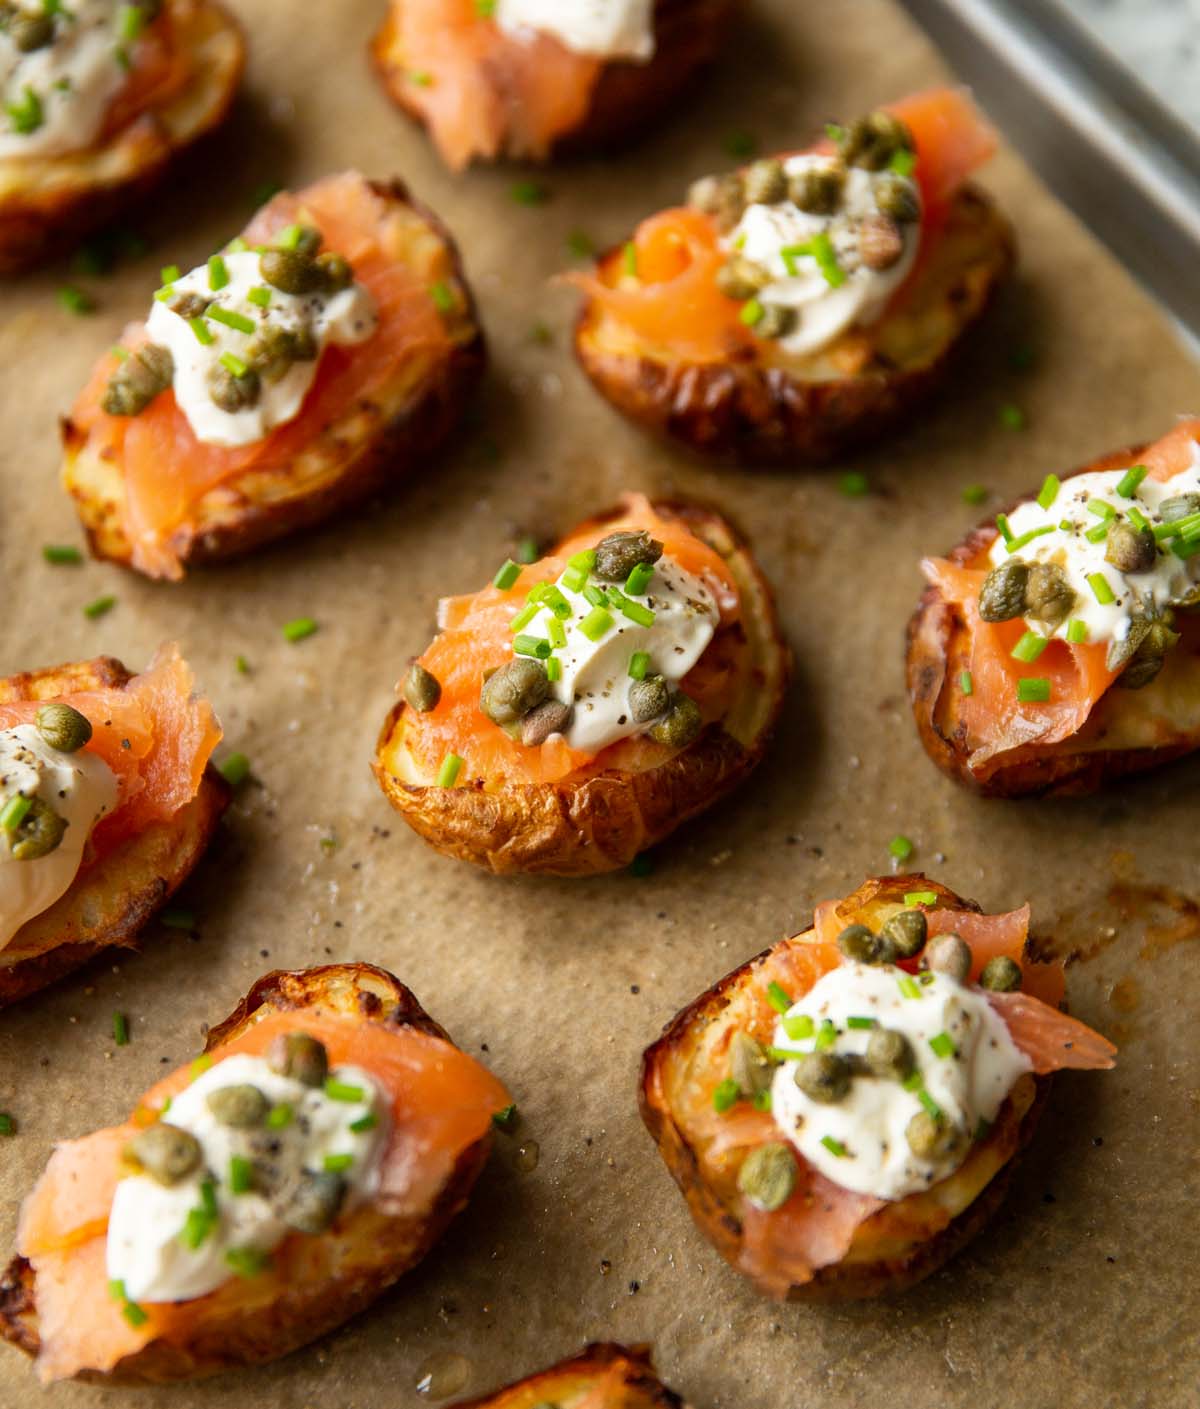
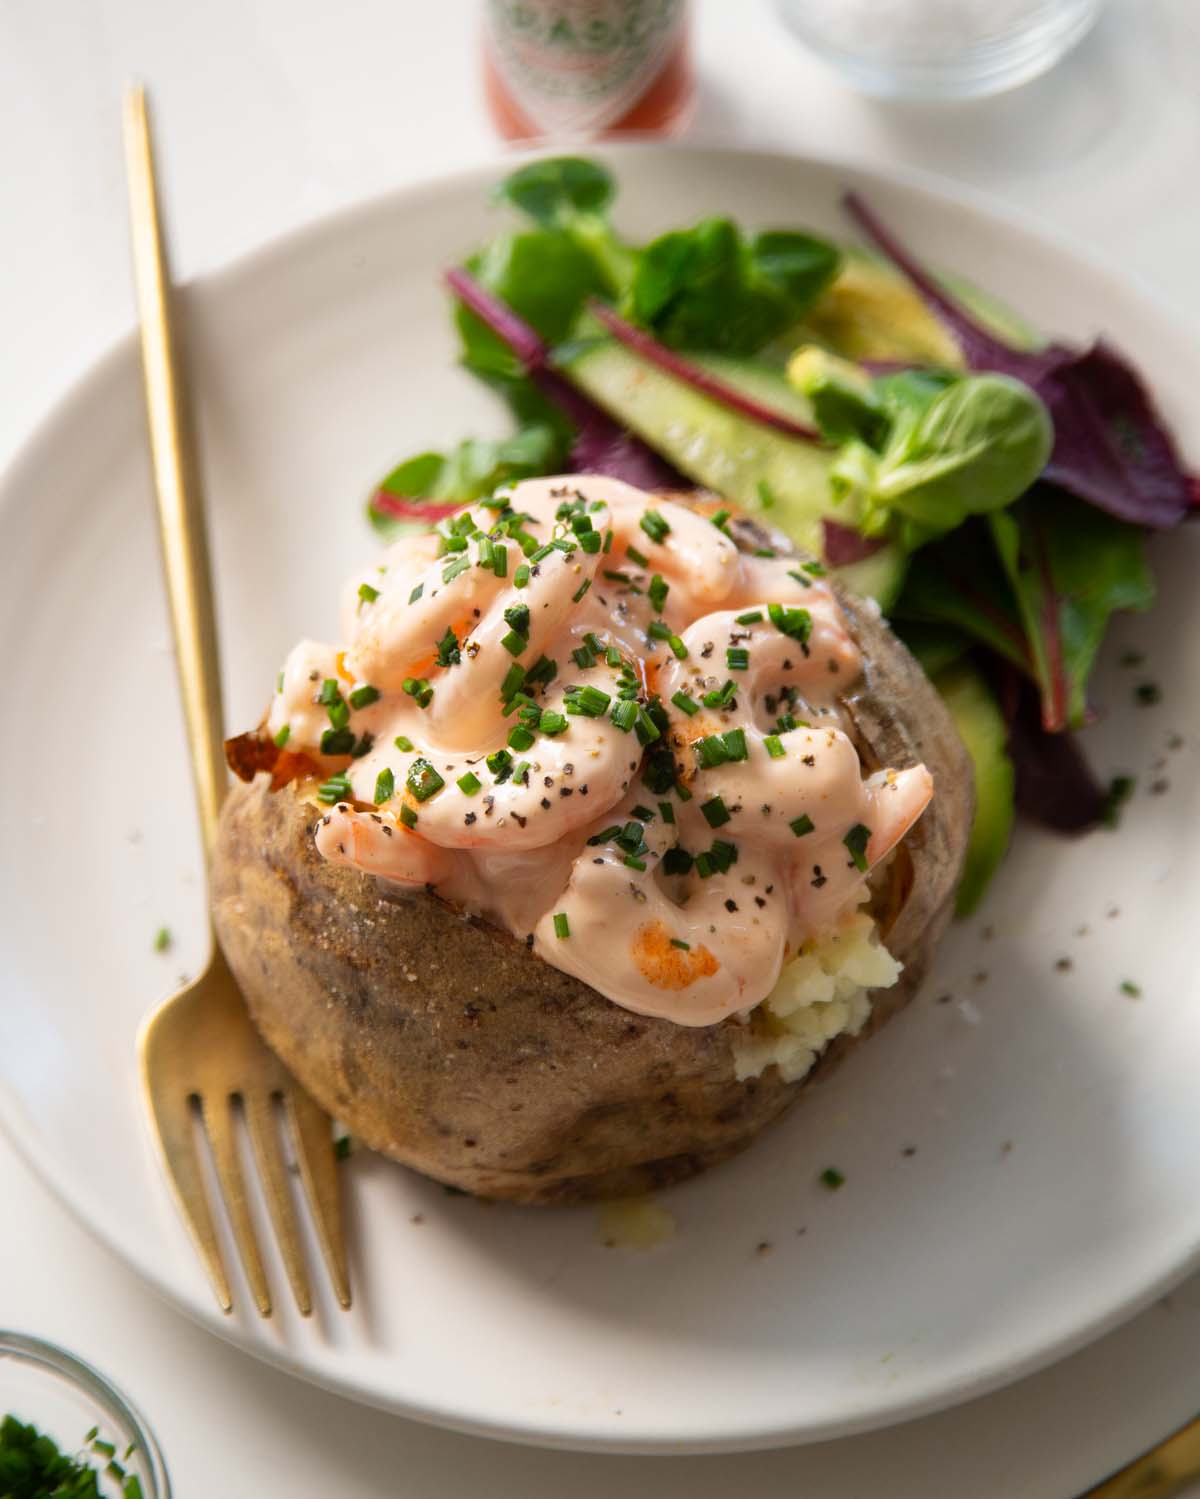
How to serve Prawn Baked Potatoes
Once you’ve plonked the prawns on top, you’ll want to round it off with some final garnish:
- Chives – these are essential for a final pop of flavour and colour.
- Salt & Pepper – I like to finish with some flaky sea salt and cracked black pepper for a finishing layer of seasoning.
- Tabasco – this is a classic addition in Marie Rose sauce, but I prefer a few drops at the end. I find it ‘pops’ more. This is optional if you don’t like spice at all.
Here I’ve added a small side salad on the side, but the potato is already pretty hearty, so don’t feel like you need to add a side!
Alrighty, let’s tuck into the full recipe for this prawn baked potato shall we?!
How to make Baked Potato with Prawns (Full Recipe & Video)

Prawn Baked Potato
Equipment
-
Large Baking Tray & Baking/Parchment Paper
-
Medium Sized Mixing Bowl
-
Kitchen Roll/Paper Towels
-
Sharp Knife & Chopping Board or Scissors (for chopping chives)
Ingredients
Potatoes
- 3 large Baking Potatoes (see notes)
- Olive Oil, as needed
- Salt, as needed
- 3 tbsp Butter
Prawns
- 120g / 1/2 cup full-fat Mayonnaise, at room temp
- 1 tbsp Ketchup
- 1/2 tsp EACH: Lemon Juice, Worcestershire Sauce
- 300g / 10.5oz Cooked King Prawns, at room temp (see notes)
Toppings
- finely diced Fresh Chives
- Cracked Black Pepper
- few drops of Tabasco (optional – see notes)
- Flaky Sea Salt (optional)
Instructions
-
Preheat the oven to 180C/350F.
-
Place the baking potatoes on a large baking tray (preferably lined with baking/parchment paper). Stab them a few times all over, then coat in a drizzle of oil and a good pinch of salt.
-
Bake in the oven for 80 minutes, or until fork tender, then crank up the heat to 430F/220C for 10mins or until ultra crispy.
-
5 or so minutes before the potatoes are done, combine the sauce in a medium-sized mixing bowl, seasoning to taste with salt as needed. Pat the prawns dry to remove excess moisture, then toss them through the sauce until fully coated.
-
Slice the potatoes through the centre and squeeze them open (guard your fingers with a tea towel if they're super hot). Add the butter and a generous helping of salt, then use a fork to mash into the potato. Top with the prawns, then finish with chives, black pepper, a few drops of tabasco and sea salt if desired.
Video
Notes
b) Prawns – I recommend getting these (and the mayo) to room temp, just so you’ve not got a fridge-cold topping going on a piping hot potato. More personal preference than anything. I use cooked prawns, but you could cook up some raw prawns, let them completely cool, then toss in the sauce.
c) Toppings – These complete the dish! Chives are essential for a final pop of colour and flavour. The salt and pepper are preference, and the Tabasco is traditional, but optional if you don’t like spice at all (it’s only a few small drops in all cases).
d) Calories – Assuming 1 1/2 tbsp olive oil used for 1kg/2lb potatoes (calories per potato + topping).
Nutrition
The post The Best Prawn Baked Potato appeared first on Don't Go Bacon My Heart.