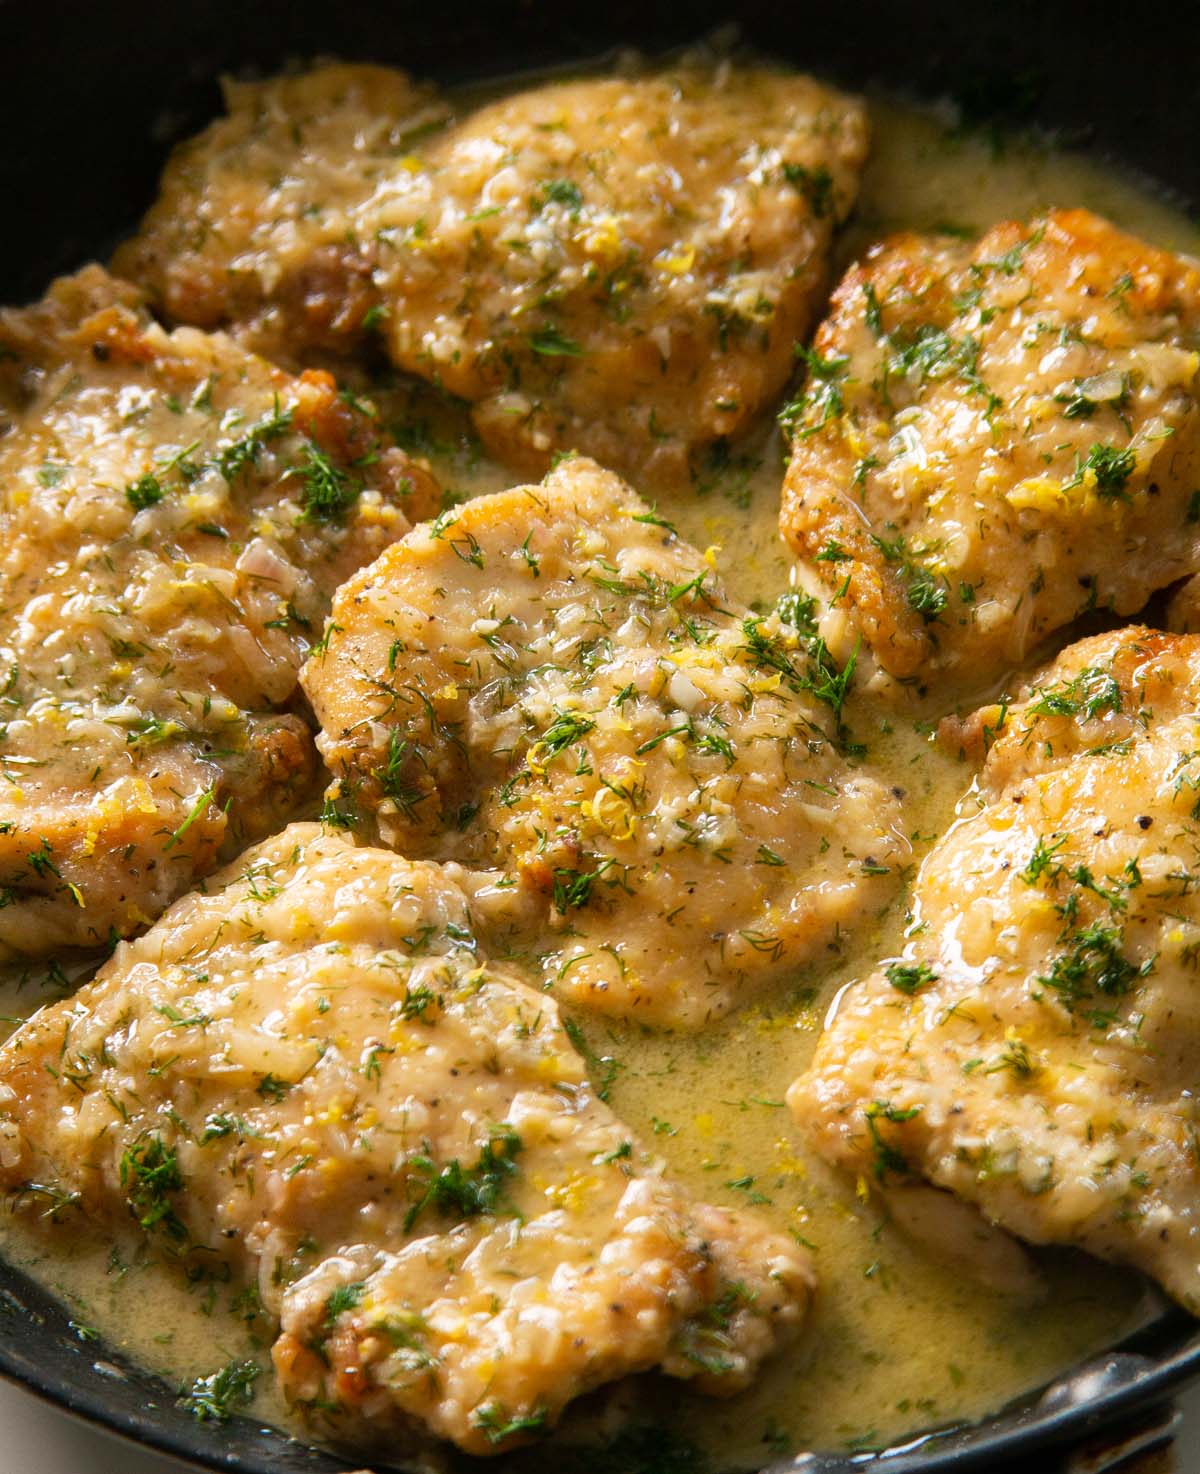
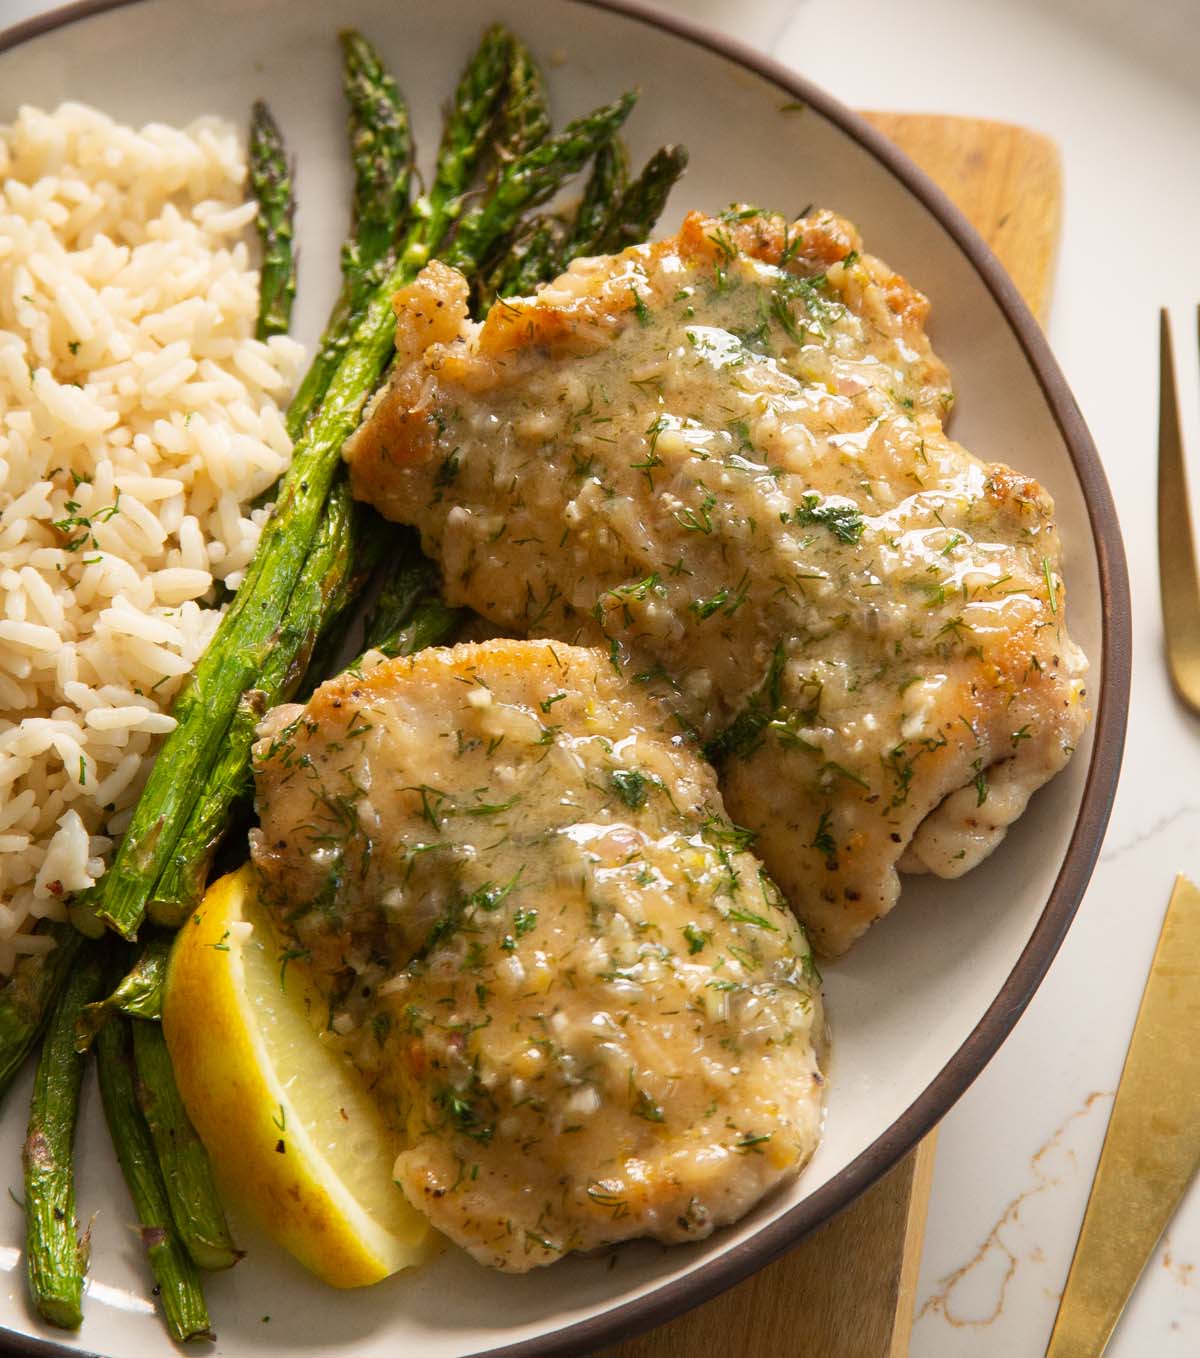
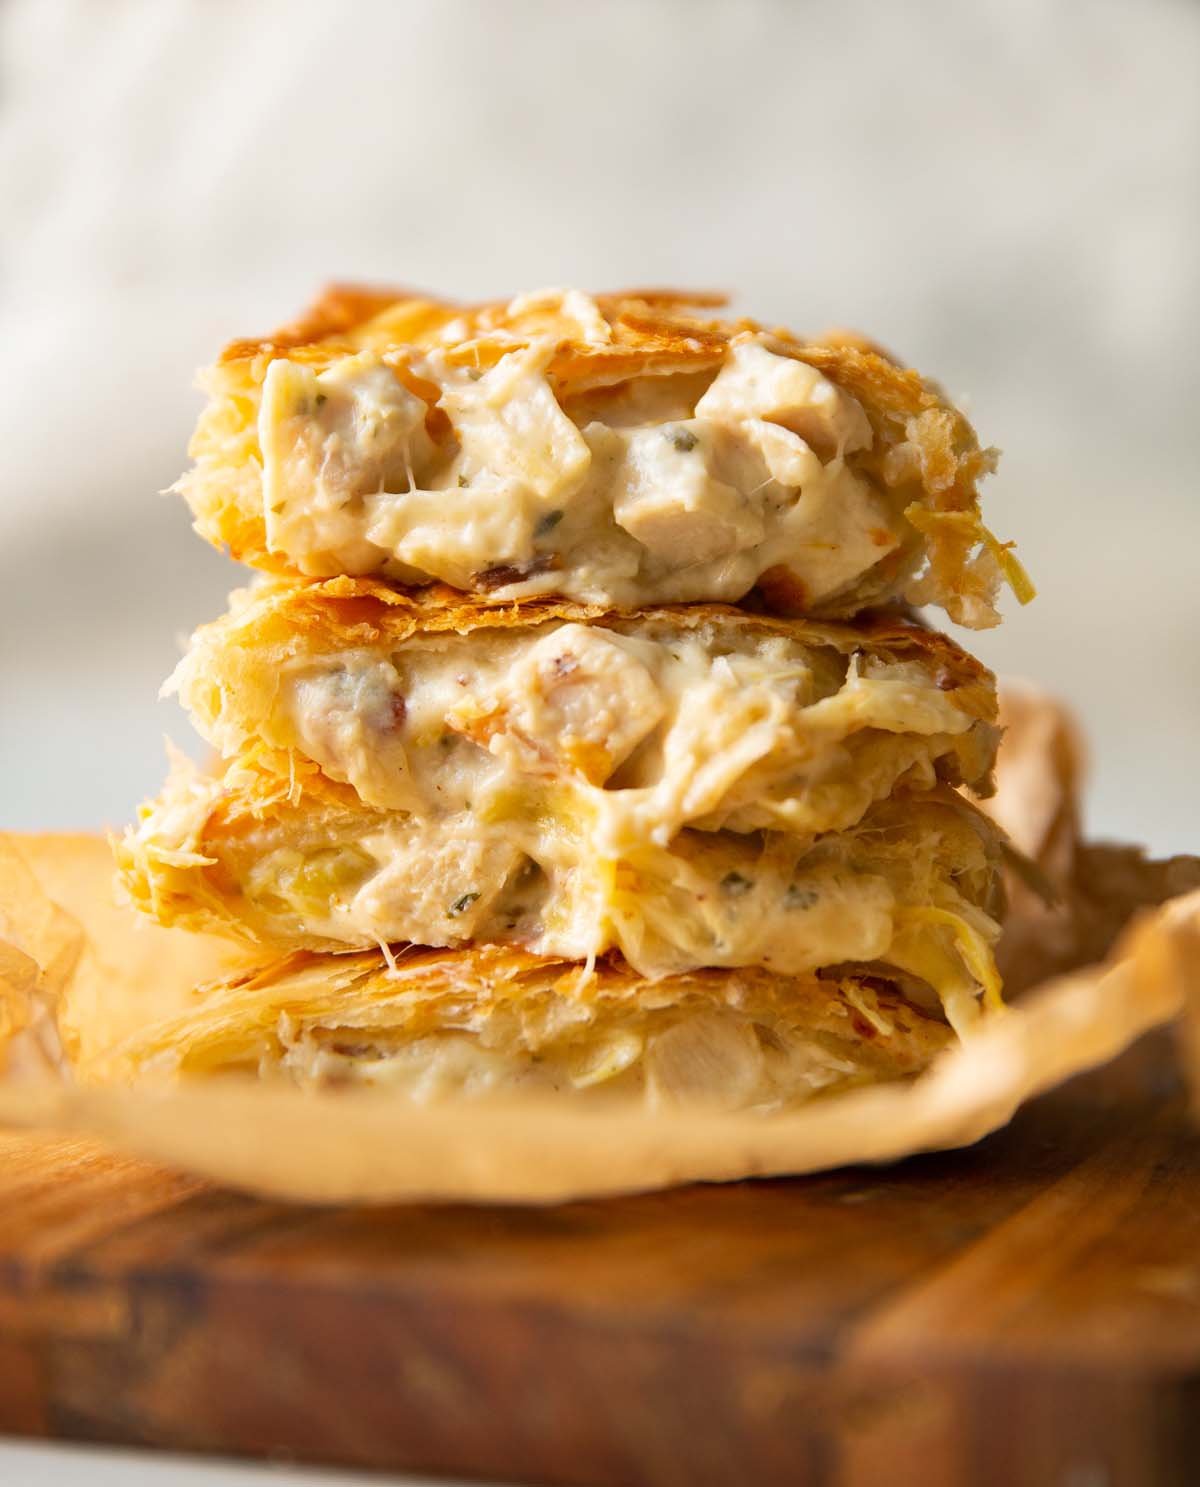
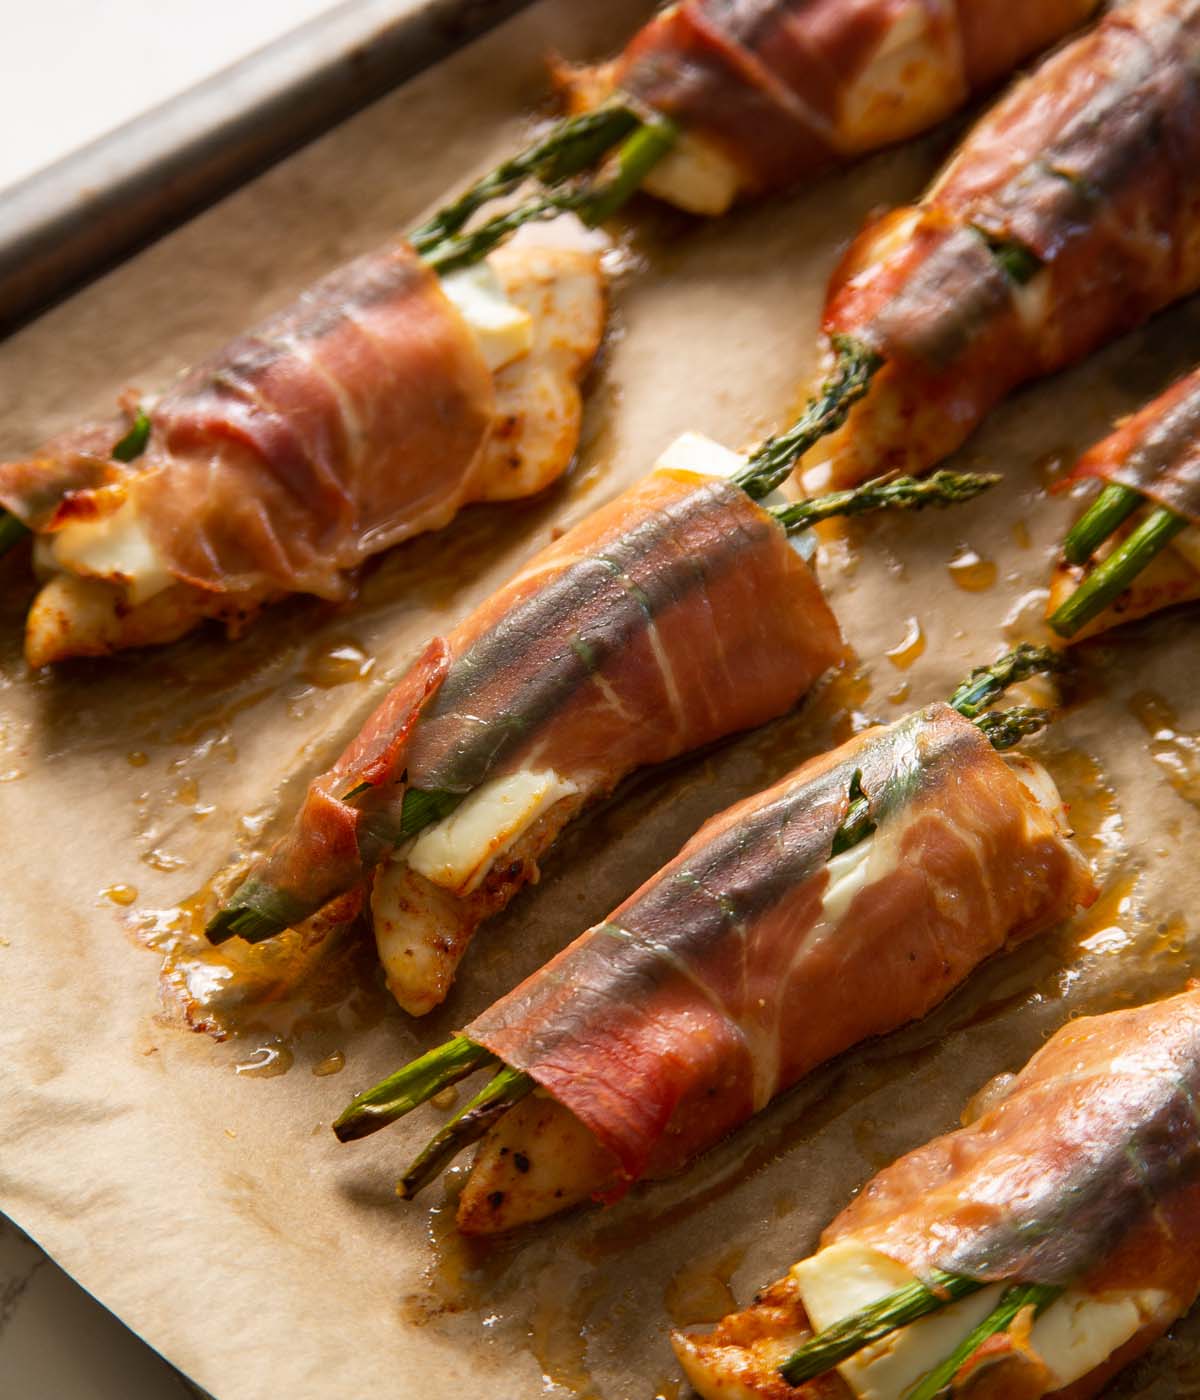
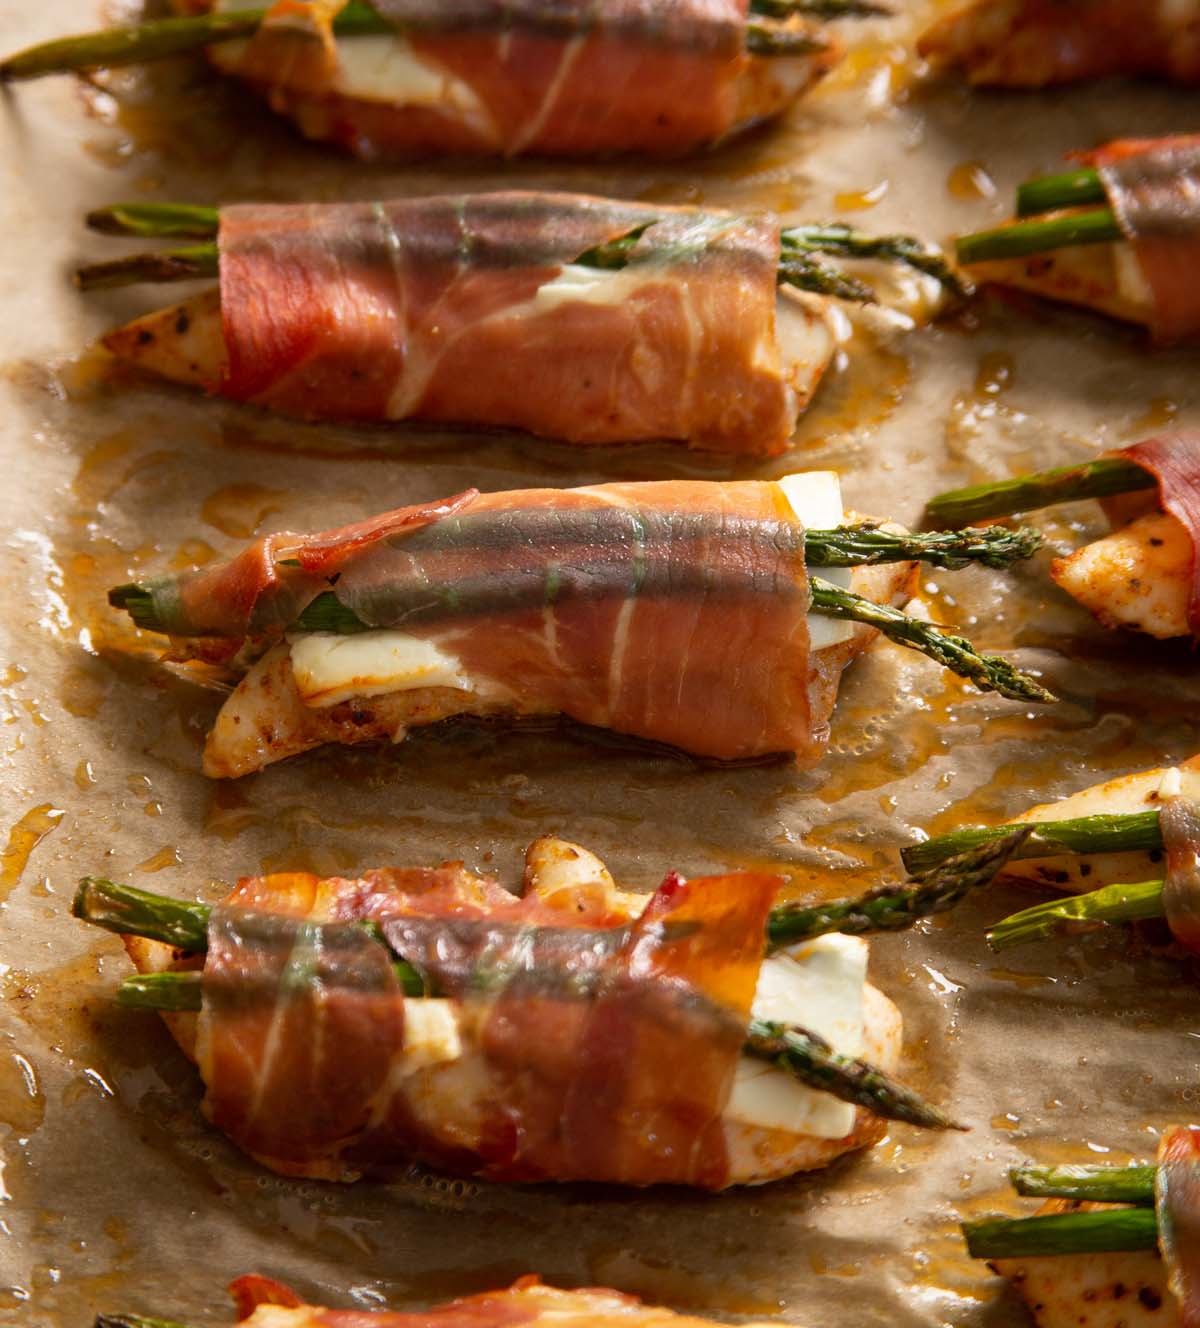
Juicy chicken, creamy feta and tender asparagus lovingly wrapped in prosciutto then baked until golden.
For how delicious these are, you’re going to be shocked at how easily they come together and how few ingredients you need. Follow me…
Chicken wrapped in Prosciutto
Most prosciutto-wrapped chicken recipes use whole chicken breasts. I find that using chicken tenders and adding a couple of other goodies renders far better results:
- Tenders – individually wrapped tenders allow the prosciutto and chicken to cook at a better rate, where the chicken ends up juicy without the prosciutto drying out.
- Toppings – adding a slice of feta adds so much flavour. It also goes gorgeously soft and creamy as it bakes. The asparagus pairs beautifully with the feta, prosciutto and chicken and adds a nice visual appeal.
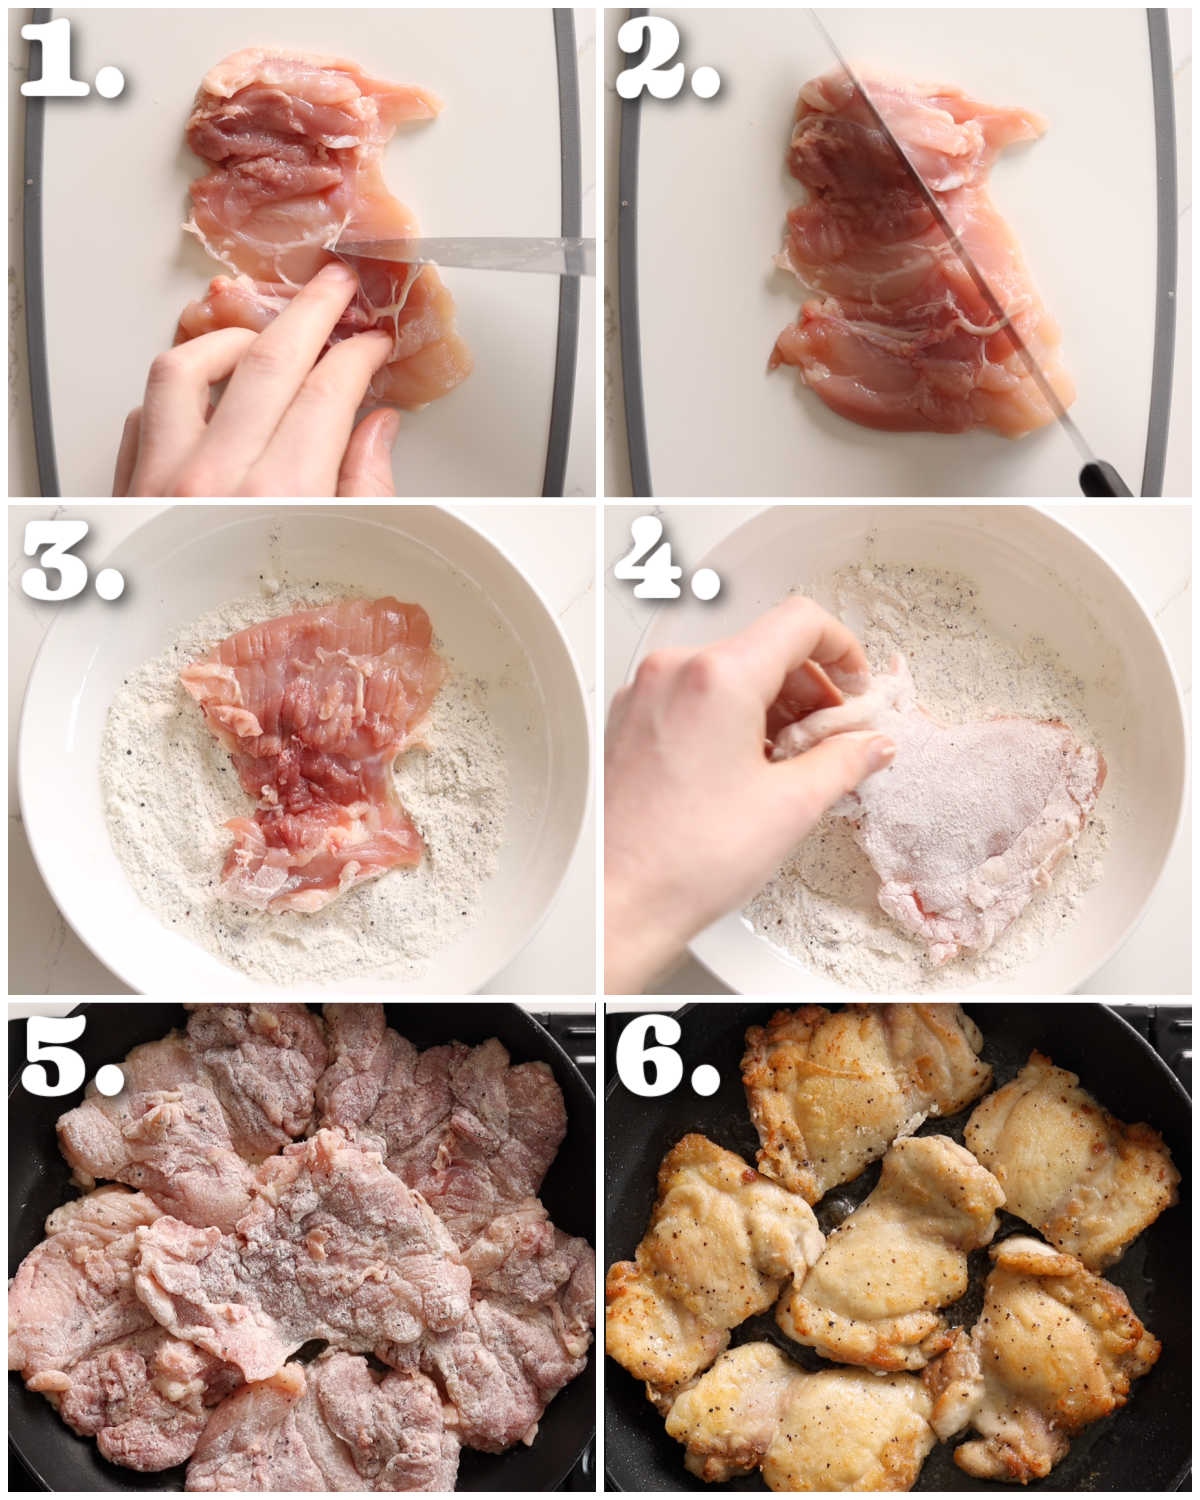
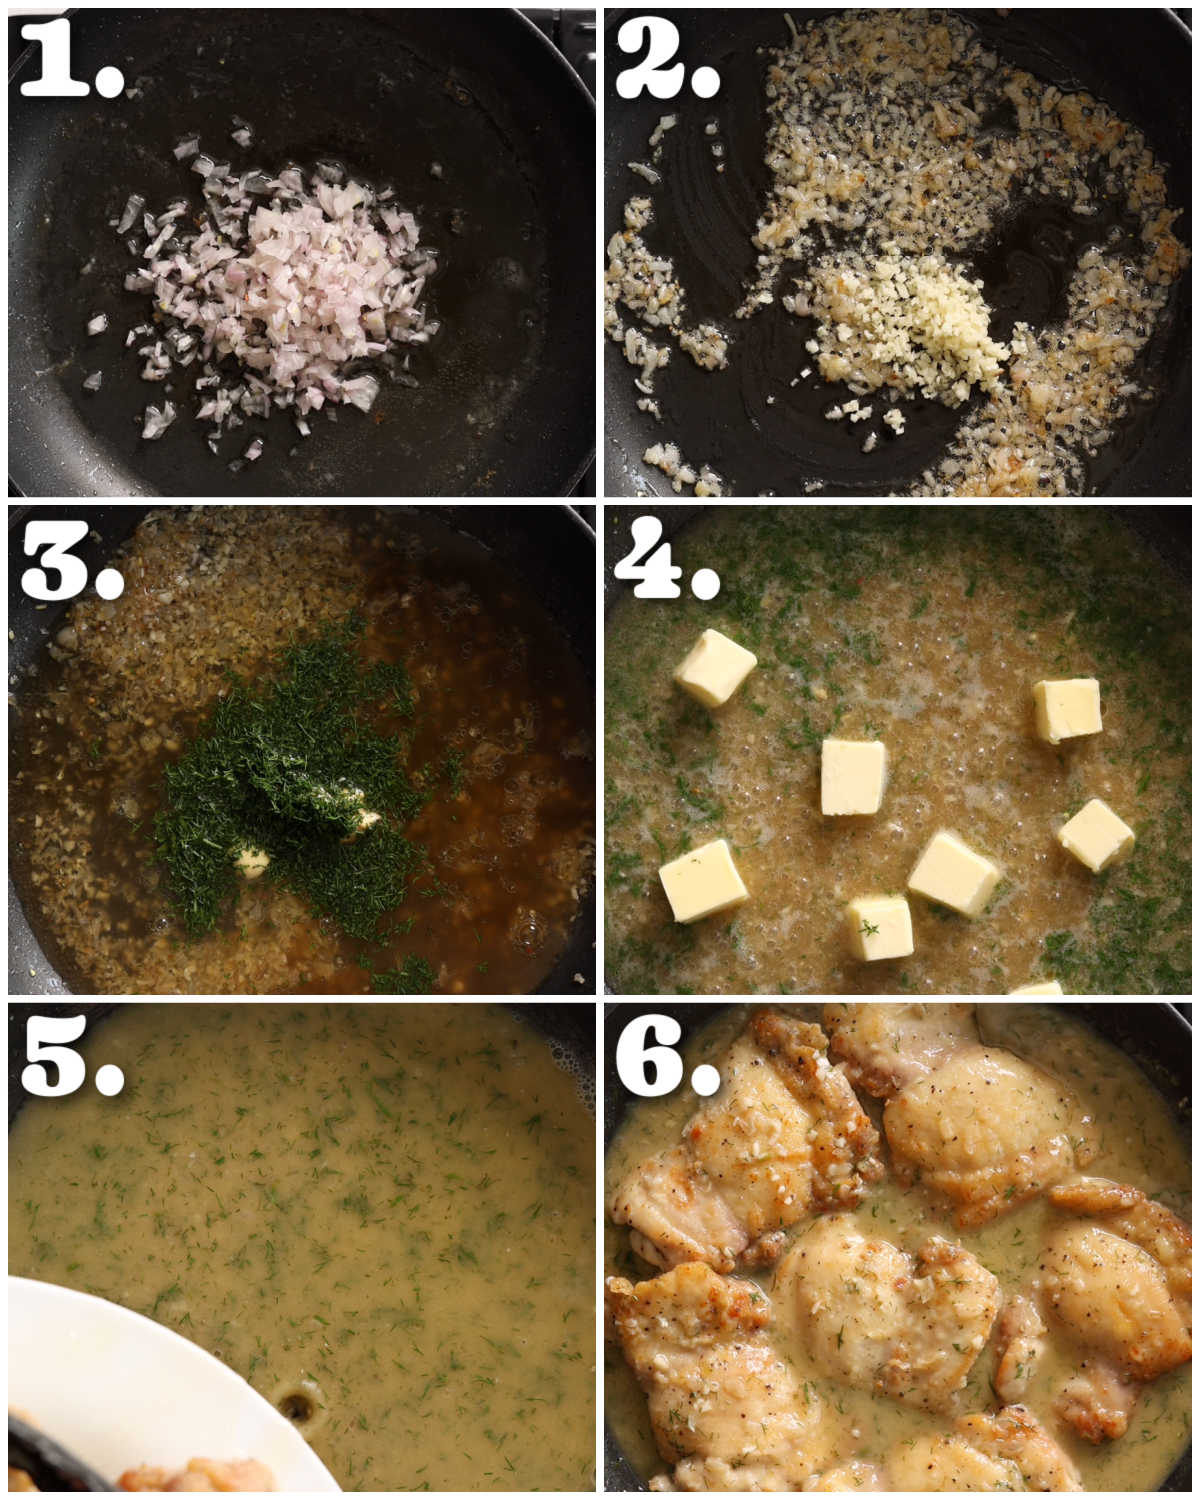
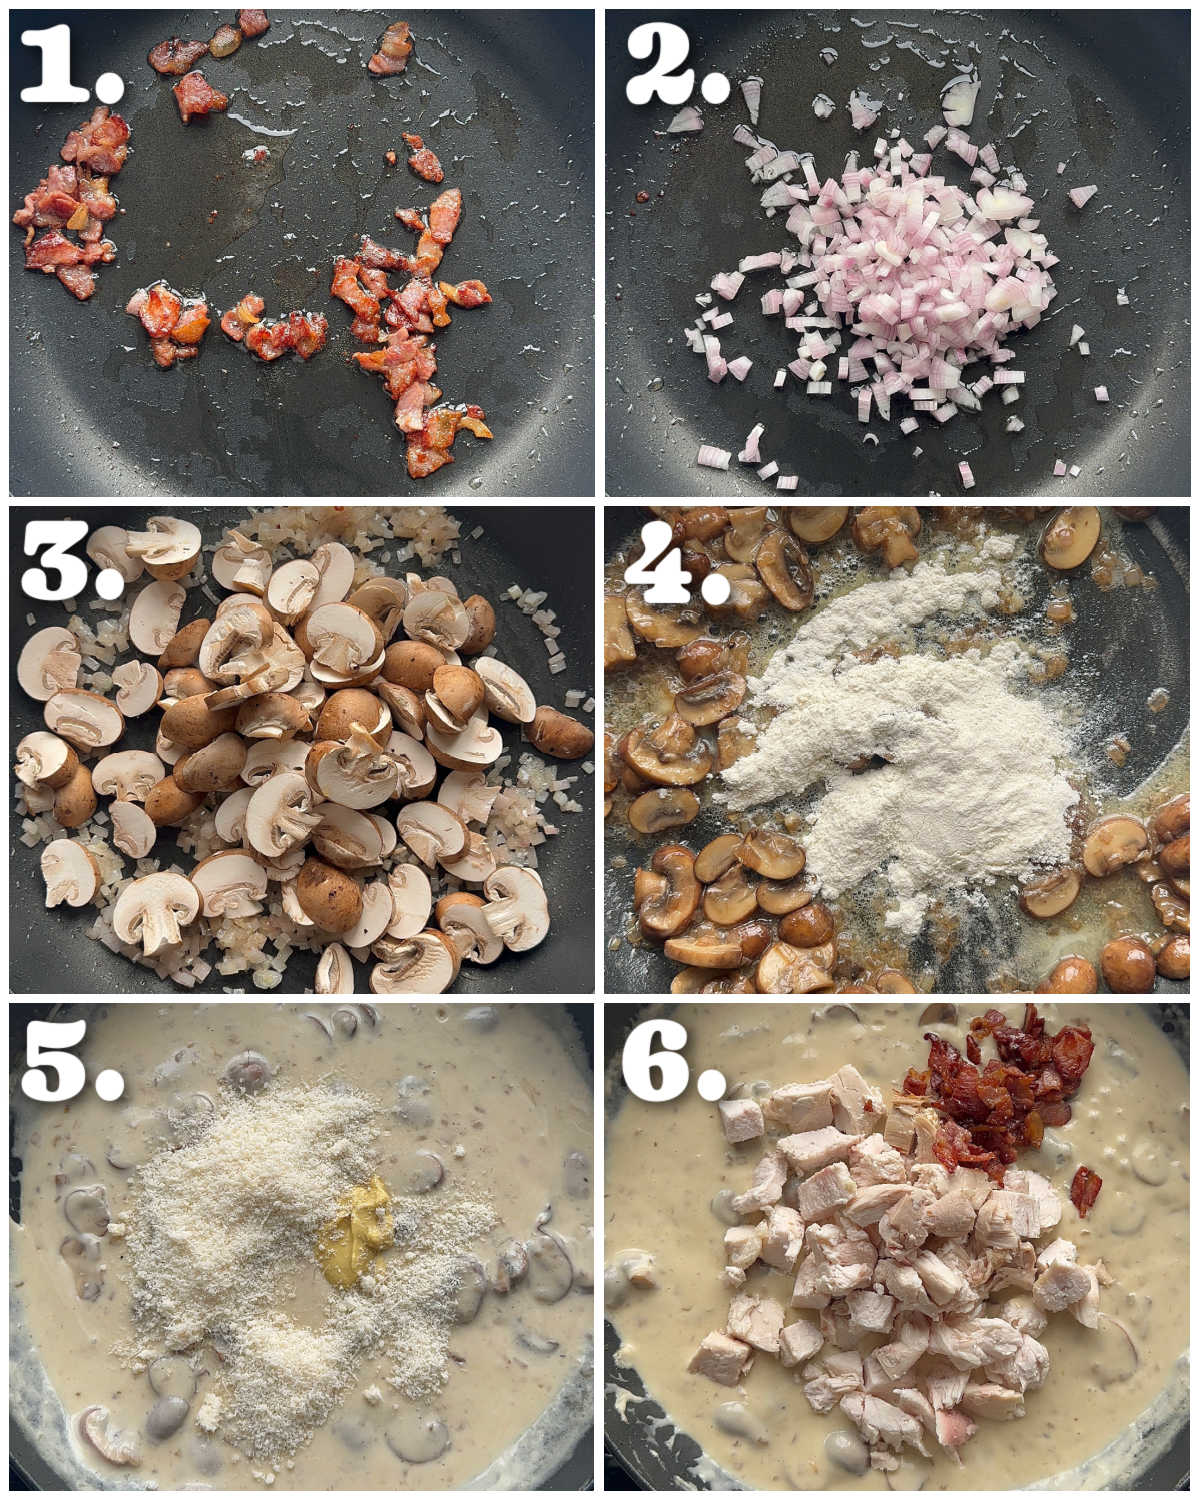
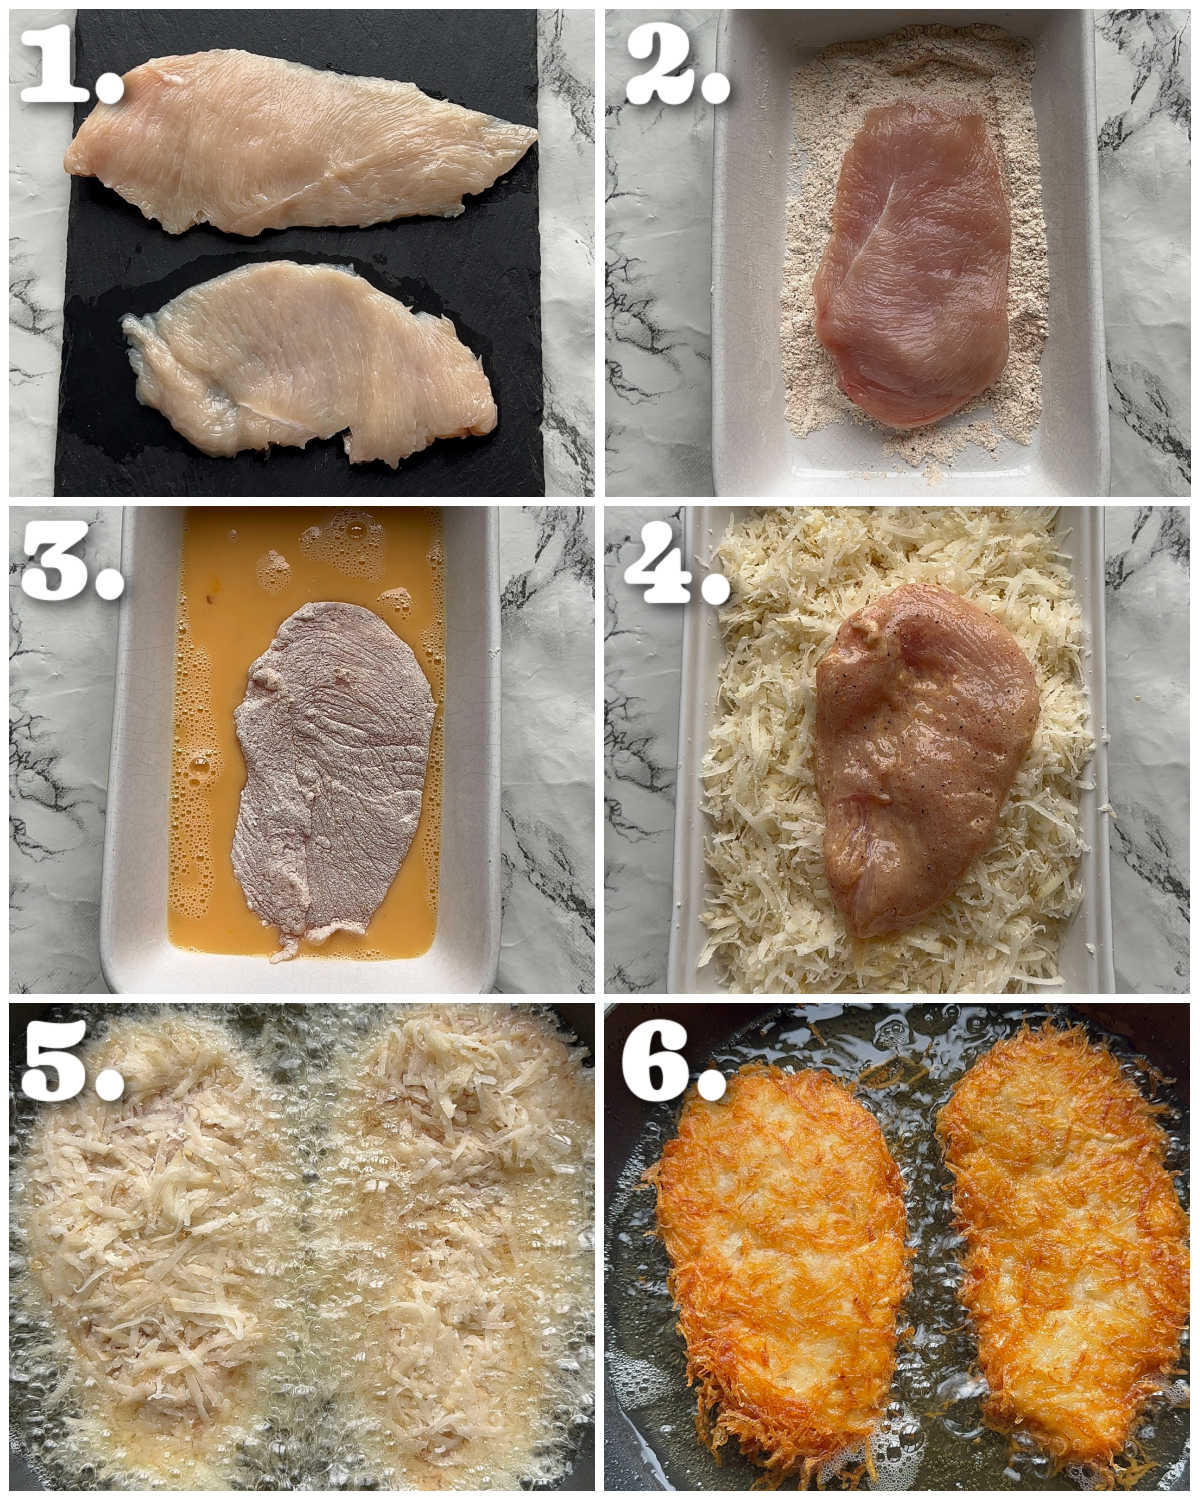
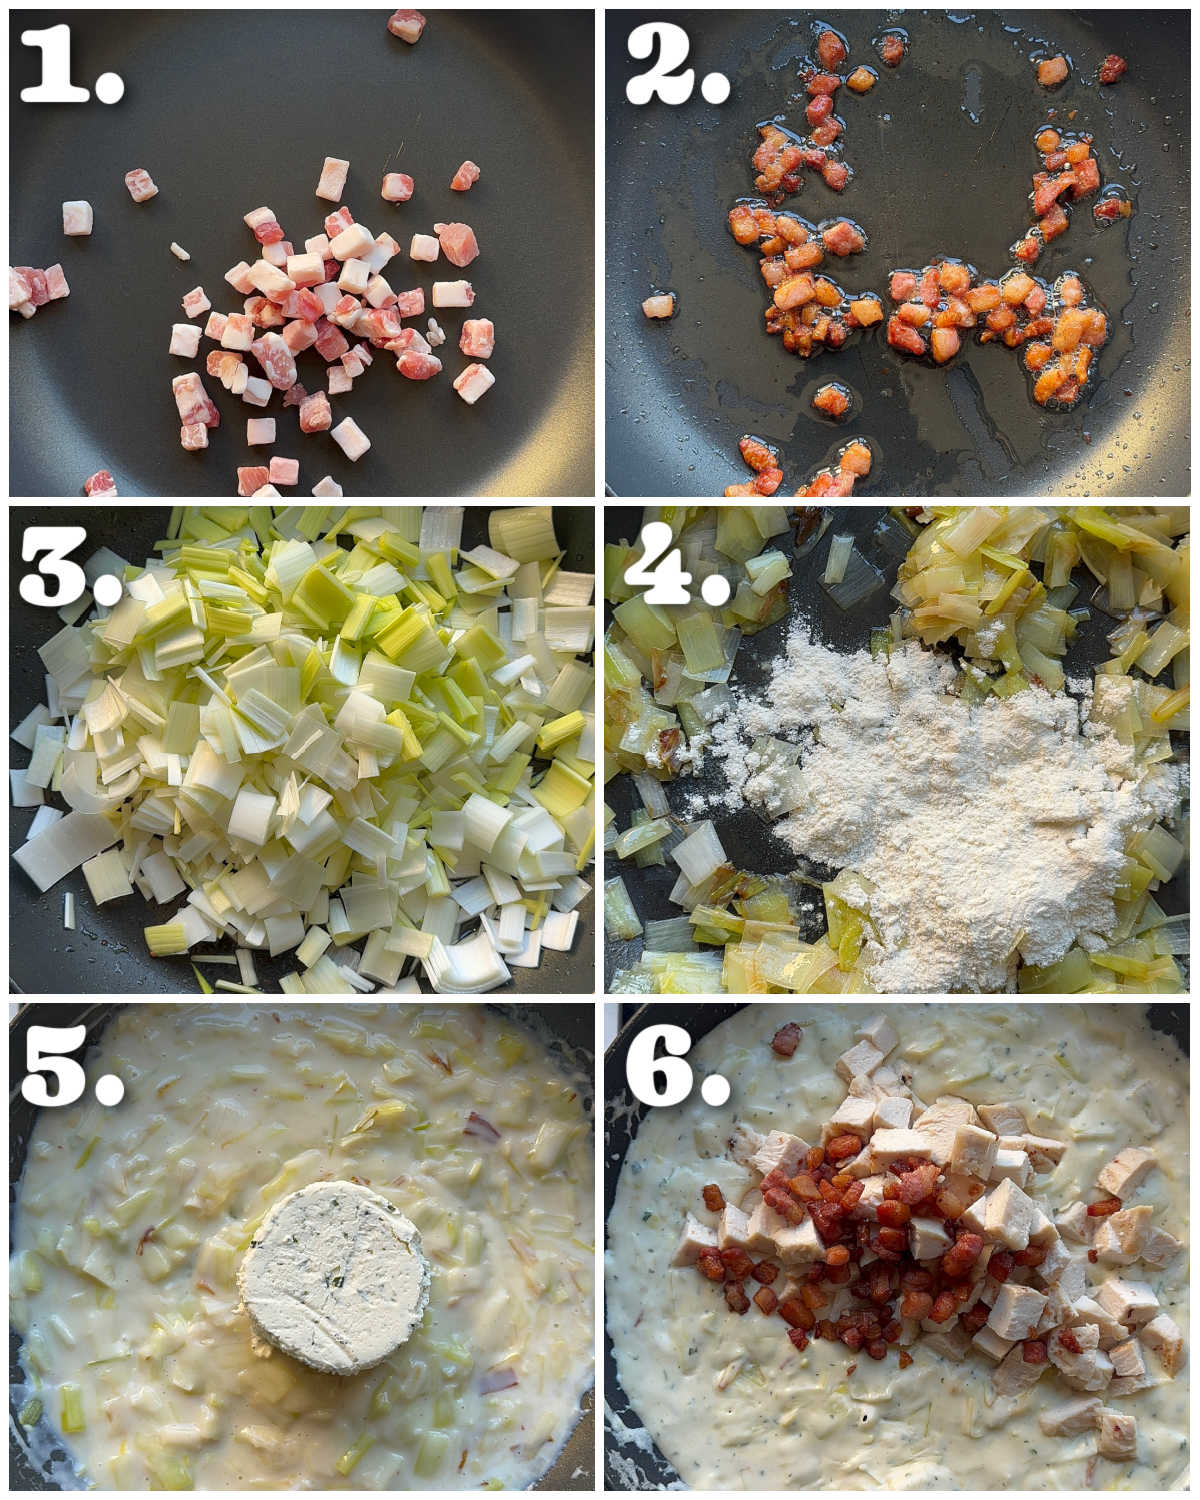
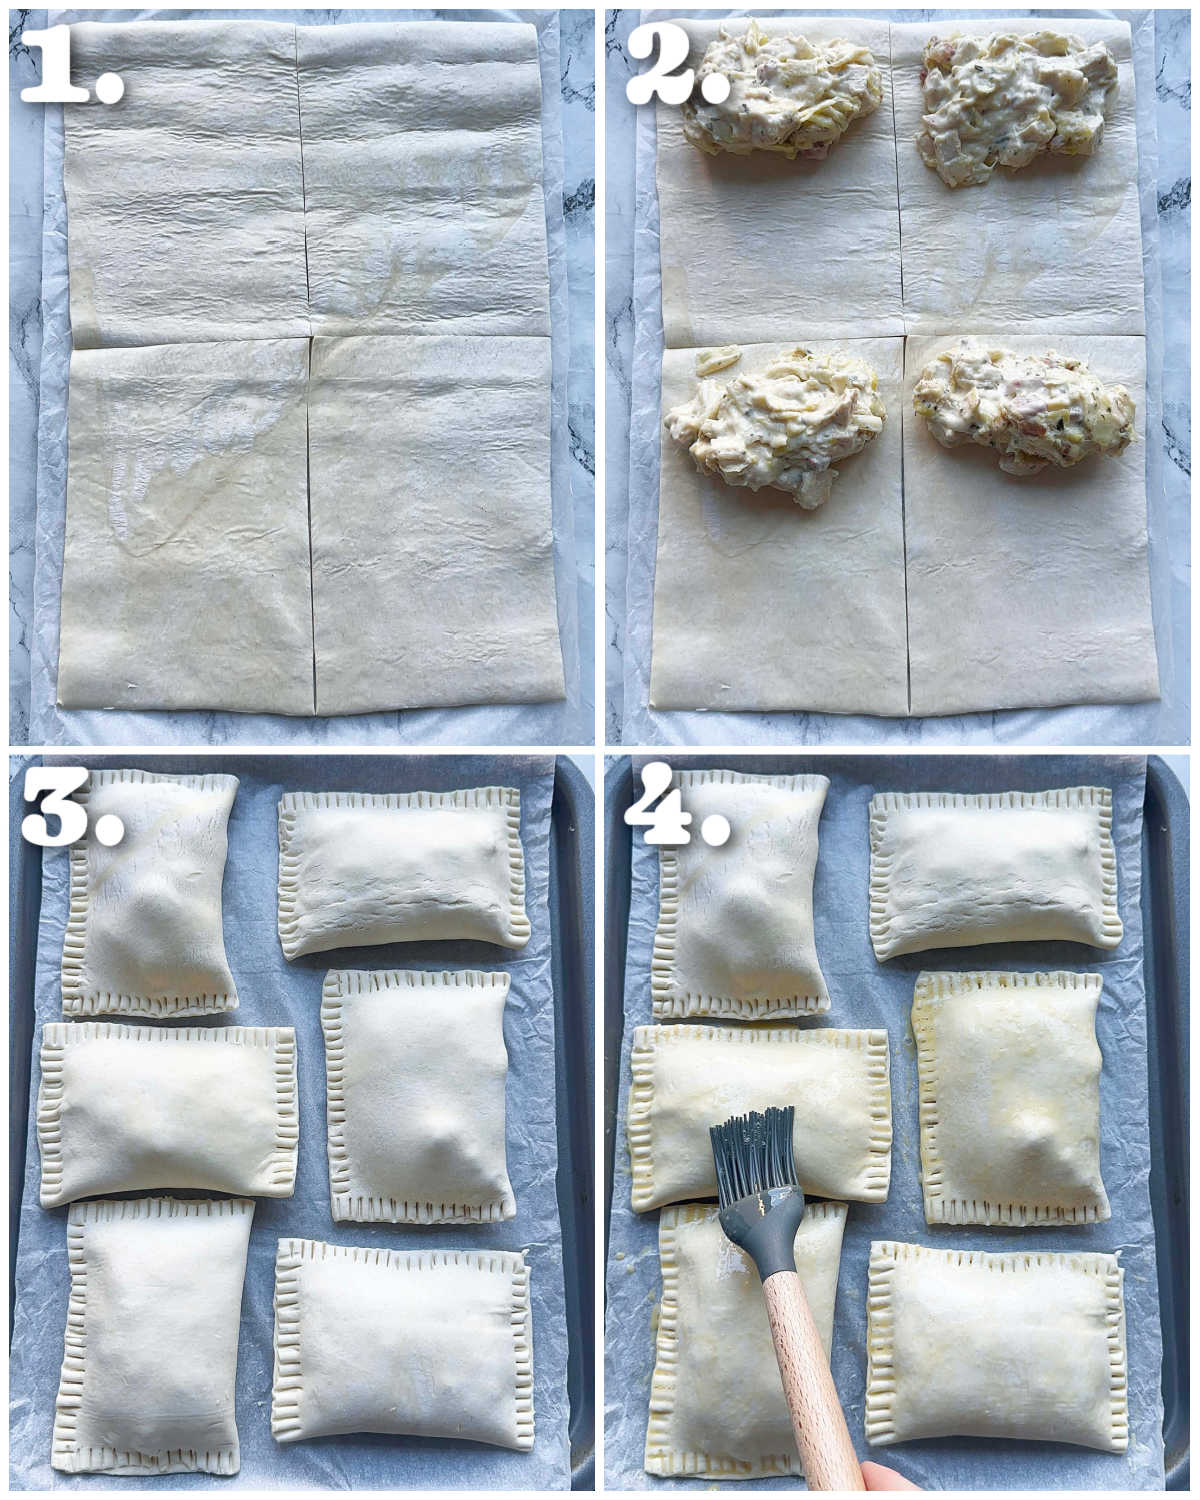
Process shots: toss tenders in oil and seasoning (photo 1), toss asparagus in leftover oil (photo 2), spread out tenders (photo 3), add feta (photo 4), add asparagus (photo 5), wrap in prosciutto (photo 6).

Prosciutto-wrapped Chicken FAQ
Yes, just tightly store in the fridge overnight. Preferably, bring them back close to room temp before baking as instructed.
You could, but only if the bacon is very thin. Flavour-wise, you’re better off with prosciutto though.
I highly recommend it if you can. They really do take this recipe to new heights. The tenders will still be delicious with just prosciutto though.
How to serve Prosciutto-wrapped Chicken
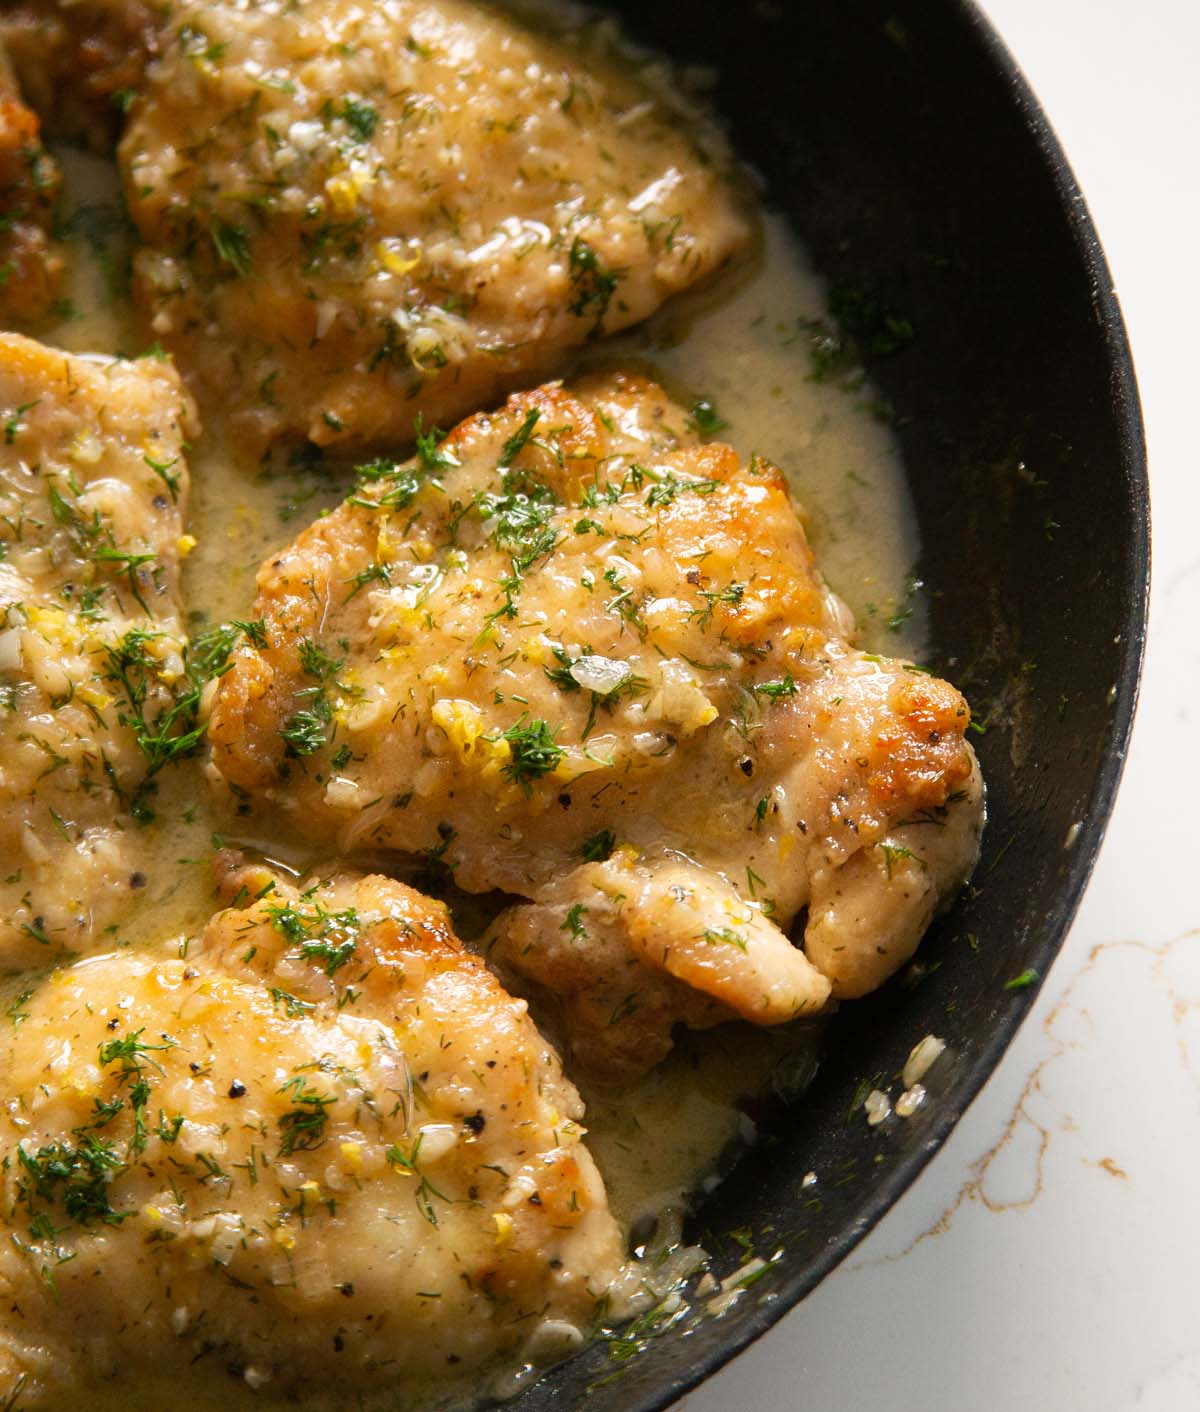
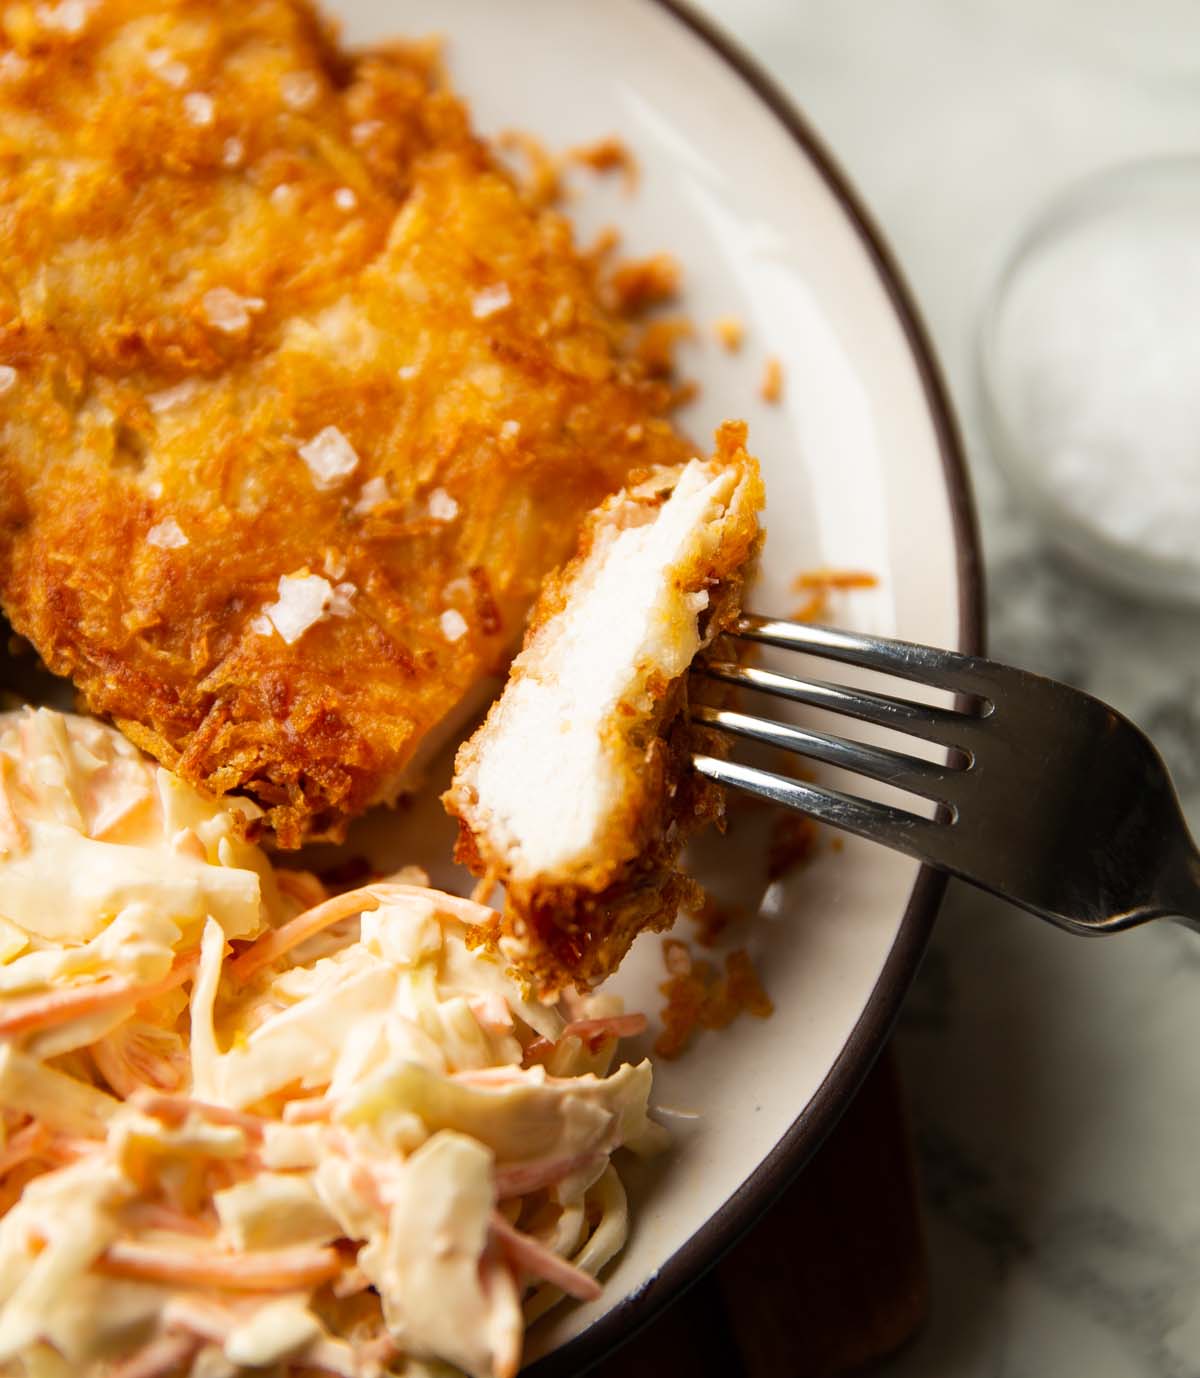
I like to finish with a squeeze of lemon juice, just to brighten up everything (although this is optional). I’ve yet to try it, but I imagine a drizzle of honey/hot honey would be amazing too!
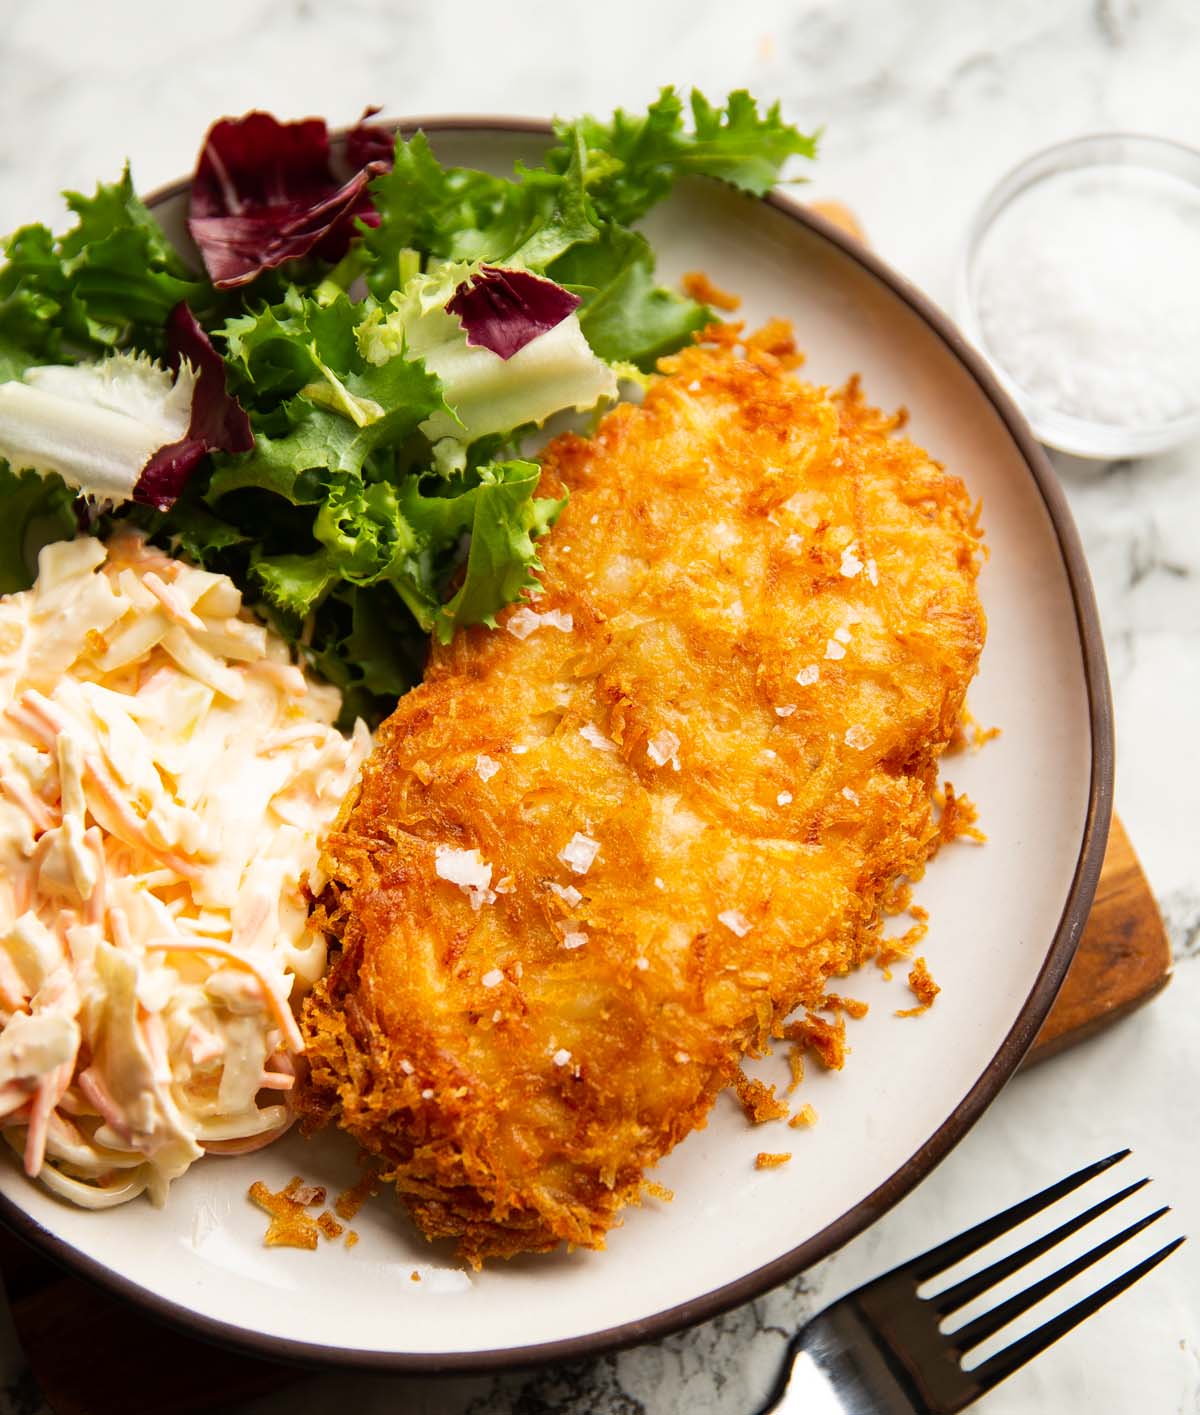
I actually typically serve these for dinner with a couple of Sides (here I’ve gone for some Baby Potatoes and a simple Rocket/Arugula Salad). These would work perfectly served for guests too as part of a spread or as a starter.
Alrighty, let’s tuck into the full recipe for these prosciutto-wrapped chicken tenders shall we?!

How to make Chicken, Asparagus & Feta wrapped in Prosciutto (Full Recipe & Video)

Prosciutto-wrapped Chicken with Asparagus & Feta
Equipment
-
Sharp Knife & Chopping Board
-
Large Shallow Dish & Tongs
-
Large Baking Tray
Ingredients
- 12 Chicken Tenders/Mini Fillets (typically 1.3lb/600g – see notes)
- 1 1/2 tbsp Olive Oil
- 1/2 tsp EACH: Salt, Black Pepper, Paprika, Garlic Powder
- 4oz / 120g Feta
- 24x Fine Asparagus (typically ~5oz/140g)
- 6 slices of Prosciutto, sliced in half
- 1 Lemon, quartered to serve (optional – see notes)
Instructions
-
Preheat the oven to 200C/400F.
-
In a large shallow dish, toss the tenders in the oil and seasoning until fully coated. Space them out on a large baking tray, leaving any excess oil in the bowl. Thinly slice the feta into strips and place on the tenders.
-
Trim the asparagus to a similar length to the tenders, then toss in the leftover oil/seasoning (there won't be much, which is fine). Place on top of the feta (2 per tender).
-
One by one, wrap the tenders in prosciutto, then bake in the oven for 15 minutes until the chicken is piping hot/white through the centre, the feta is creamy and the asparagus is very lightly charred.
-
Serve with a squeeze of lemon juice (optional) then tuck in and enjoy!
Video
Notes
b) Timings – depending on the size of the tenders, they could take a little less or more time, so just be vigilant. Very thick tenders could take up to 18 minutes. But just be careful they don’t dry out (you can always put them back in if needed).
c) Lemon – I like to finish with a squeeze of lemon juice, just to brighten up the tenders. You might find them delicious as they are, so it is optional.
d) Calories – Per tender.
Nutrition
The post Prosciutto-wrapped Chicken with Asparagus & Feta appeared first on Don't Go Bacon My Heart.