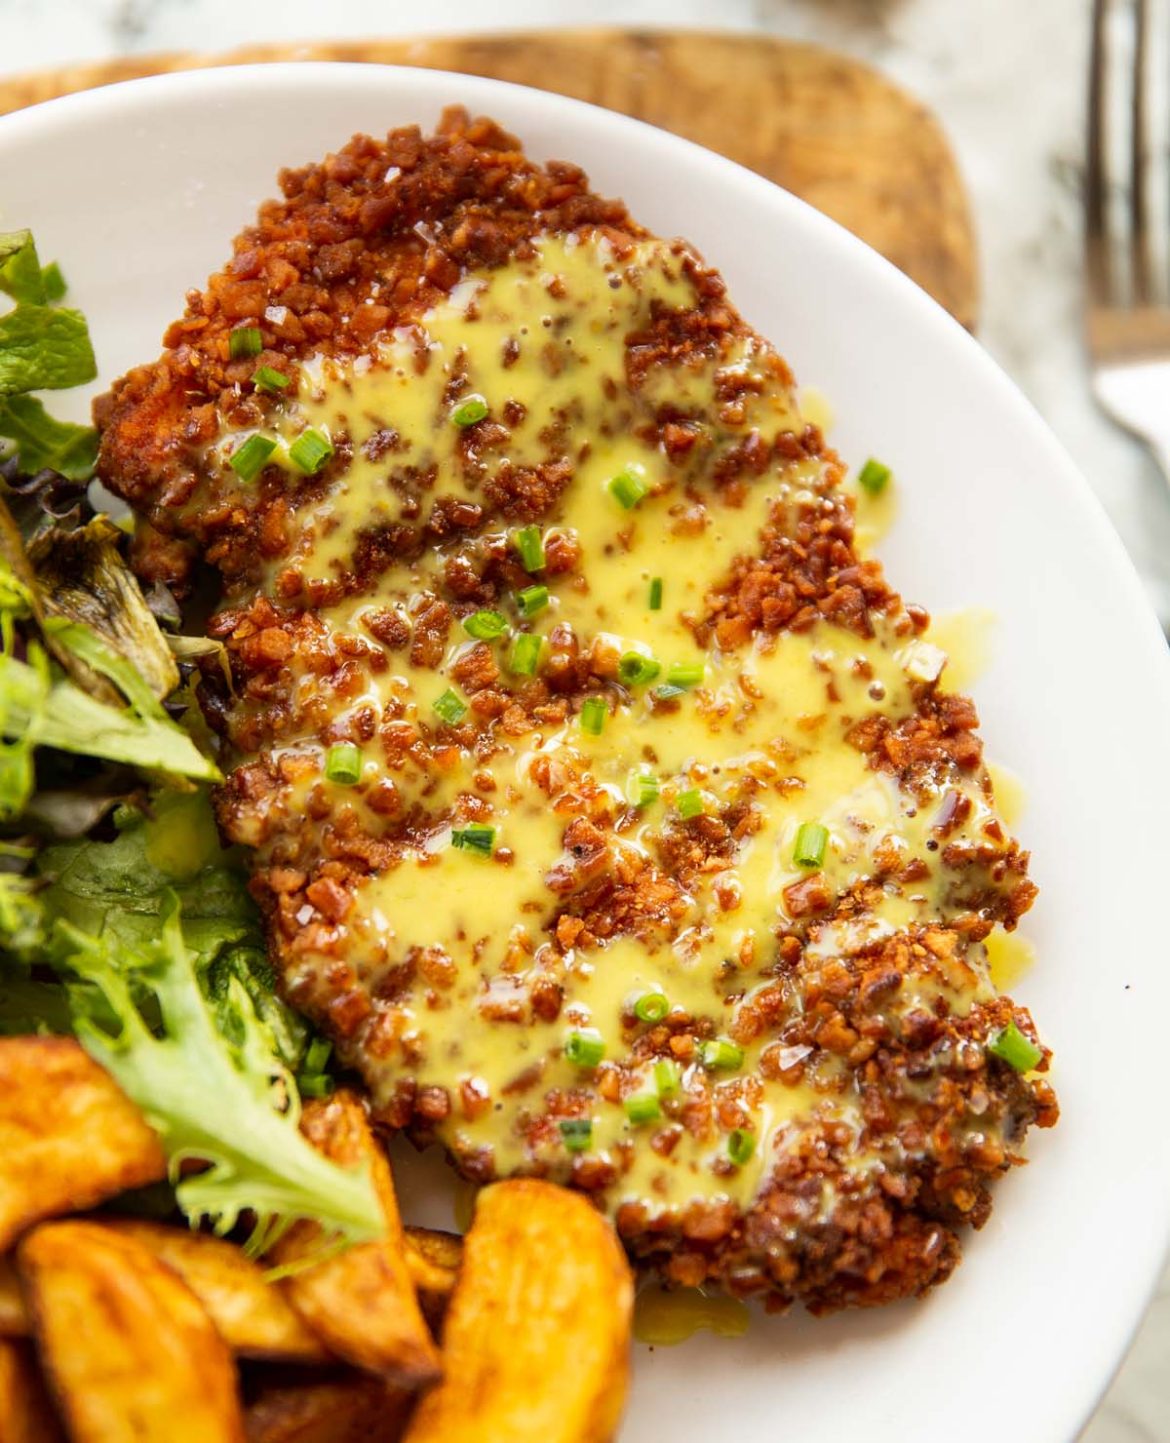
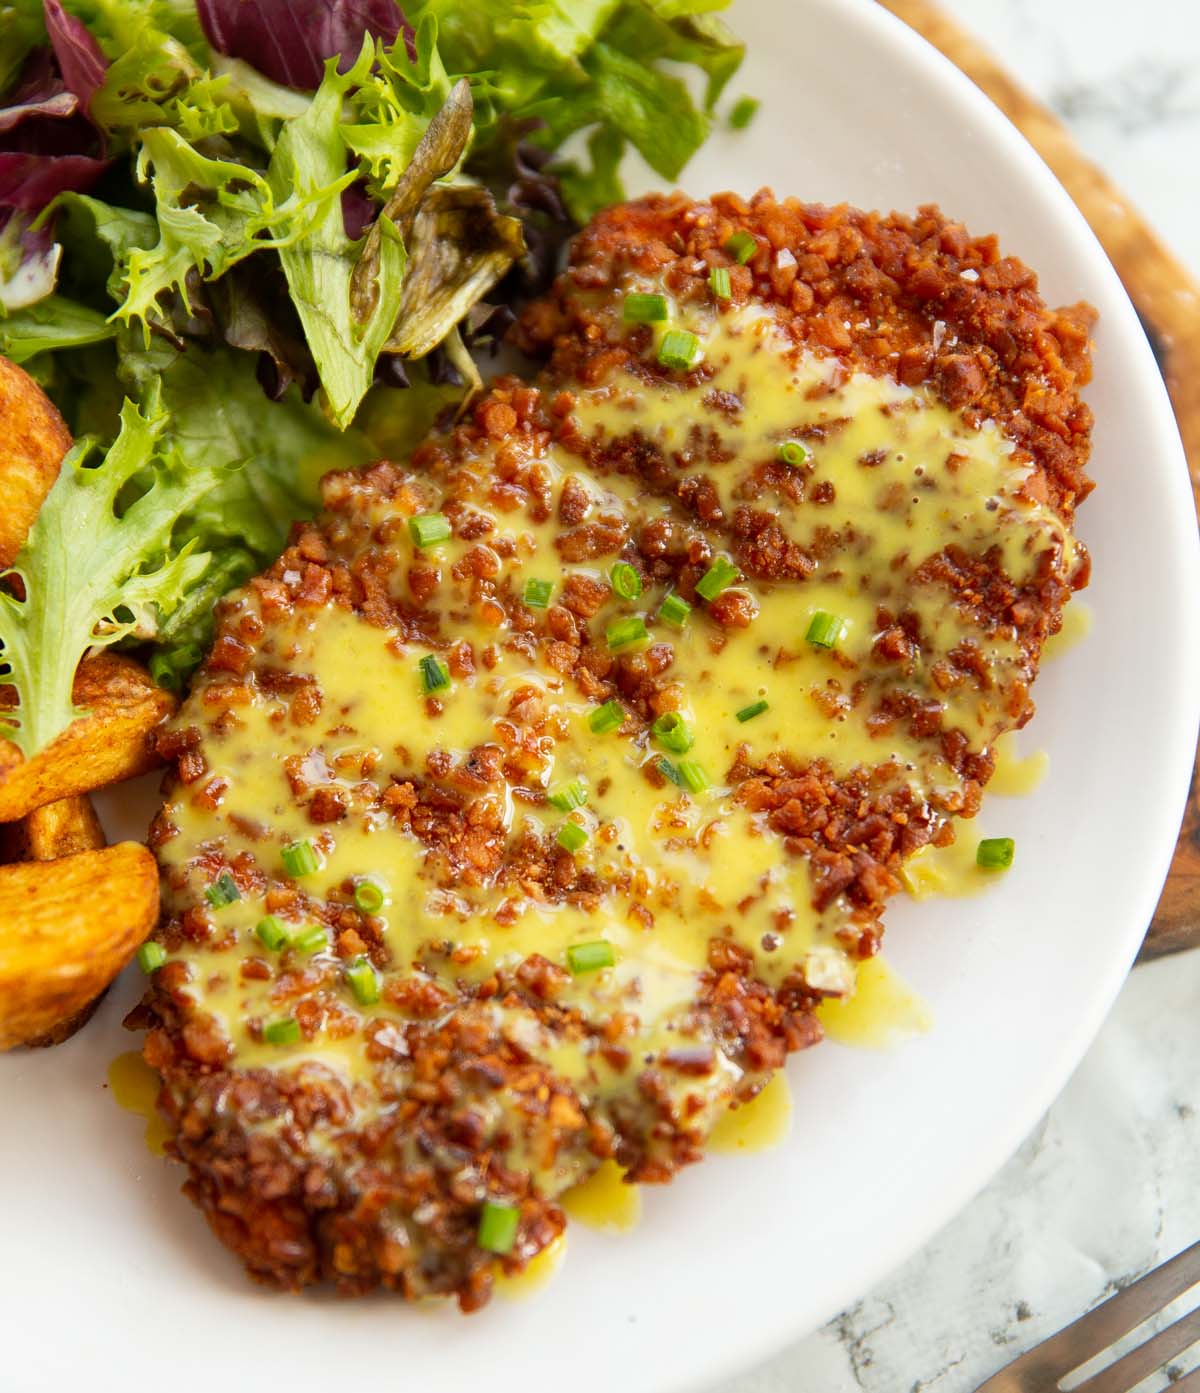
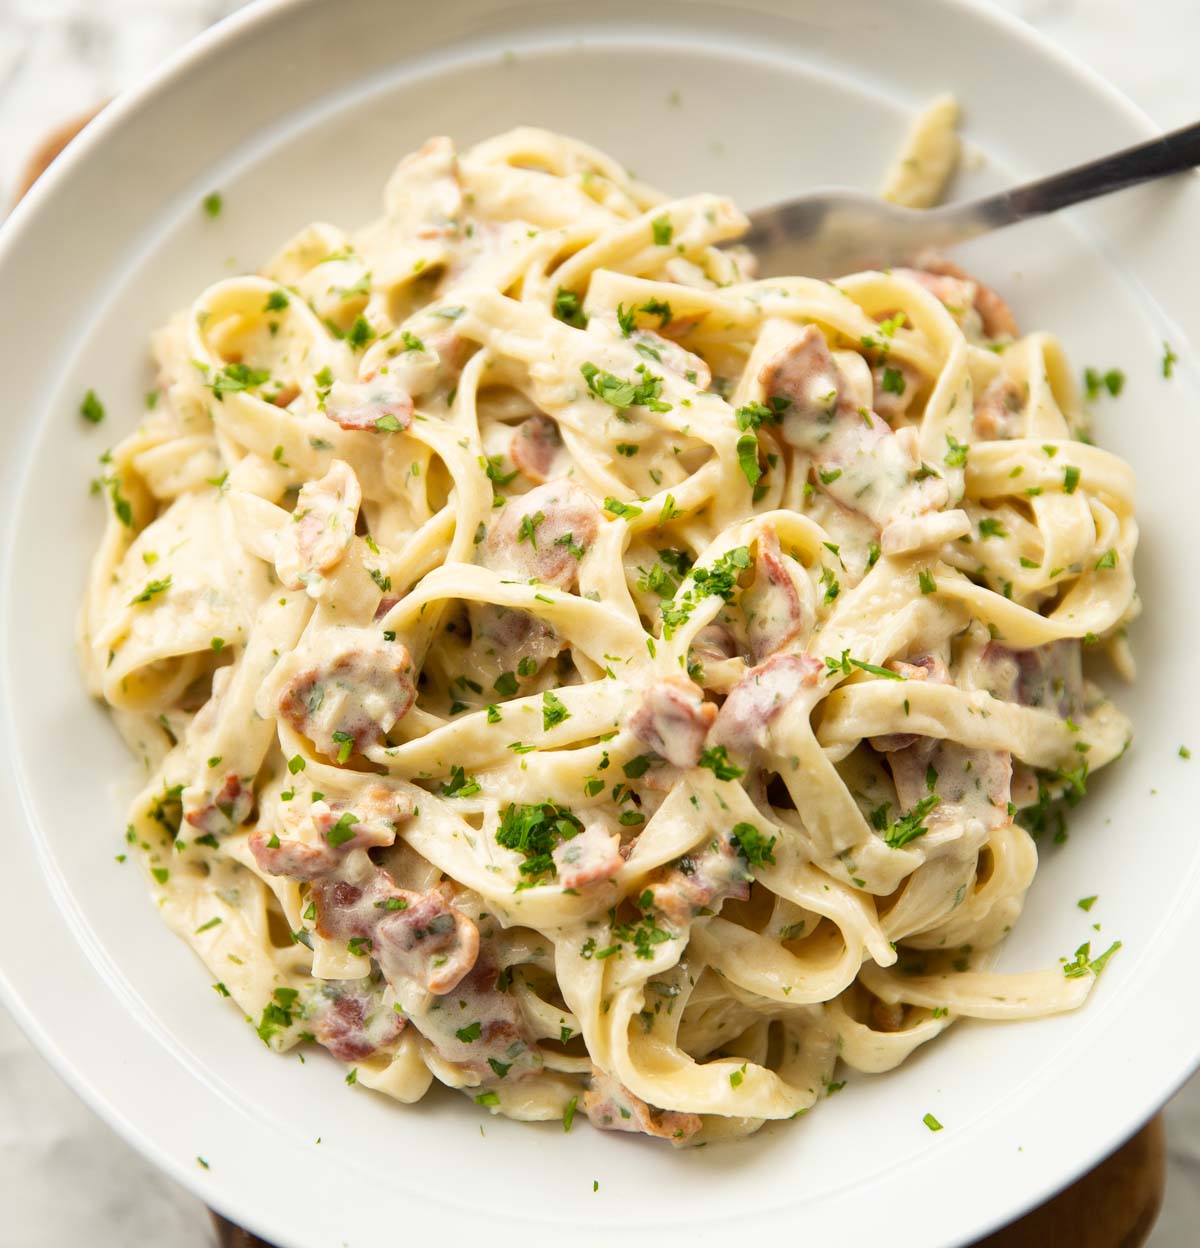
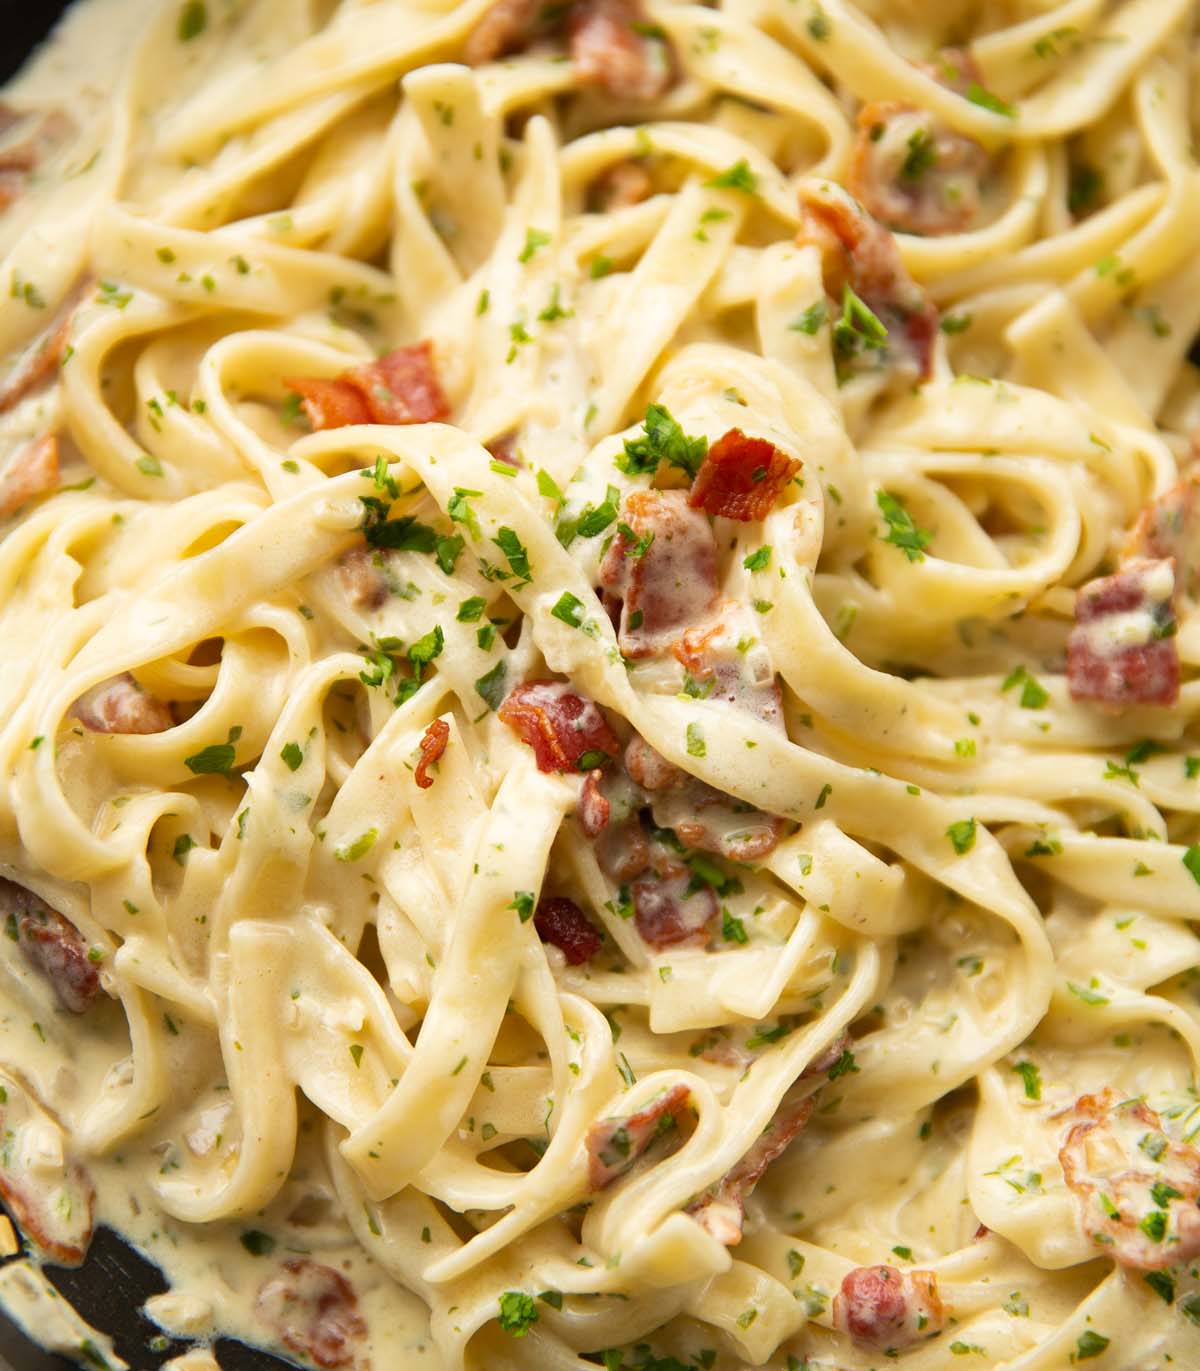
This creamy bacon pasta is way too easy and delicious not to try!
For how simple this recipe is, I think you’re going to be surprised by just how tasty it is. Follow me…
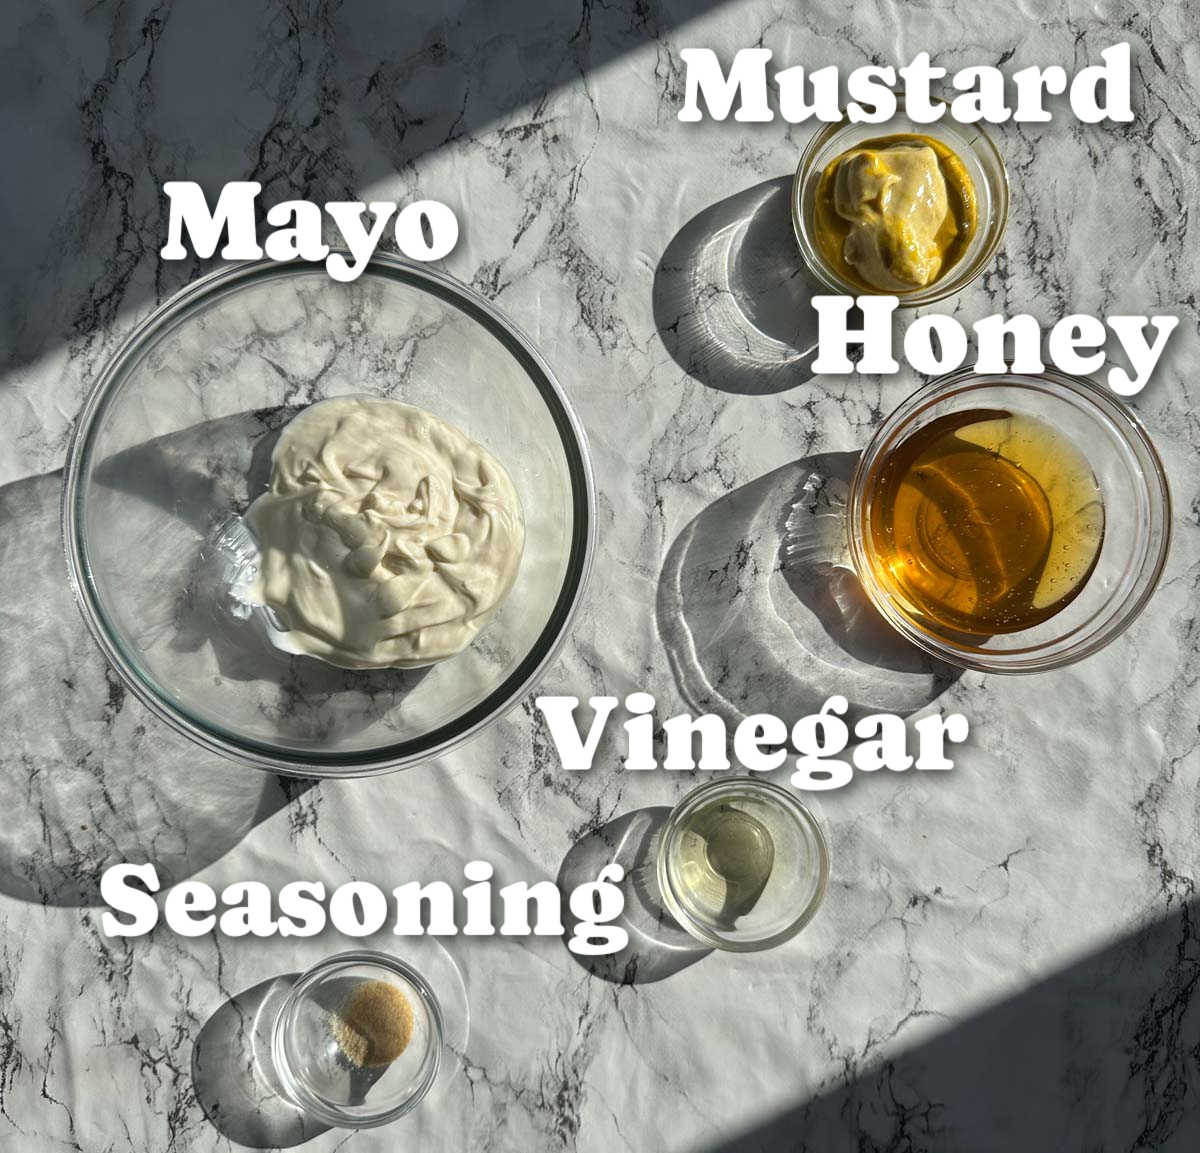
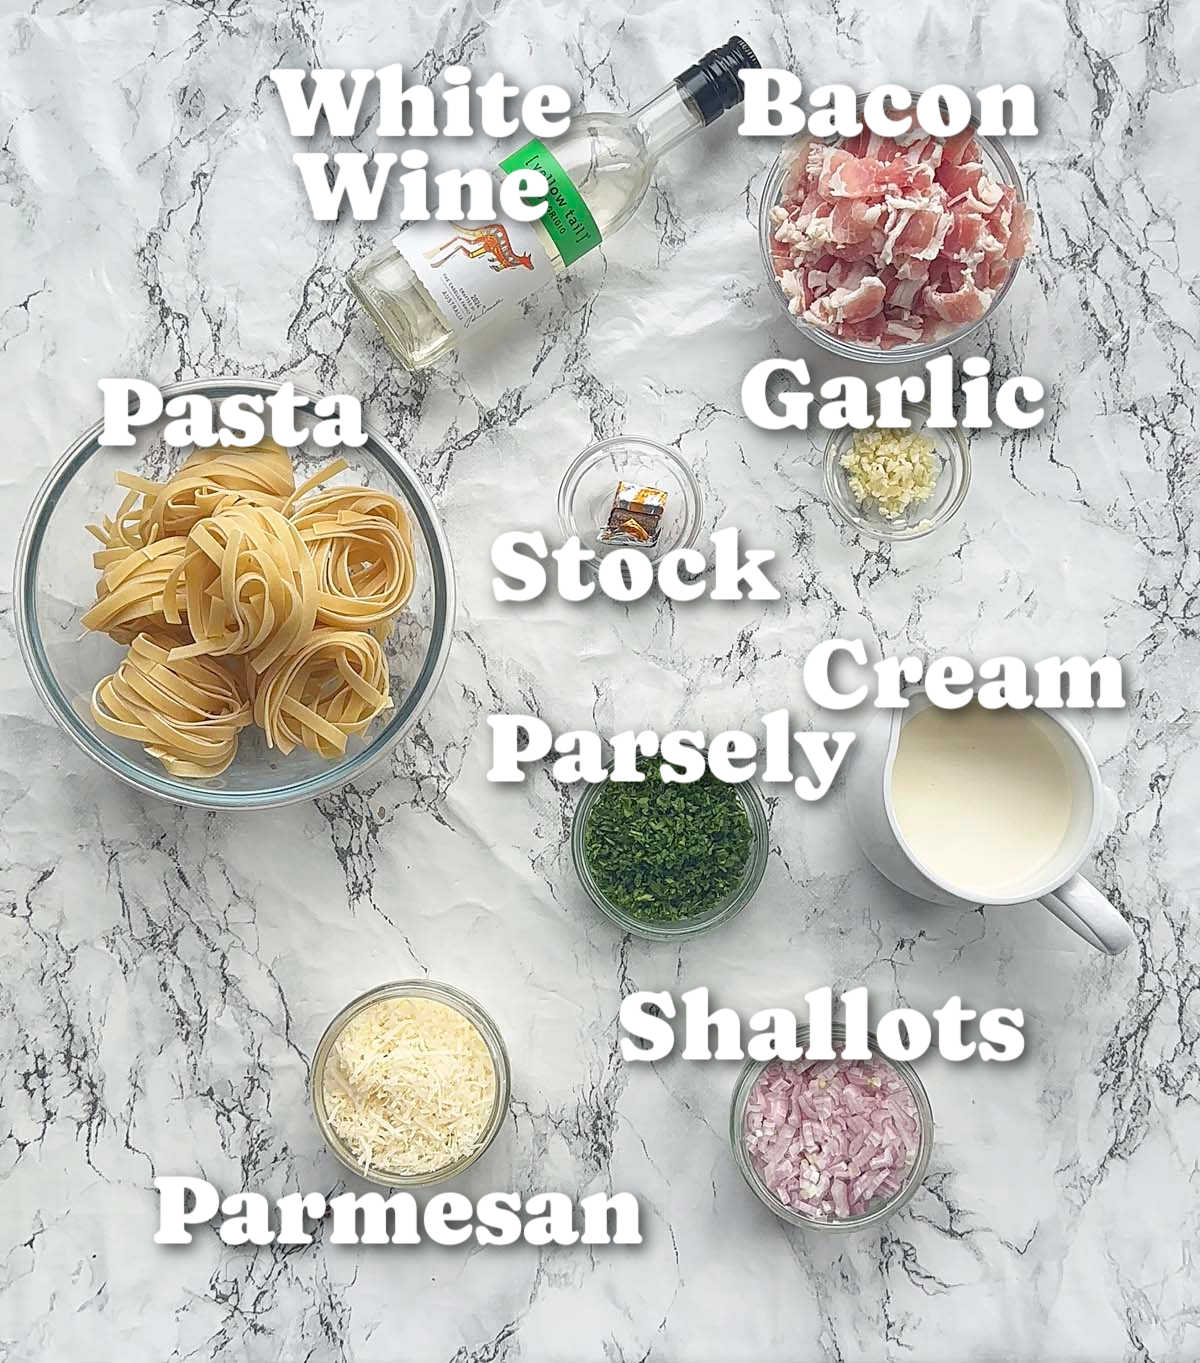
Creamy Bacon Pasta Ingredients
This recipe requires just a handful of ingredients, some of which you should hopefully have knocking about the kitchen already:
- Pasta – I prefer using long-cut pasta to toss in the sauce, but you can use any variety you fancy. Here I use tagliatelle.
- Wine – Any brand of dry white wine will do – doesn’t need to be expensive!
- Bacon – I recommend using streaky bacon so you can use the excess fat in the sauce.
- Chicken Stock – I make it using half a stock cube, but you can use ready-made if you’d prefer.
- Garlic – Must be fresh (not the jarred stuff).
- Parsley – This adds a fresh burst of flavour and a pop of colour.
- Cream – Make sure it’s heavy/double cream so the sauce ends up thick and luscious.
- Shallots – These add a savoury depth of flavour to the sauce.
- Parmesan – This will be stirred through the sauce, although you can finish with more if you’d like.
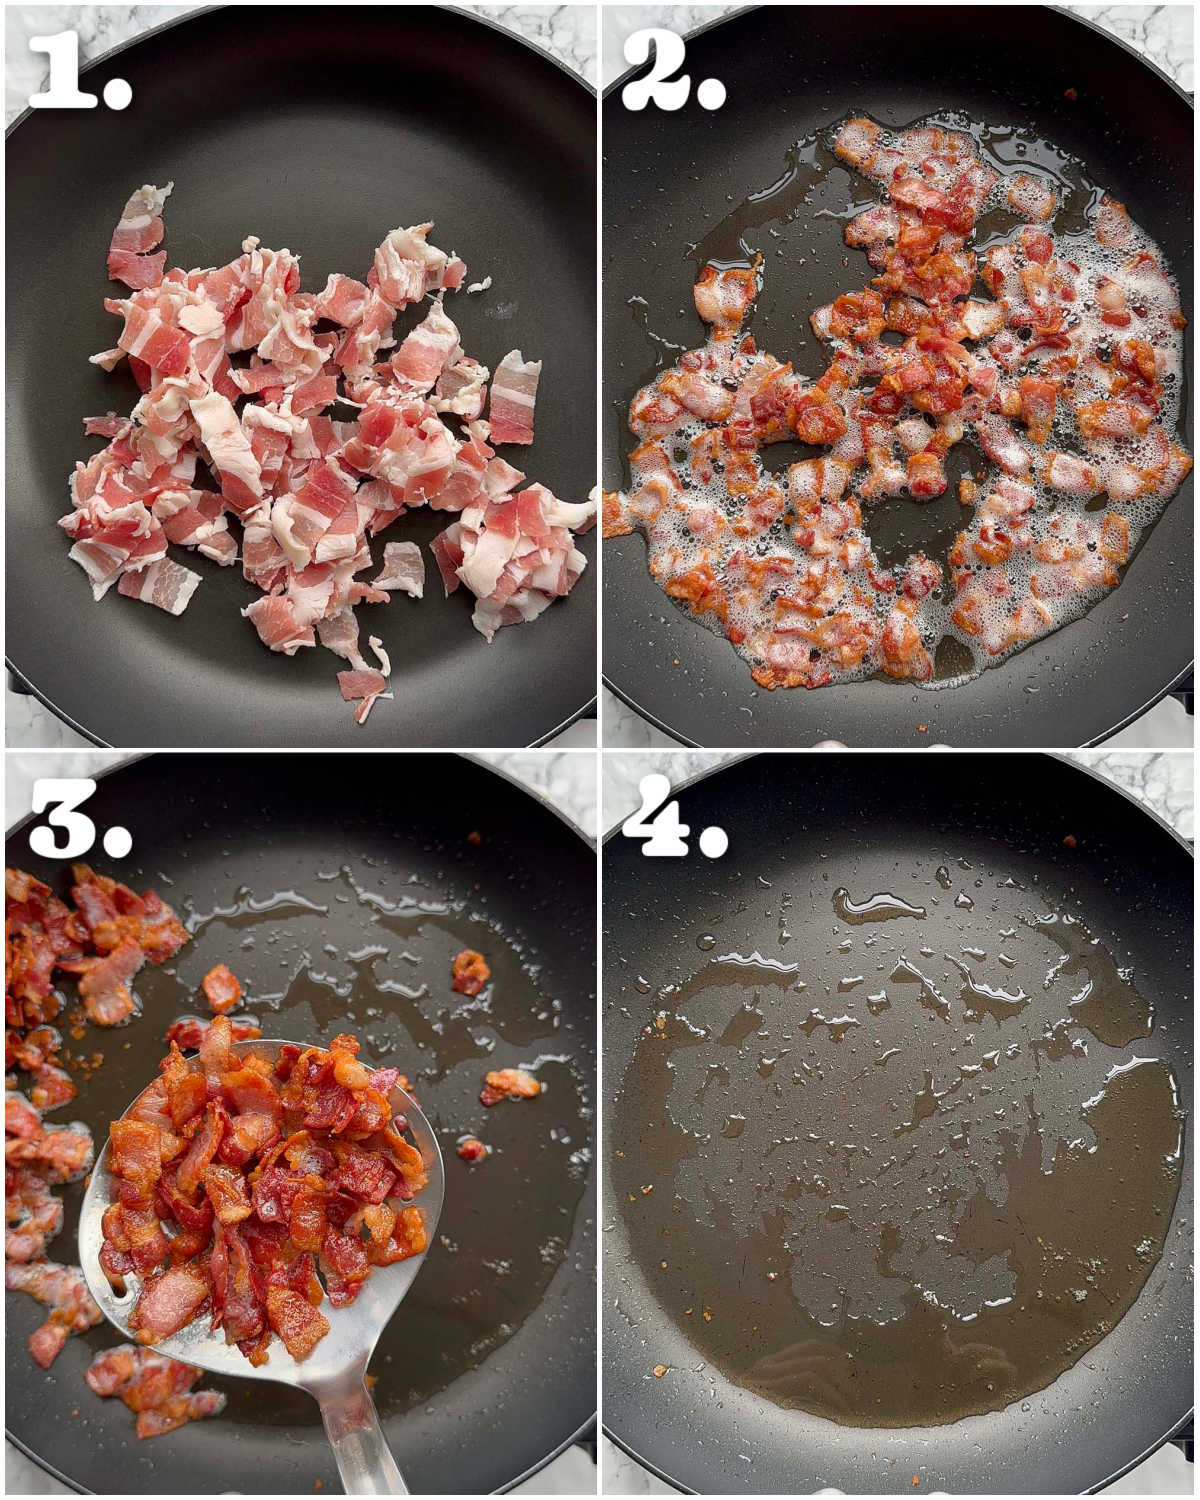
Crispy Bacon
A bacon pasta recipe requires the bacon to shine, so here are a few tips to bring out the best in the bacon:
- Streaky bacon – Aka regular bacon in the US. This is typically fattier than back bacon, so you get the bonus of the excess fat in the pan. Not only does this add flavour to the sauce, but it’s perfect to recycle and use for frying the shallots and garlic.
- Cold pan – starting the bacon in a cold pan will help render down the fat more efficiently, which in turn, results in maximum crispiness. From there, I fry the bacon on a medium heat. I don’t recommend cranking up the heat – you want to gradually draw the fat out of the bacon.
- Remove – while you could leave the bacon in the pan as you simmer the sauce, I much prefer removing it and adding it in at the end, just so it stays nice and crispy.
Ideally, you want around 1 tbsp of excess fat left in the pan. If there’s more, just discard it. If there’s less, just top up with oil or butter.
Process shots: add bacon to pan (photo 1), fry (photo 2), remove (photo 3), leave fat behind (photo 4).
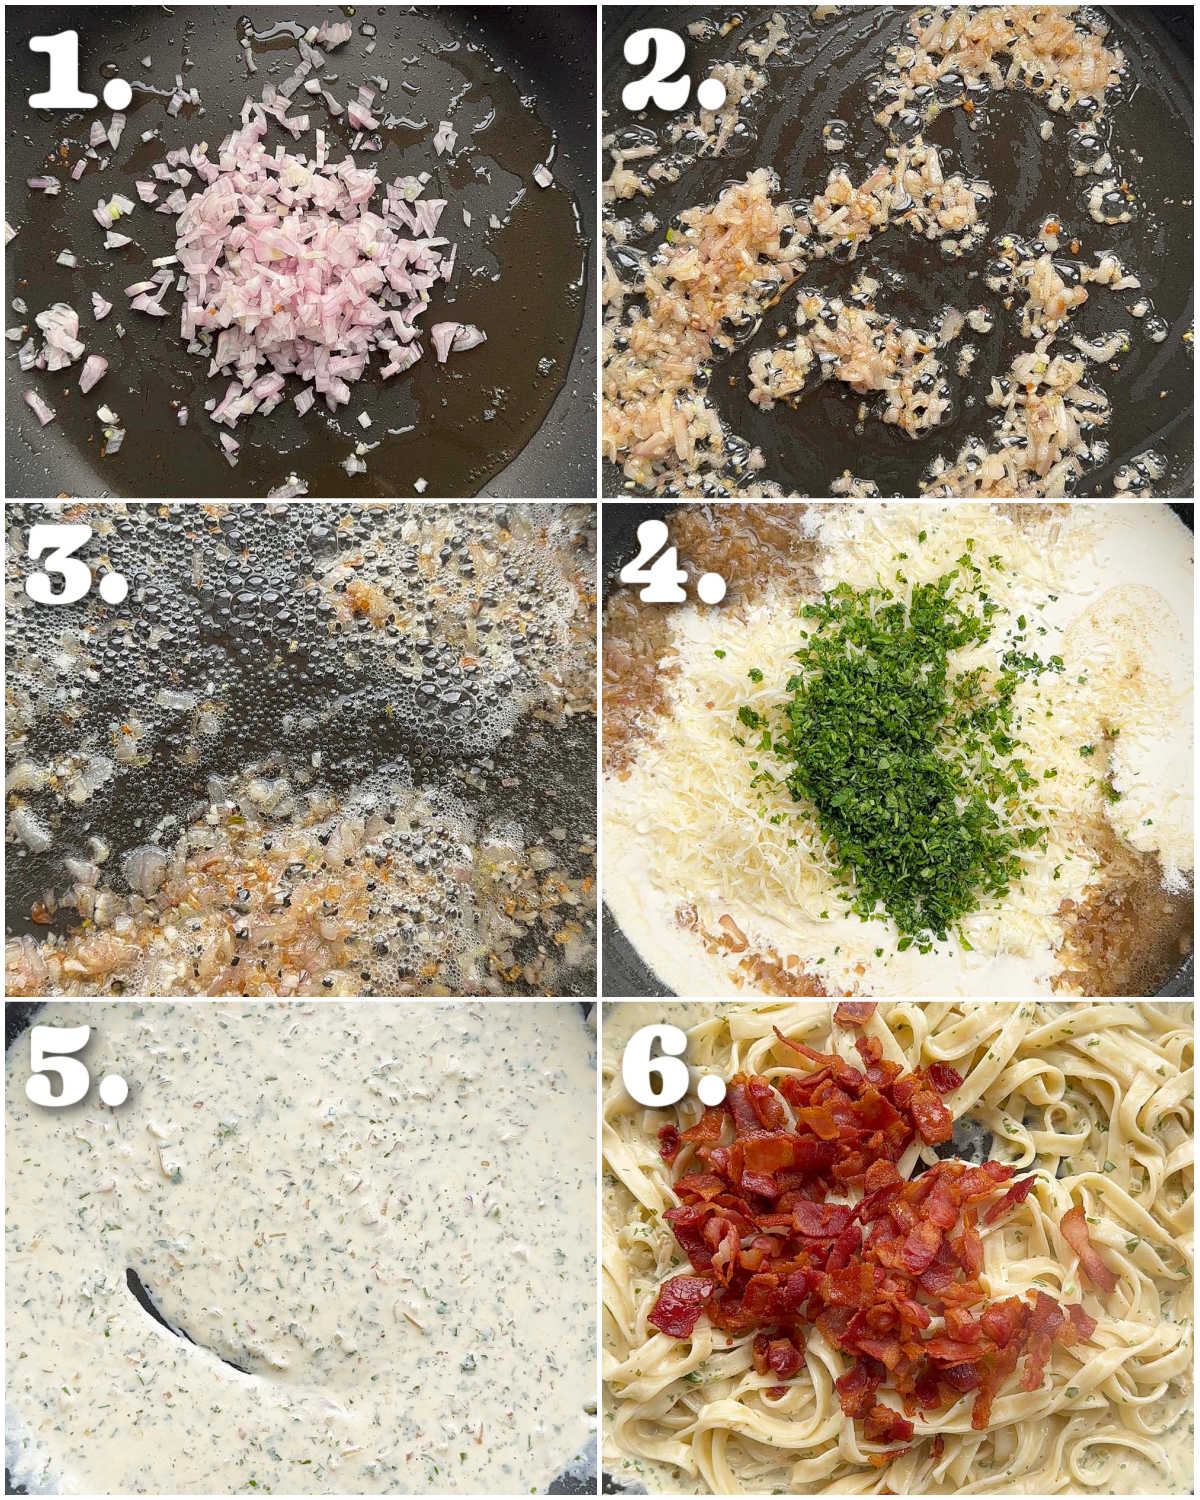
Creamy Bacon Pasta Sauce
Just like the bacon, we want to fry the shallots on a medium heat. This will give them a chance to soften and sweeten. From there, a quick fry of the garlic and we’ve completed the base flavour of the sauce.
White Wine
This sauce benefits from a splash of wine for a few different reasons:
- Balance – The wine cuts through the richness of the sauce and helps balance everything.
- Flavour – It adds a mellow background flavour.
- Deglaze – It’s perfect for scraping any flavour from the pan.
Sauce Consistency
Once you’ve reduced the wine, we’ll create a sauce with cream, chicken stock, parmesan and parsley. You’ll want the sauce fairly thick because adding the pasta will thin it back out again.
Process shots: fry shallots (photo 1), fry garlic (photo 2), reduce wine (photo 3), add stock, cream, parsley and parmesan (photo 4), simmer (photo 5), add pasta and bacon (photo 6).
Creamy Bacon Pasta FAQ
Most of, if not all of the alcohol will burn off, but if you still can’t use it then use a non-alcoholic wine or leave it out altogether.
Using double/heavy cream is important to create a thick sauce. Anything lighter will be too thin and may curdle with the wine.
Mushrooms would go delightfully with this, as would chicken!
Serving Creamy Bacon Pasta
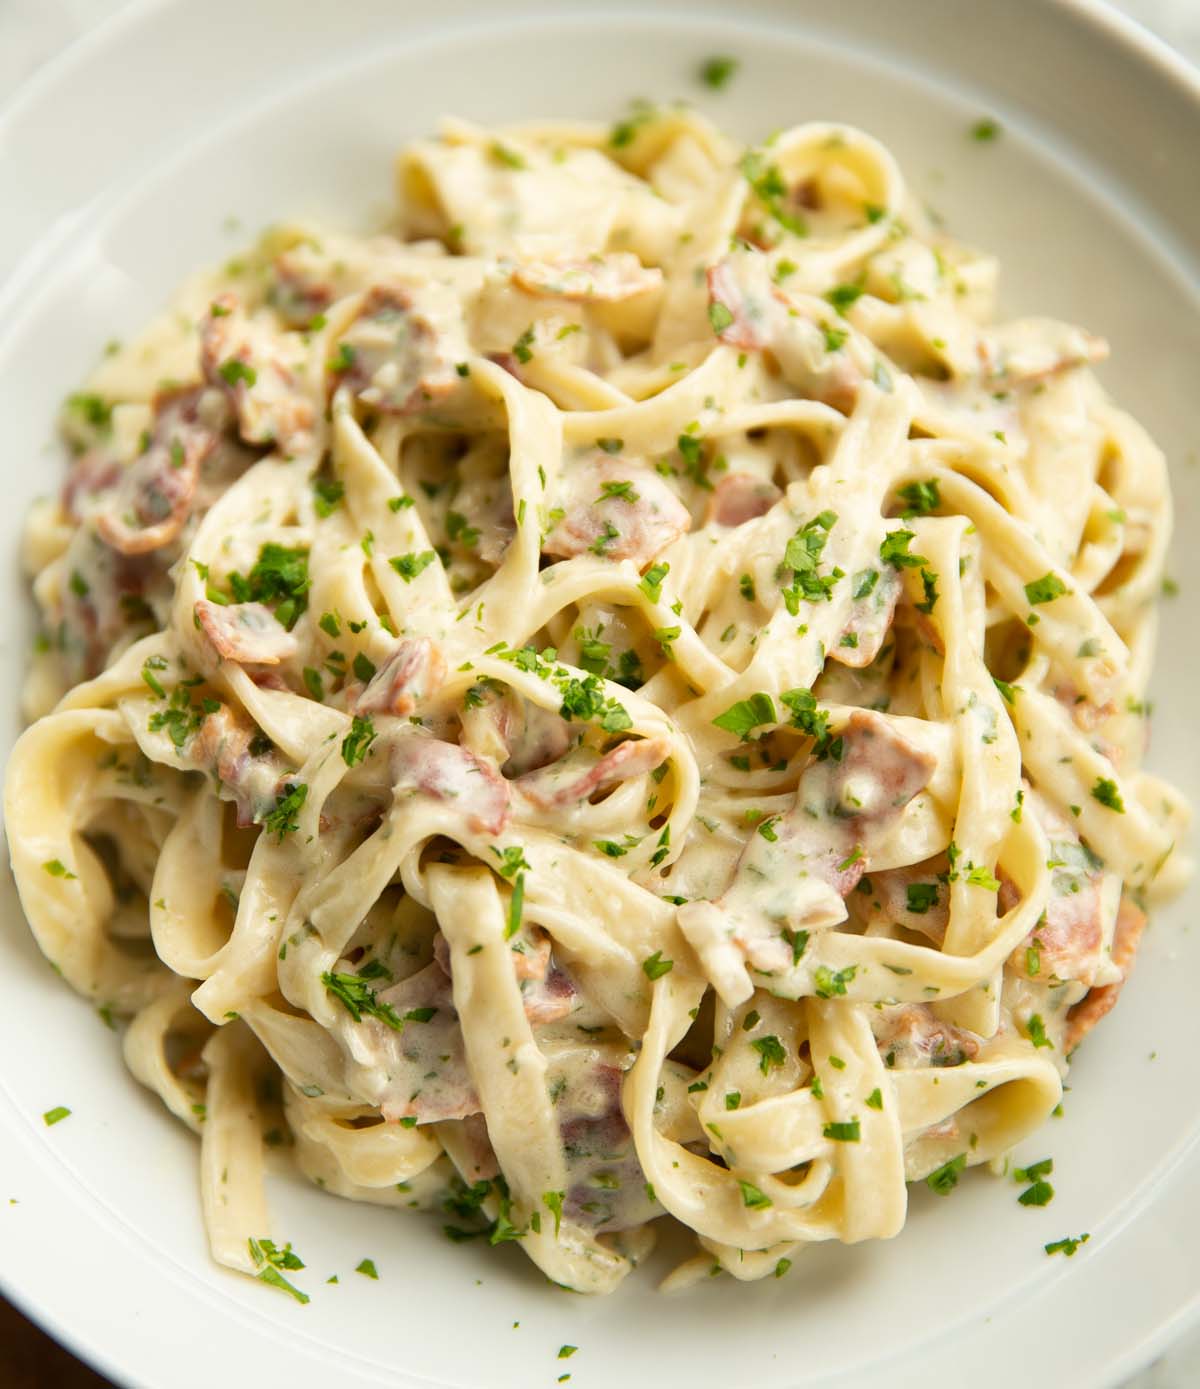
Once the sauce thickens and clings to the pasta you’ll want to serve up right away. If the sauce over-thickens, you can simply toss in some more starchy pasta water.
If you’d like, you can go in with some extra parmesan and parsley too.
For the sister dish to this recipe check out my Tomato Bacon Pasta!
Alrighty, let’s tuck into the full recipe for this creamy bacon pasta shall we?!
How to make Creamy Bacon Pasta (Full Recipe & Video)
Creamy Bacon Pasta (easy & delicious!)
#wprm-recipe-user-rating-2 .wprm-rating-star.wprm-rating-star-full svg * { fill: #343434; }#wprm-recipe-user-rating-2 .wprm-rating-star.wprm-rating-star-33 svg * { fill: url(#wprm-recipe-user-rating-2-33); }#wprm-recipe-user-rating-2 .wprm-rating-star.wprm-rating-star-50 svg * { fill: url(#wprm-recipe-user-rating-2-50); }#wprm-recipe-user-rating-2 .wprm-rating-star.wprm-rating-star-66 svg * { fill: url(#wprm-recipe-user-rating-2-66); }linearGradient#wprm-recipe-user-rating-2-33 stop { stop-color: #343434; }linearGradient#wprm-recipe-user-rating-2-50 stop { stop-color: #343434; }linearGradient#wprm-recipe-user-rating-2-66 stop { stop-color: #343434; }
Equipment
-
Sharp Knife & Chopping Board
-
Large Pan & Wooden Spoon
-
Slotted Spoon & Kitchen Roll/Paper Towels (for removing bacon)
-
Large Pot & Tongs (for pasta)
-
Jug (for stock)
-
Fine Cheese Grater
Ingredients
- 150g / 5.3oz Streaky Bacon, diced
- 2 Shallots, finely diced
- 1 large clove of Garlic, finely diced
- 60ml / 1/4 cup Dry White Wine (see notes)
- 200g / 7oz Long-Cut Pasta (see notes)
- 80ml / 1/3 cup Chicken Stock
- 160ml / 2/3 cup Double/Heavy Cream
- 2 tbsp finely diced Fresh Parsley
- 30g / 1/3 cup freshly grated Parmesan
- Salt & Black Pepper, as needed
Instructions
-
Add the bacon to a large pan with the heat off. Turn the heat to medium and fry until crisp with the fat rendered down. Don't rush the process and crank up the heat. Remove the bacon with a slotted spoon and place it on kitchen roll/paper towels. If there's more than 1 tbsp fat in the pan remove excess.
-
Add the shallots to the leftover fat and gently sweat them down until soft and golden. Add the garlic and fry for another 30 seconds or so, then pour in the wine. Increase the heat slightly a simmer the wine for 3-4 minutes, or until it almost completely evaporates and the pungent smell of alcohol disappears.
-
Meanwhile, add the pasta to a large pot of salted boiling water and cook until al dente.
-
Lower the heat back down the medium and stir in the stock, cream, parmesan and parsley. Simmer for a few minutes, stirring as you go, until the sauce thickens. Check for seasoning and adjust if needed, then use tongs to transfer the cooked pasta straight from the pot into the sauce (embrace any excess water that comes with it). Toss to coat the pasta in the sauce, then add the bacon and continue tossing until the sauce thickens and clings to the pasta. If it over-thickens, just toss in a splash more pasta water.
-
Serve up with more parmesan and parsley if desired then tuck in and enjoy!
Video
Notes
b) Wine – This helps cut through the richness of the sauce and will also add a very faint background flavour. Most of, if not all of the alcohol will burn off, but if you can’t use it then use non-alcoholic wine or leave it out.
c) Pasta – I like using long-cut pasta for this recipe (I use Tagliatelle here). I find it easier to toss and bind the sauce. You can use any type of pasta you fancy. For reference, 200g/7oz is the dry weight.
d) Stock – I use 1/2 a chicken Oxo cube to make 80ml / 1/3 cup stock. If you have ready-made stock obviously just measure that out. If you’re sensitive to salt you can use reduced-salt stock.
e) Calories – Whole recipe divided by 2 with no extra parmesan.
Nutrition
For more similar recipes check out these beauties:
Creamy Pasta Recipes
- Creamy Mushroom Pasta
- Creamy Salmon Pasta
- Creamy Courgette Pasta
- Creamy Prawn Pasta
- Creamy Cajun Chicken Pasta
The post Creamy Bacon Pasta (easy & delicious!) appeared first on Don't Go Bacon My Heart.