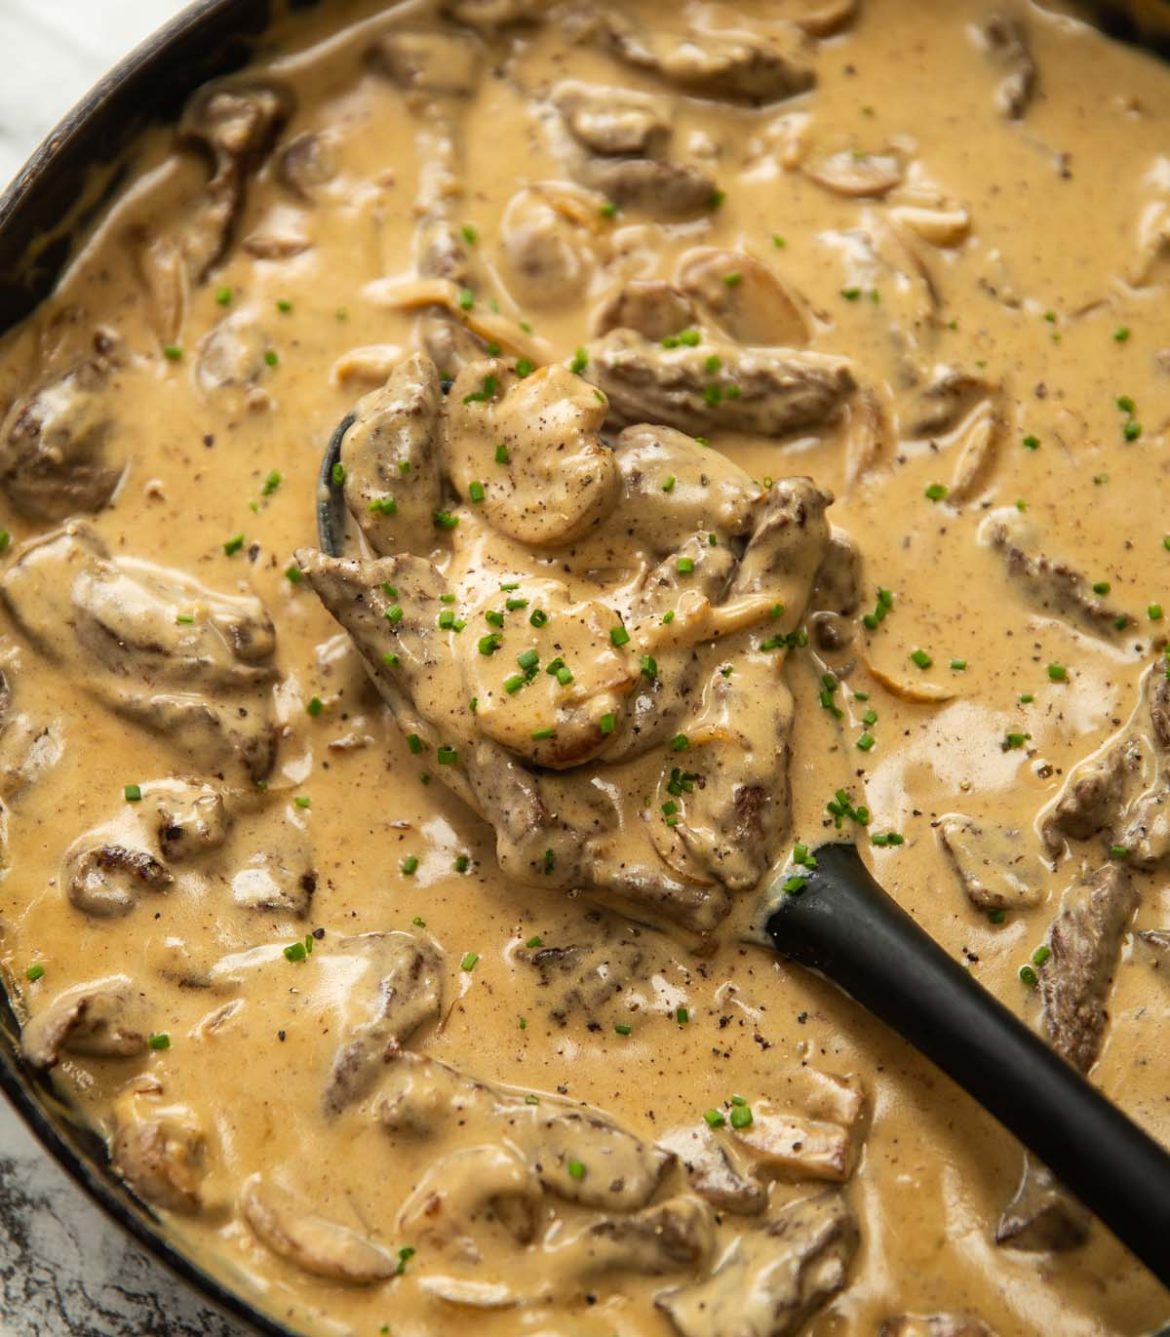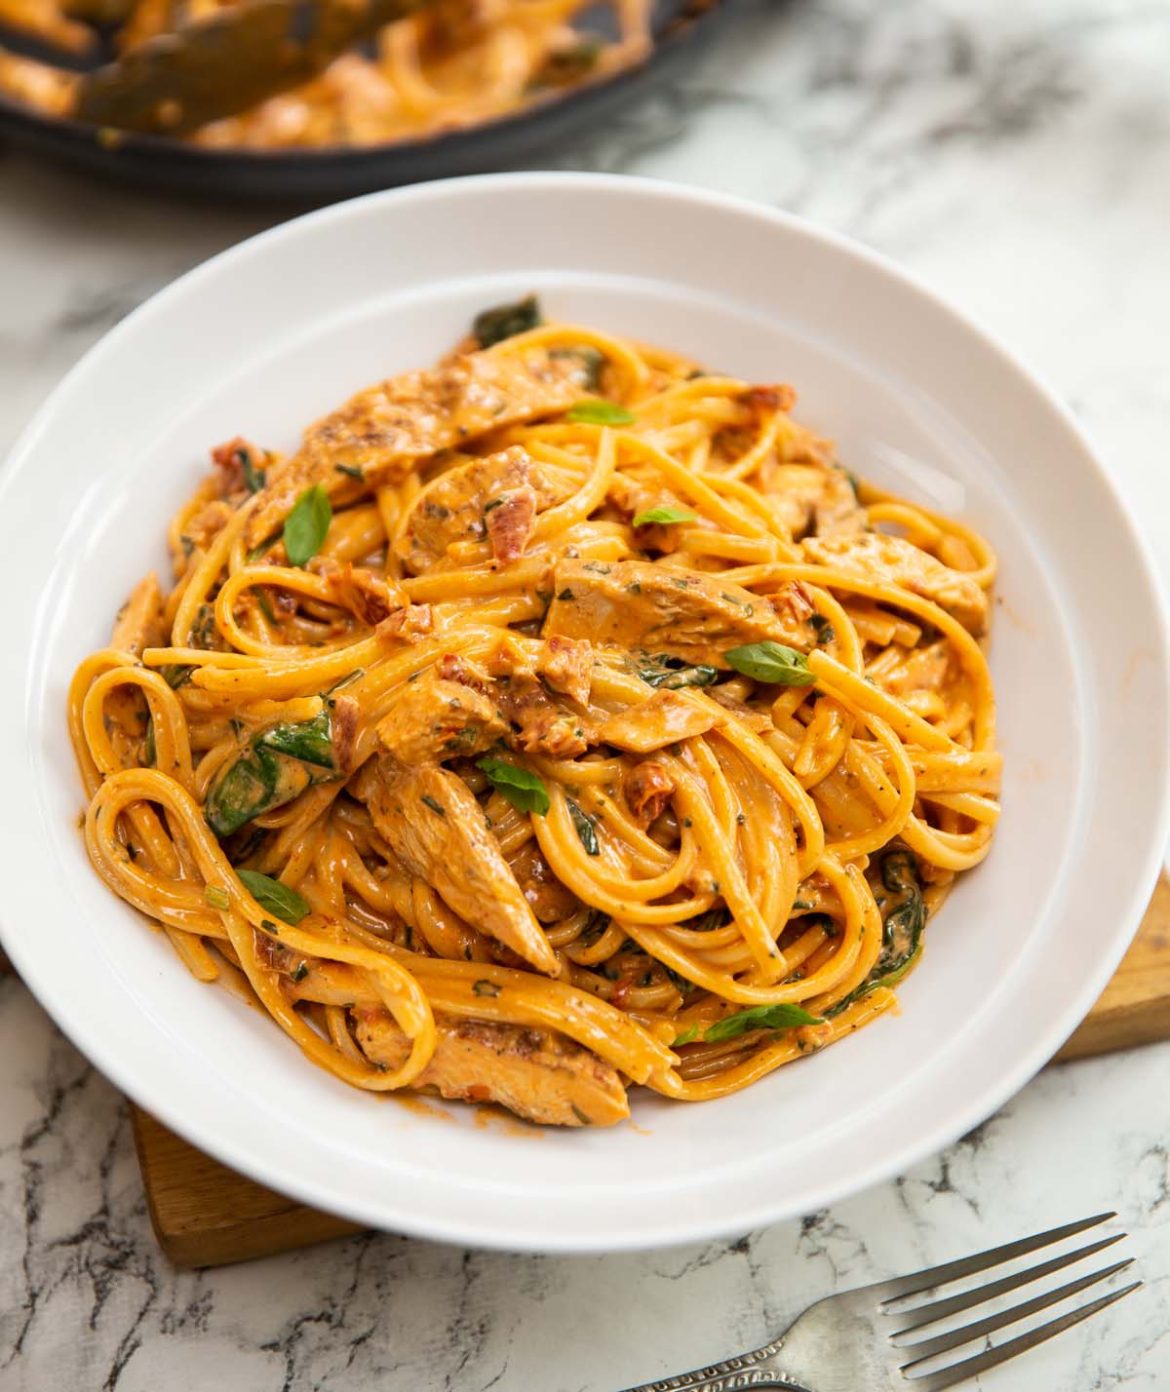
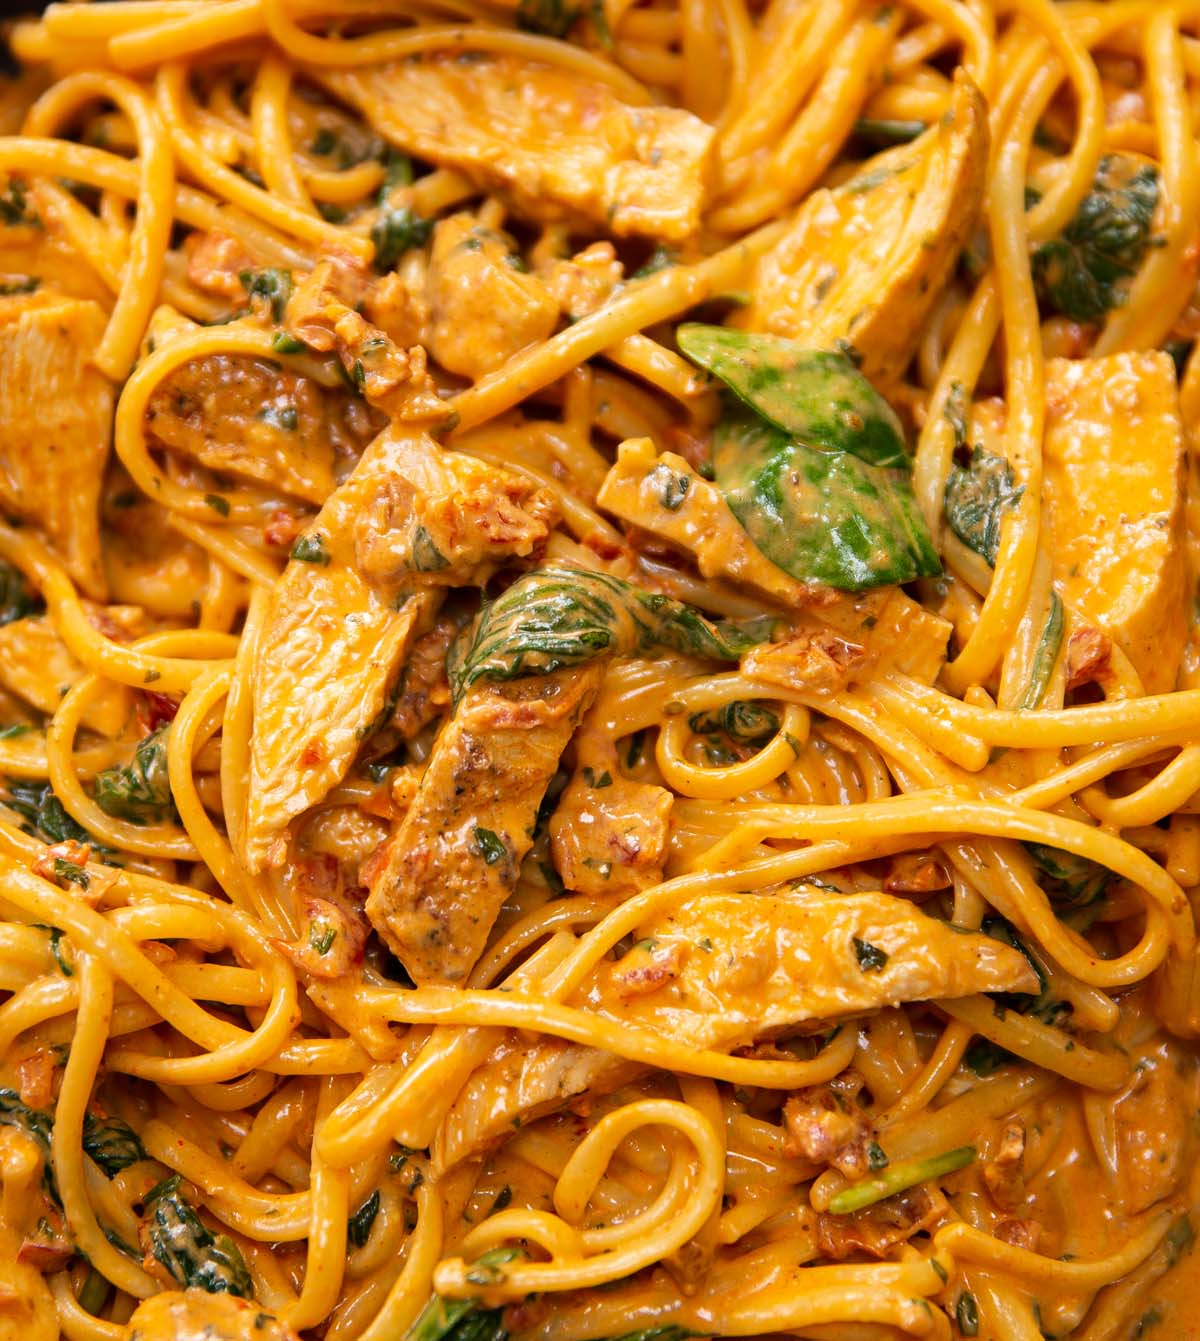
This Creamy Chicken Tuscan Pasta is creamy, packed with flavour and so simple to make!
If I had to choose one dish that really illustrates the food served on this blog, it could well be this. Creamy, carby, saucy and delicious. Better still, it couldn’t be easier to make! Follow me…
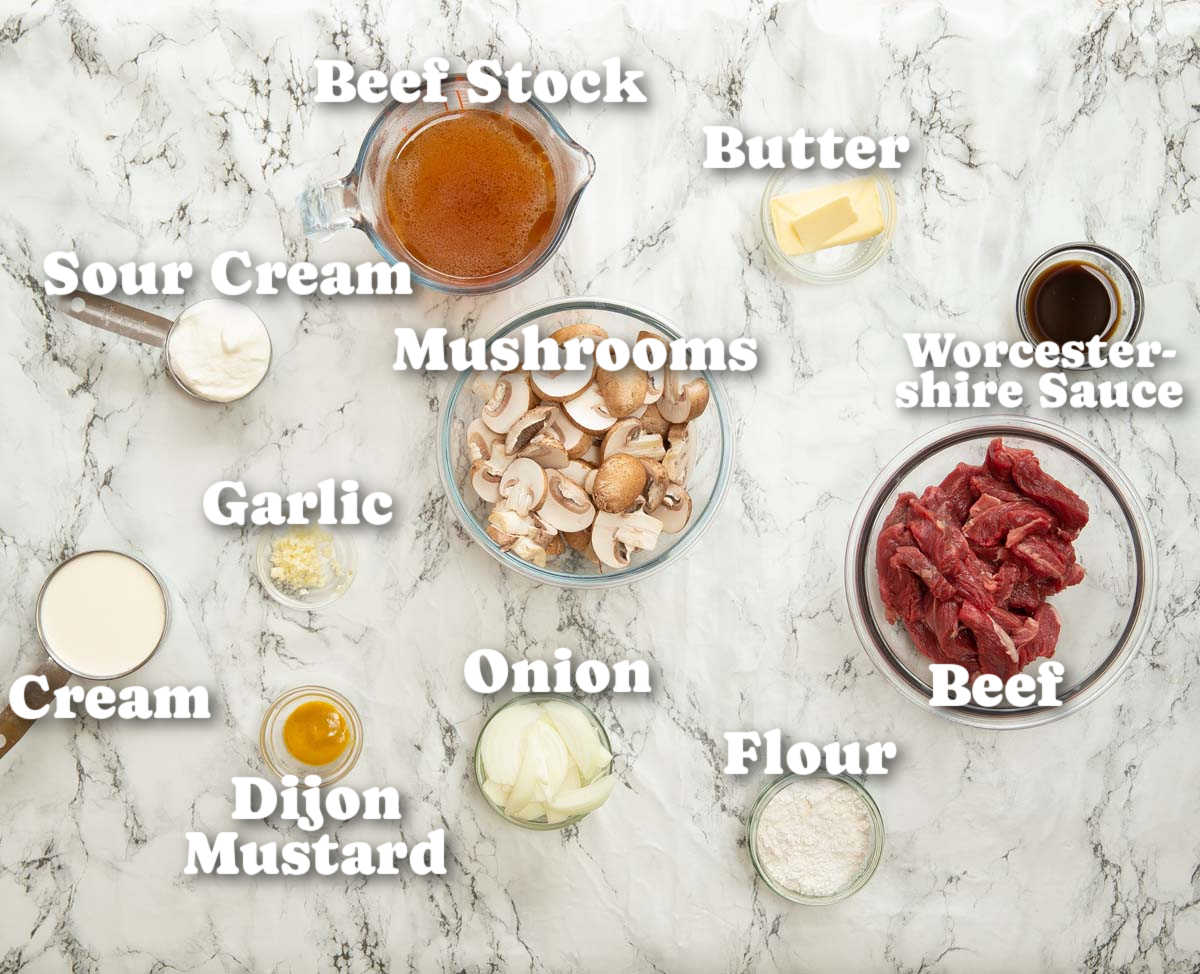
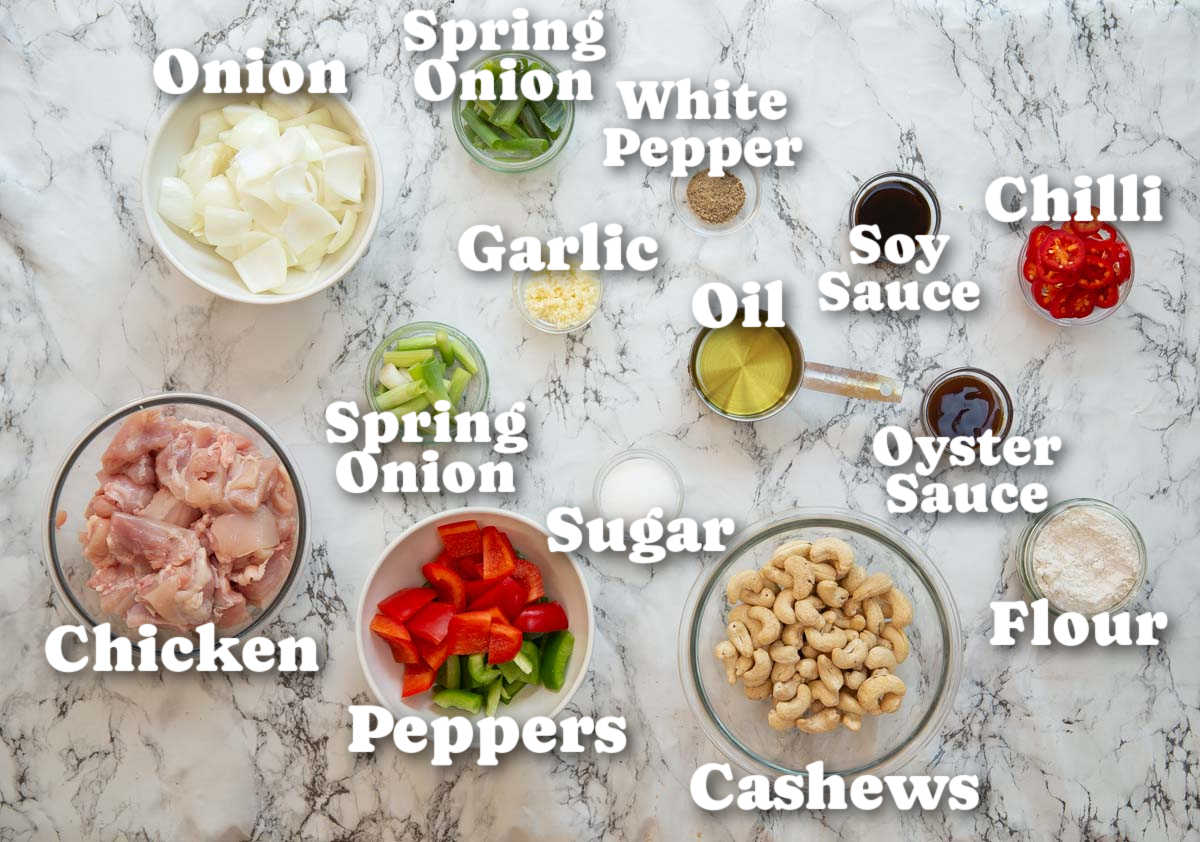
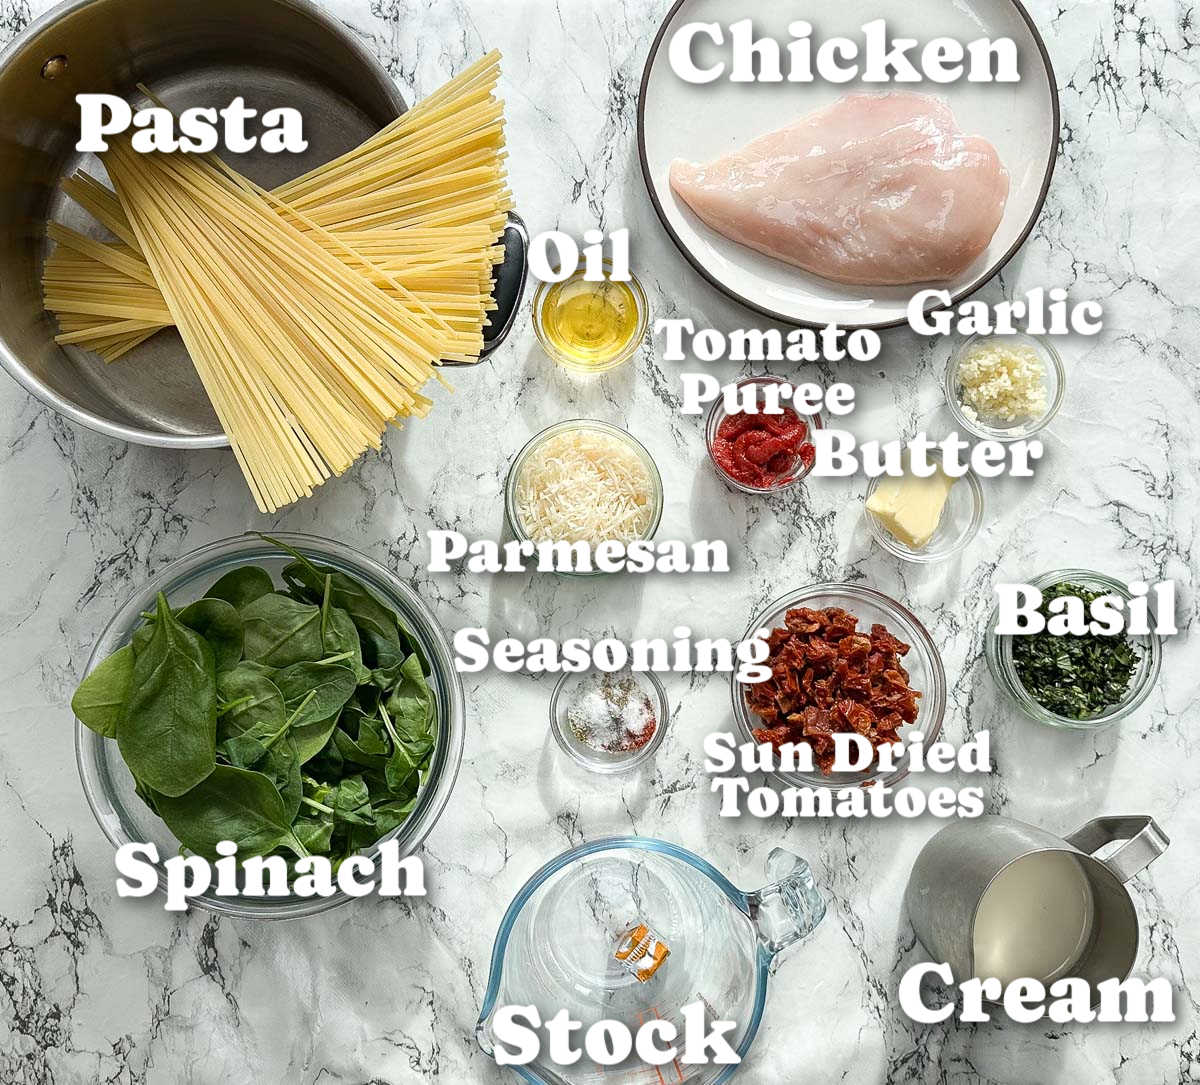
Tuscan Chicken Pasta Ingredients
Tuscan-style food has really gone off on a tangent these days, where it seems that most things with spinach and sun dried tomatoes in a creamy sauce are considered Tuscan. So, apologies to any Italians reading this – but this title has become most recognisable for this dish!
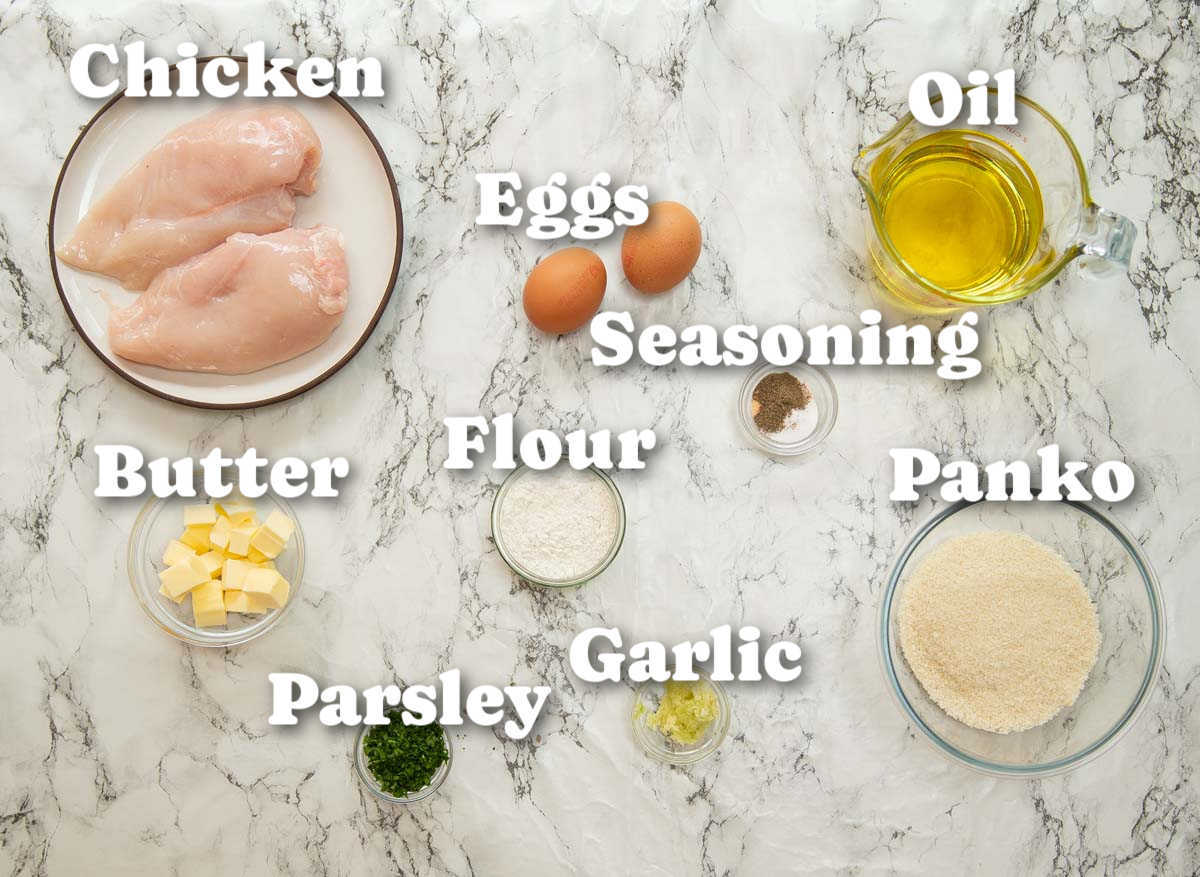
Anywho, let’s take a look at the simple selection of ingredients you’ll need:
- Pasta – I like using long-cut pasta as I find it easiest to toss and bind everything in the sauce. Here I’ve gone for Linguine.
- Chicken – We’ll be using one chicken breast and dividing it into two pieces (more on this in a sec).
- Seasoning – To season the chicken directly, I love using smoked paprika, oregano, onion powder, salt & pepper.
- Oil – To fry the chicken, I love using some oil from a jar of sun dried tomatoes. You can sub olive oil though.
- Garlic – I highly recommend using fresh garlic for the best flavour.
- Butter – This is to fry the garlic (because garlic + butter = heaven).
- Sun Dried Tomatoes – These are essential in this recipe! Don’t sub fresh tomatoes, they’ll throw off the flavour and texture of the sauce.
- Tomato Puree – This deepens the tomato flavour and thickens the sauce a little.
- Basil – A good amount of basil brings this dish to life and pairs beautifully with the tomatoes.
- Spinach – Bulks out the dish and pairs nicely with the creamy, garlicky sauce.
- Stock – Adds some depth of flavour and helps create the sauce. I use half an Oxo cube + water.
- Cream – The backbone of the sauce. Make sure it’s heavy/double cream for a thick consistency and rich flavour.
- Parmesan – Adds a good punch of flavour. This melts through the sauce and can be added on top at the end too.
(Full measurements are in the recipe card below. This is just a quick explanation of each ingredient).
Tuscan Chicken
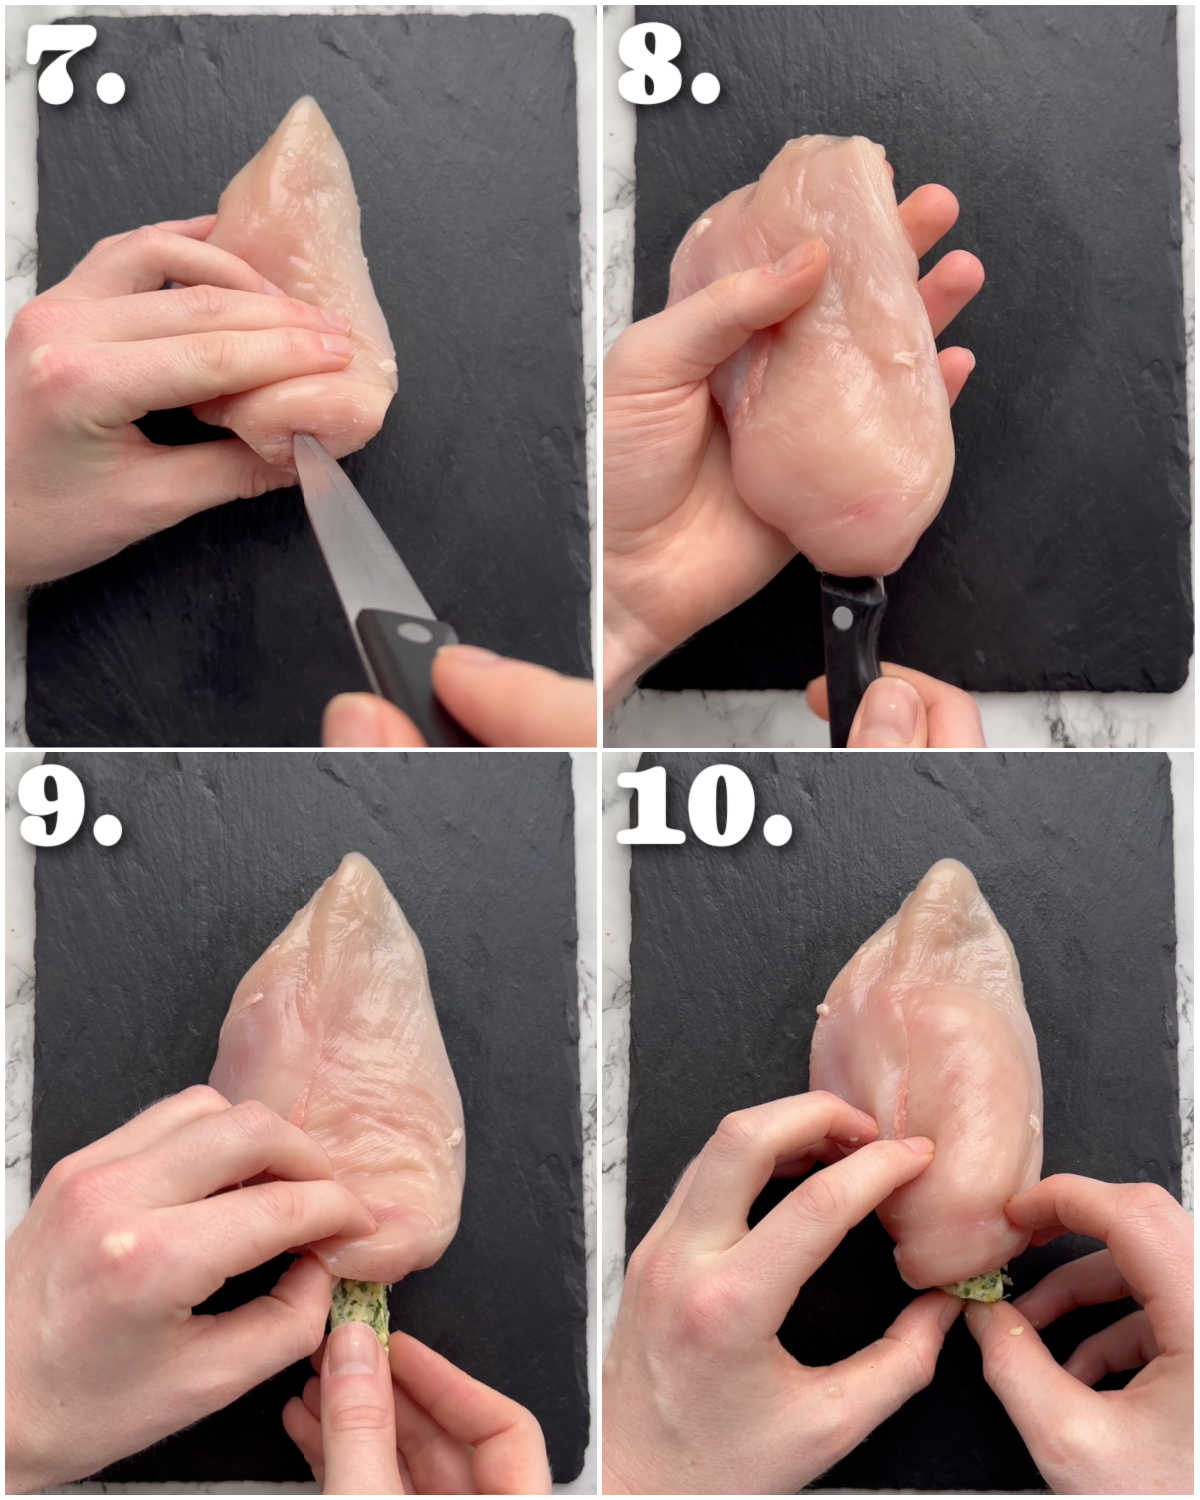
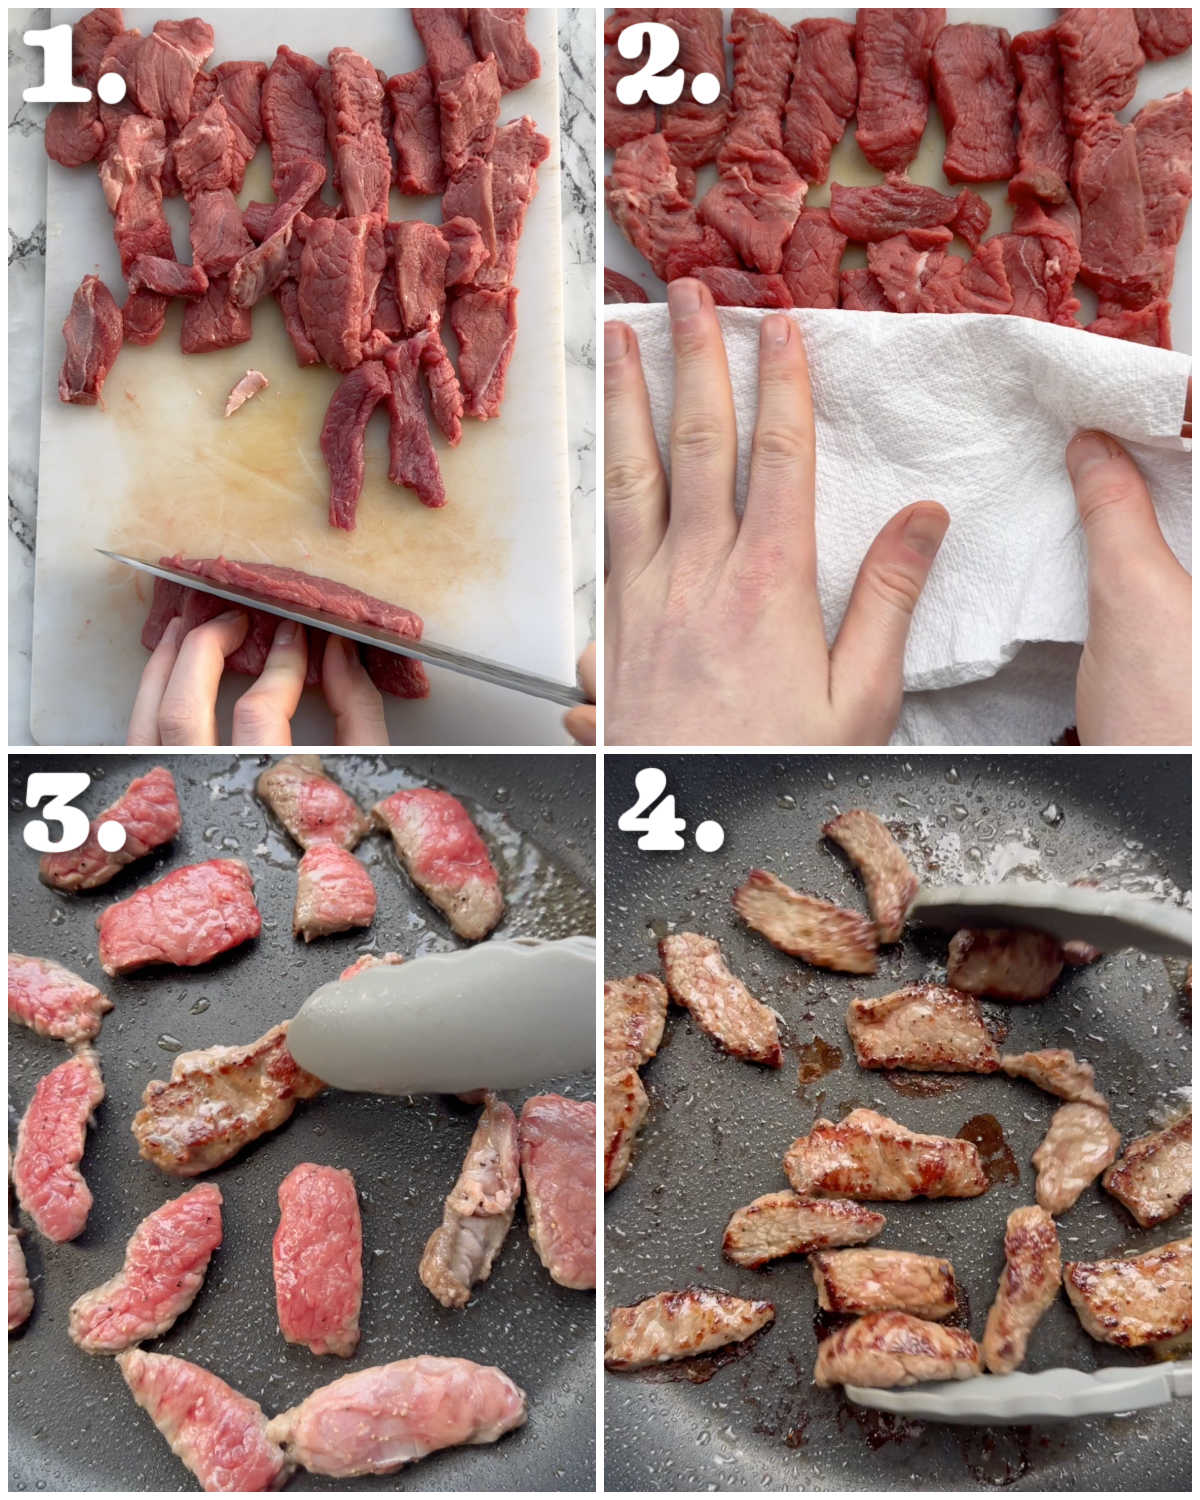
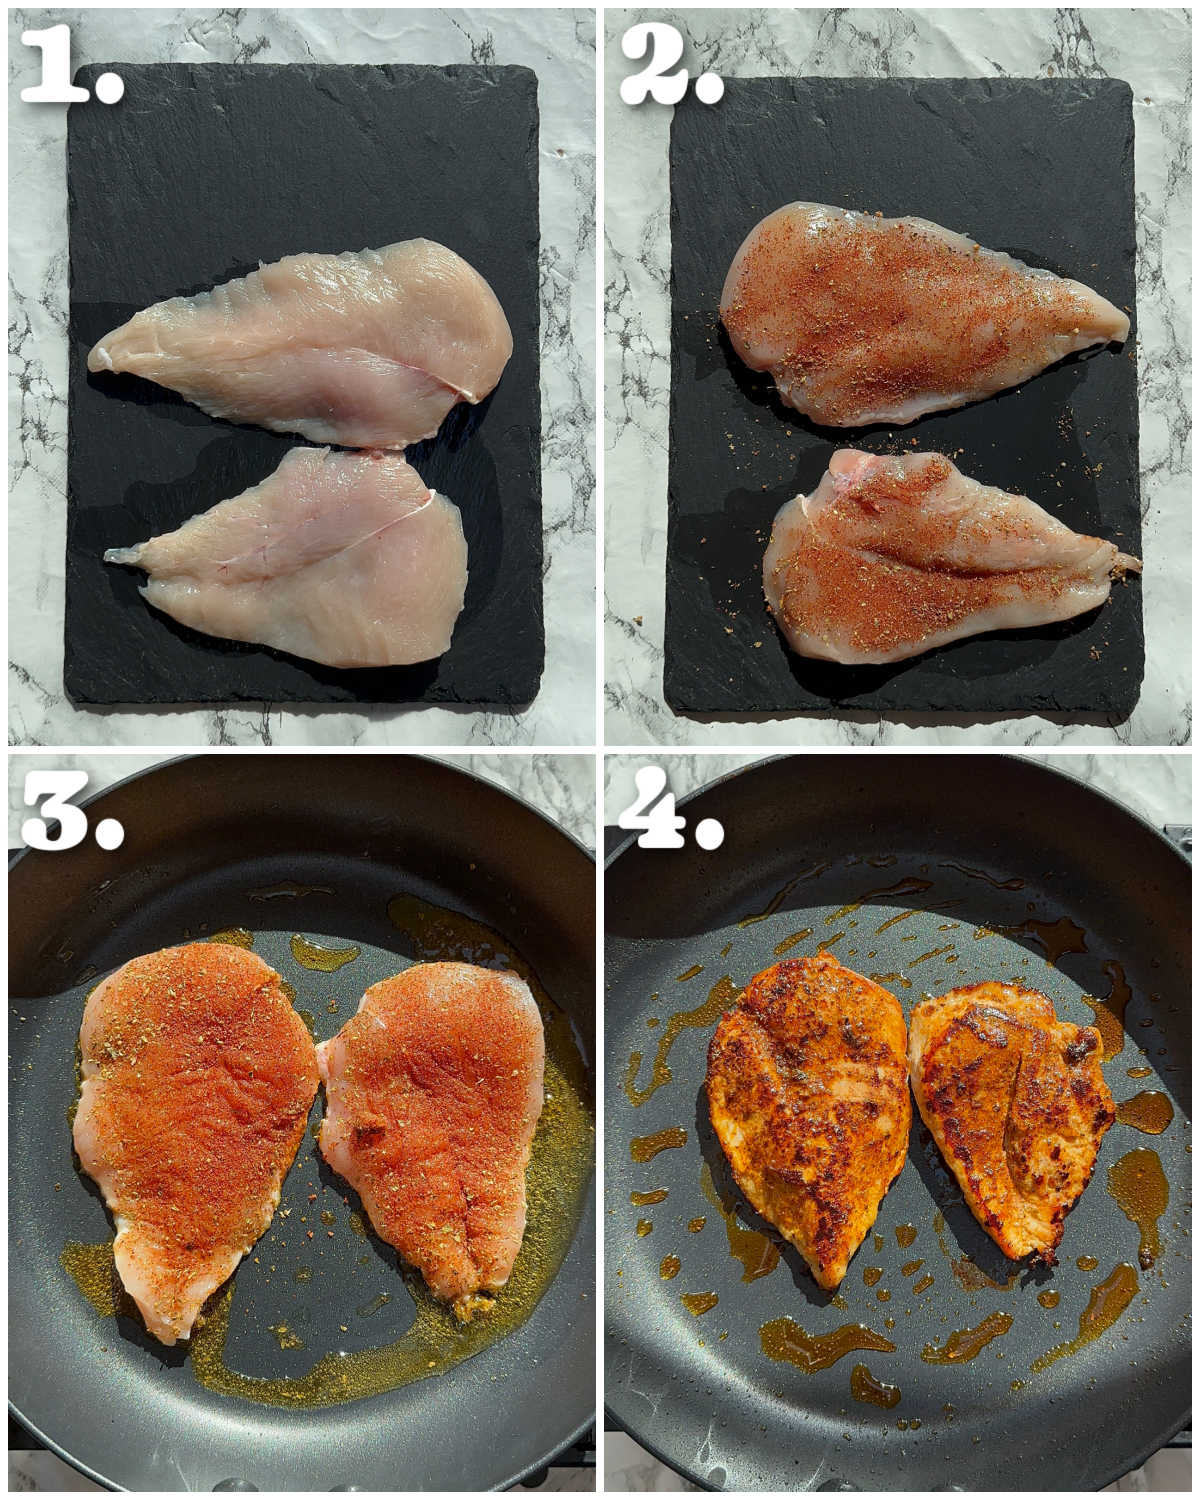
To prep the chicken, we’re going to slice it right through the centre to create 2 even-sized breasts. This will not only help the chicken cook through more evenly, but it’ll also cook through more quickly too.
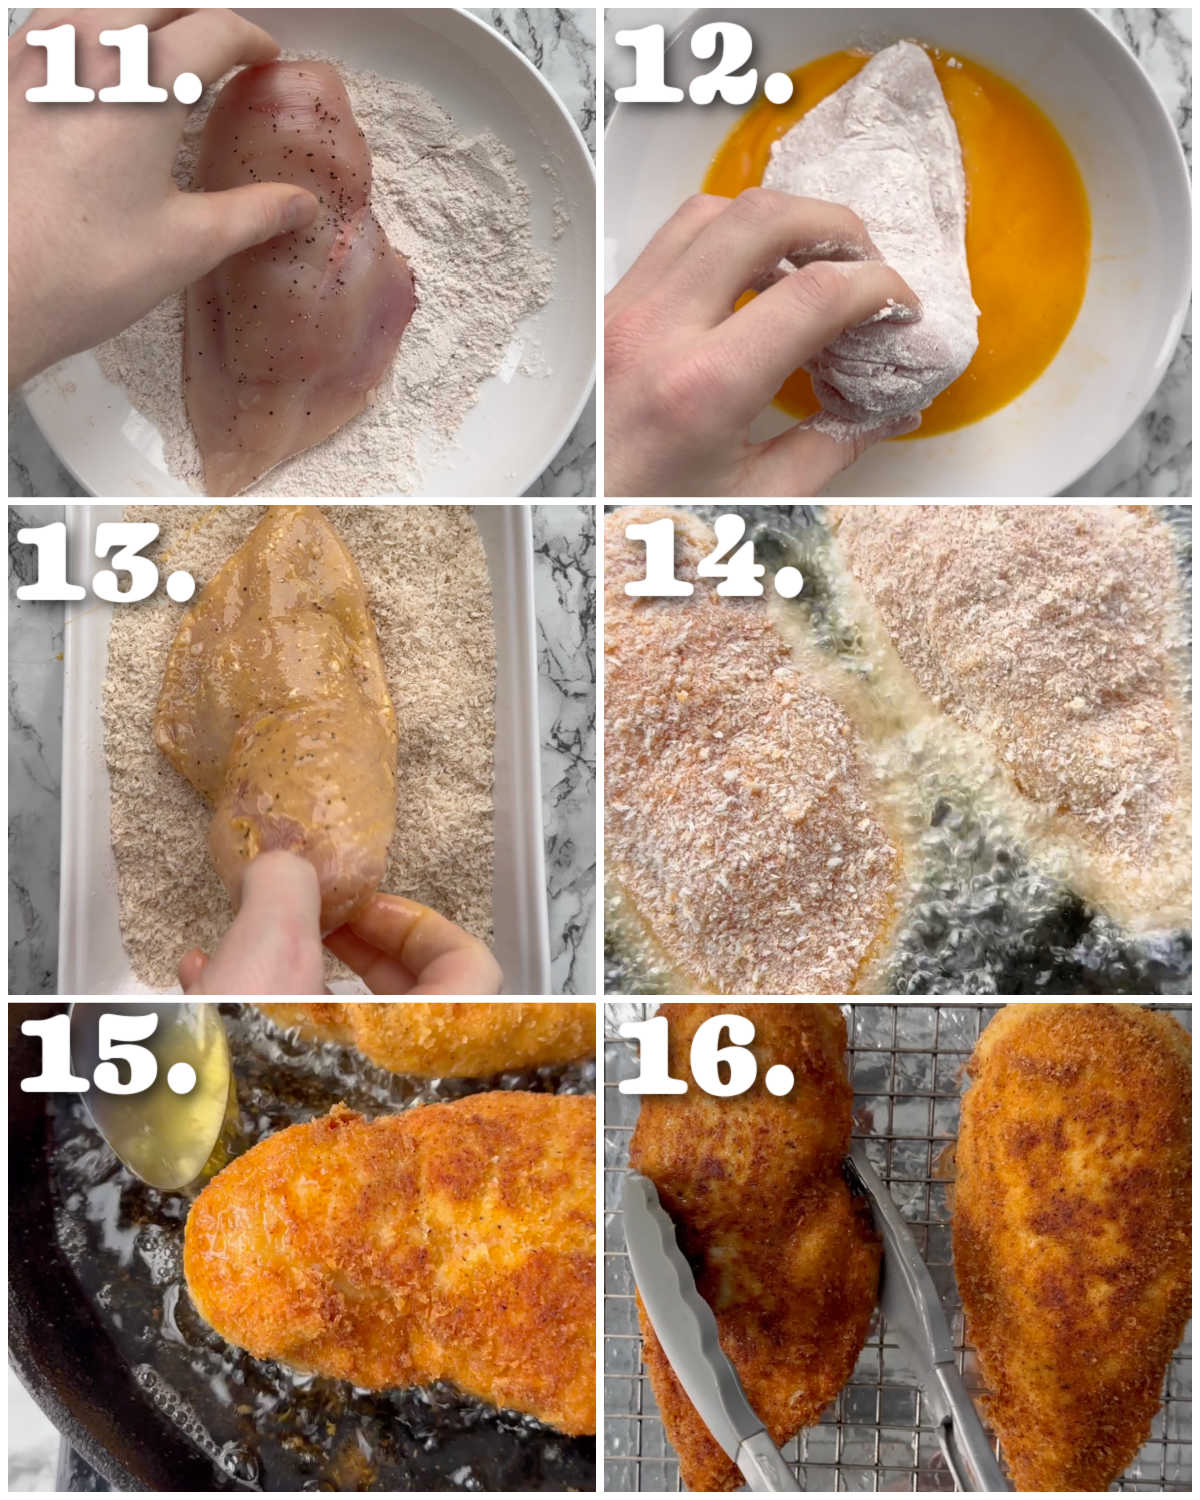
When it comes to frying the chicken, it shouldn’t take long to cook through at all. You’re looking to pick up some light charring on each side, just to develop some flavour.
Once the chicken is cooked, it’s important to let it rest before you slice it. Not only will the chicken continue cooking very slightly, but the resting period will allow for the meat to retain its juices. If you slice straight in, the juices will pour right out.
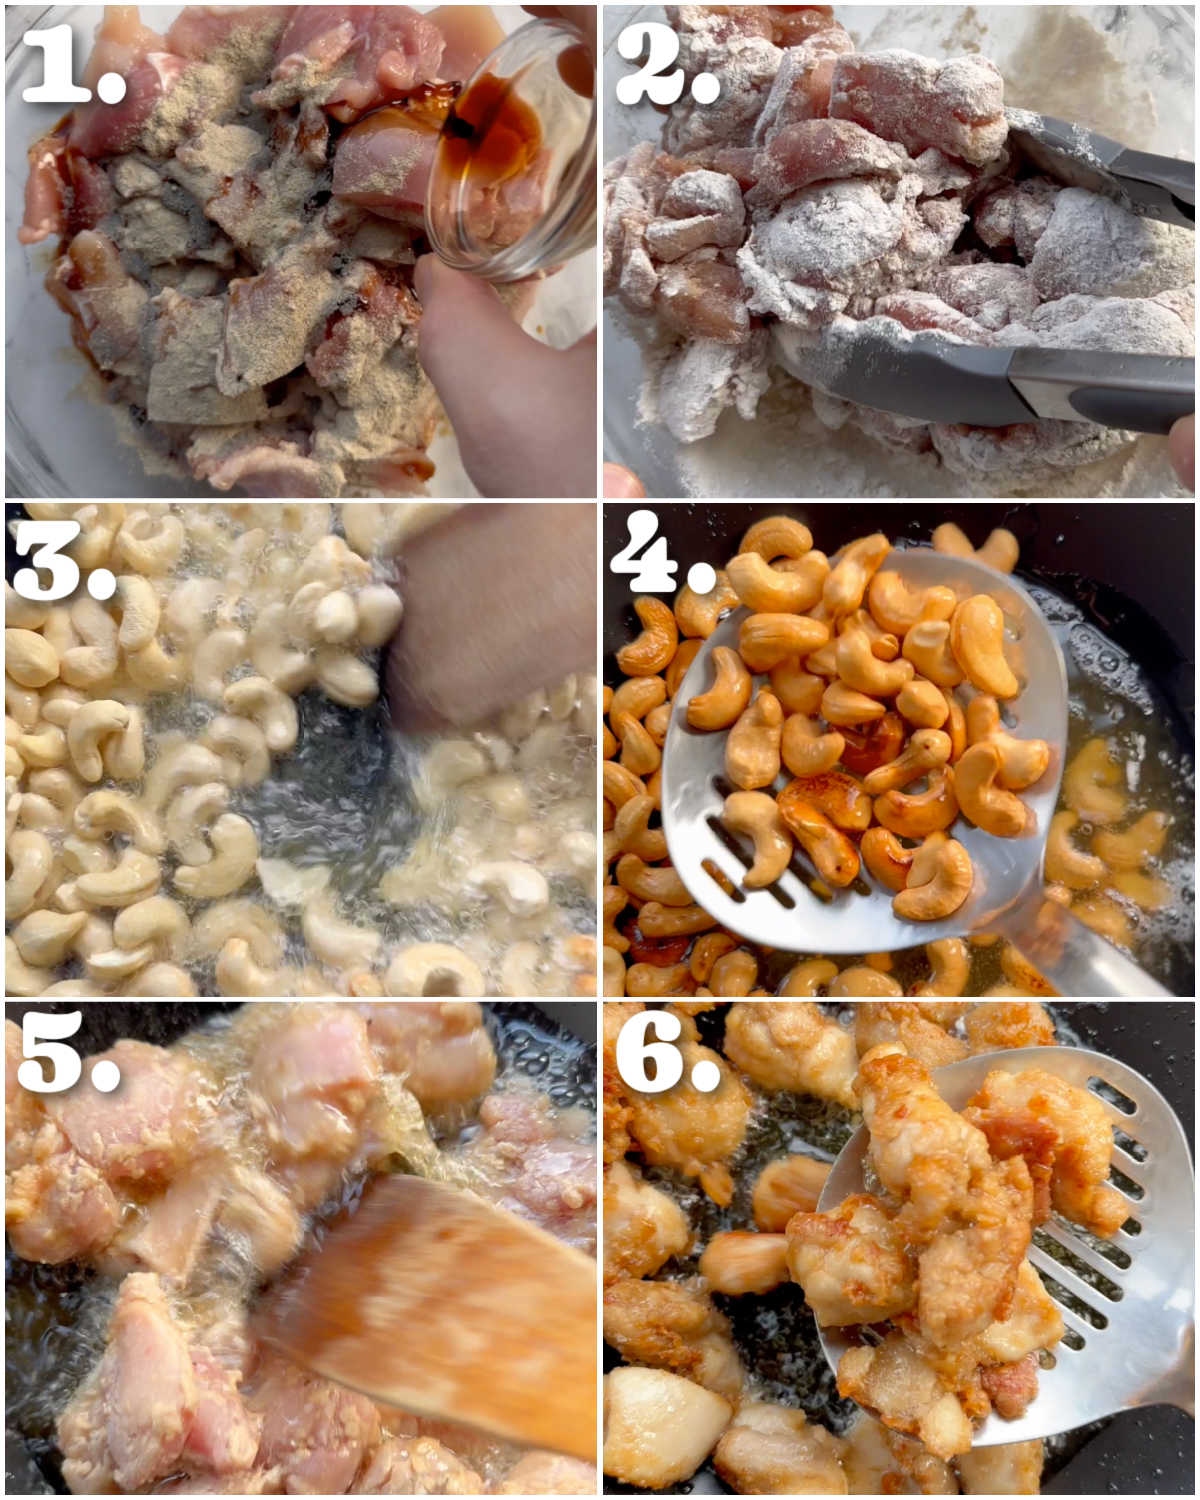
Process shots: slice chicken (photo 1), season chicken (photo 2), add to pan (photo 3), fry then remove (photo 4).
Top Tip
When it comes to slicing the chicken, try and slice the chicken against the natural grain of the meat and at a slight angle. This will give you the most tender slices.
Creamy Tuscan Chicken Pasta
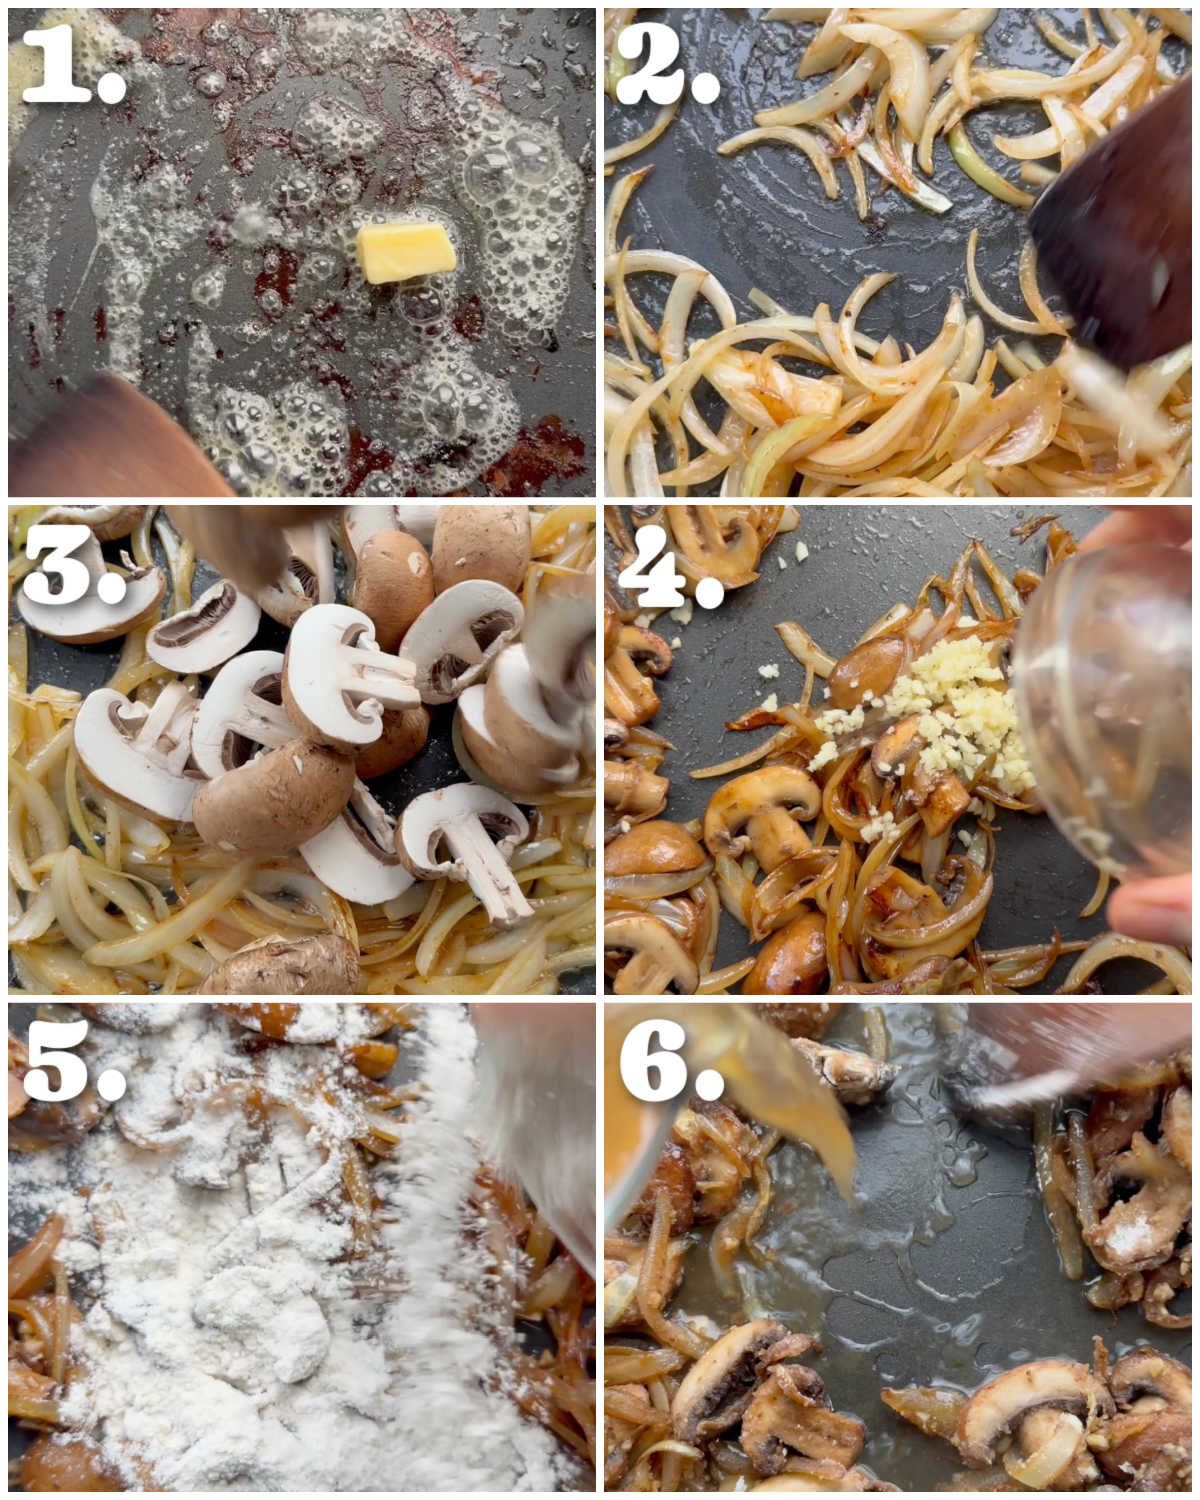
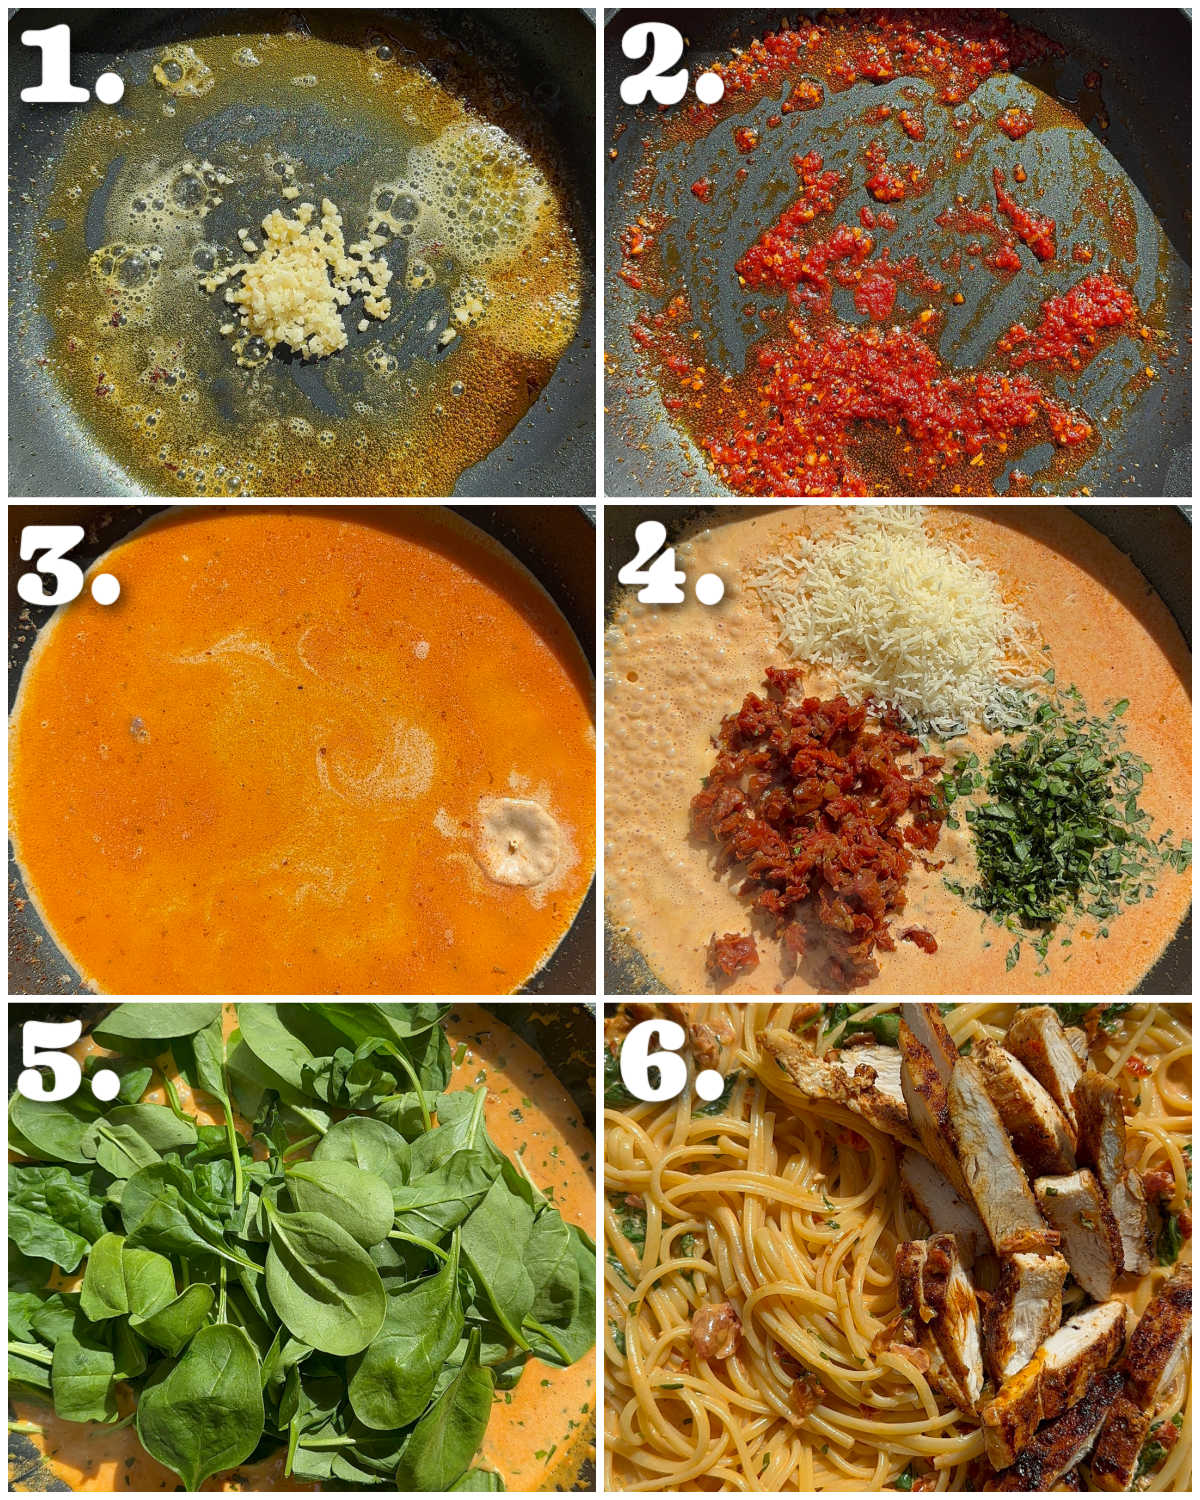
The sauce comes together pretty quickly, so you’ll want to pop the pasta on as soon as the chicken is done. Once the pasta has cooked, I like to use tongs to transfer it straight from the pot into the sauce. The excess starchy water that comes with it helps turn the sauce nice and glossy/creamy and will help emulsify the fats.
I like to toss the chicken in right at the end (do not forget the resting juices – that’s bonus flavour just waiting to be used). That way it stays nice and tender and won’t overcook.
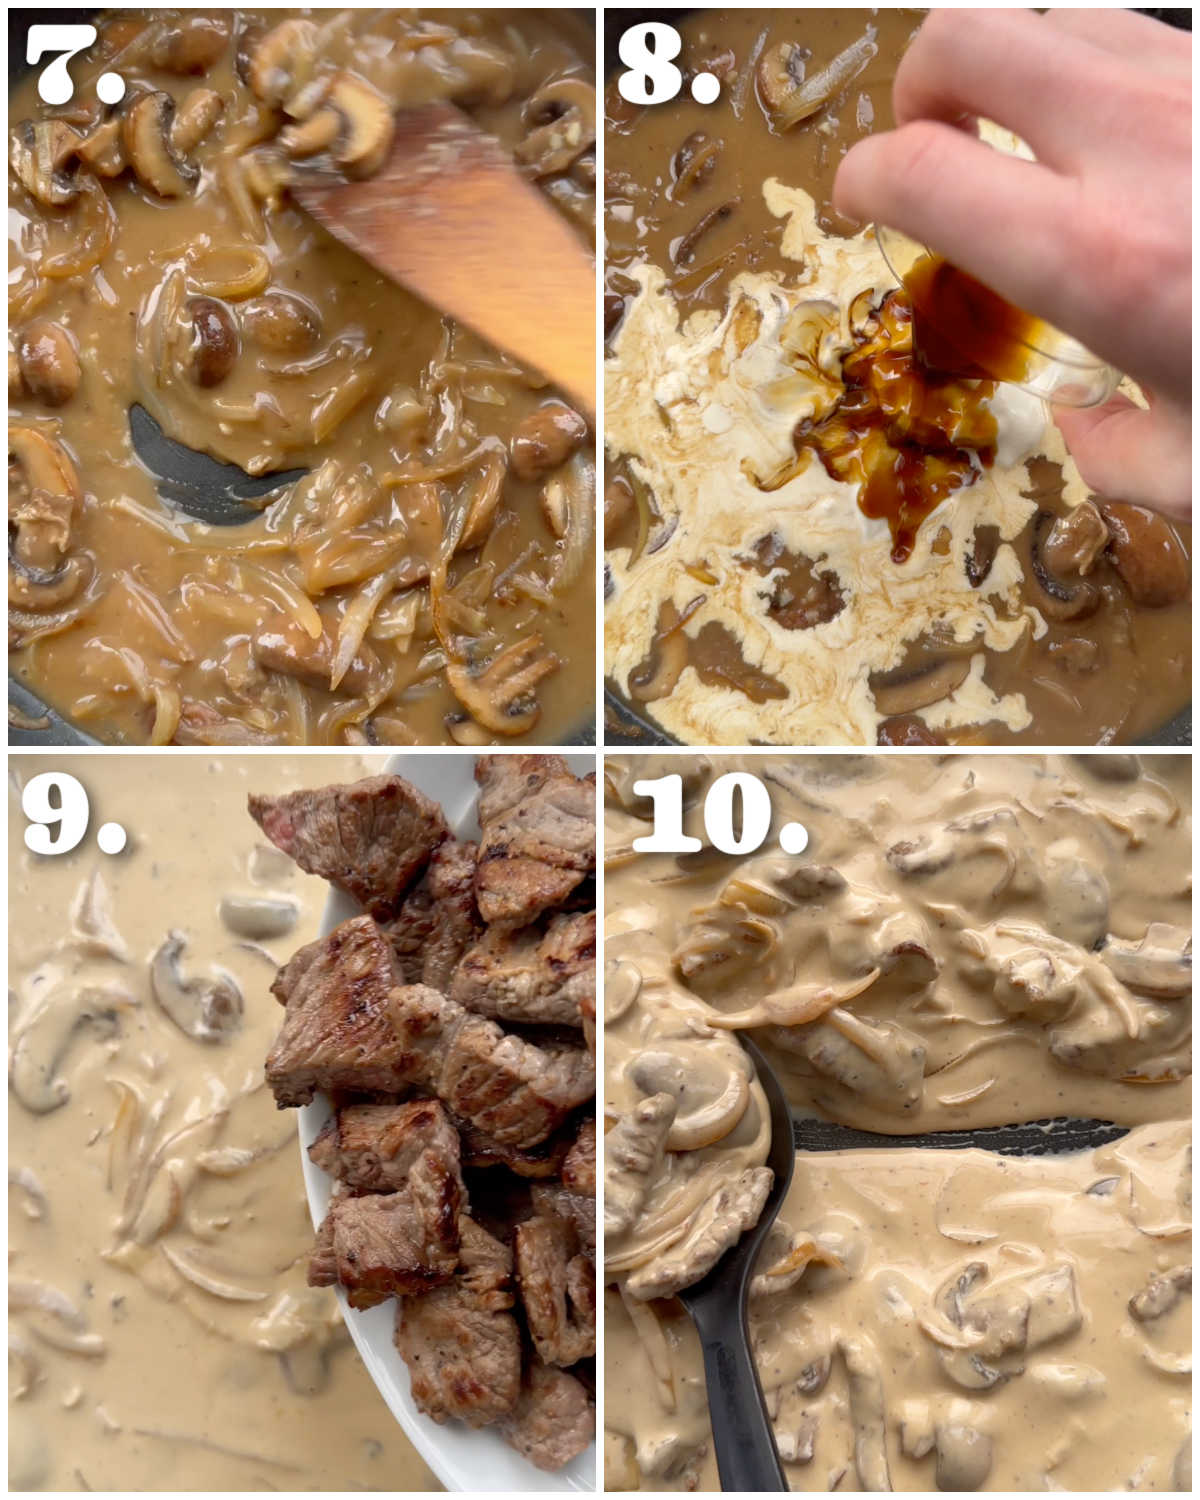
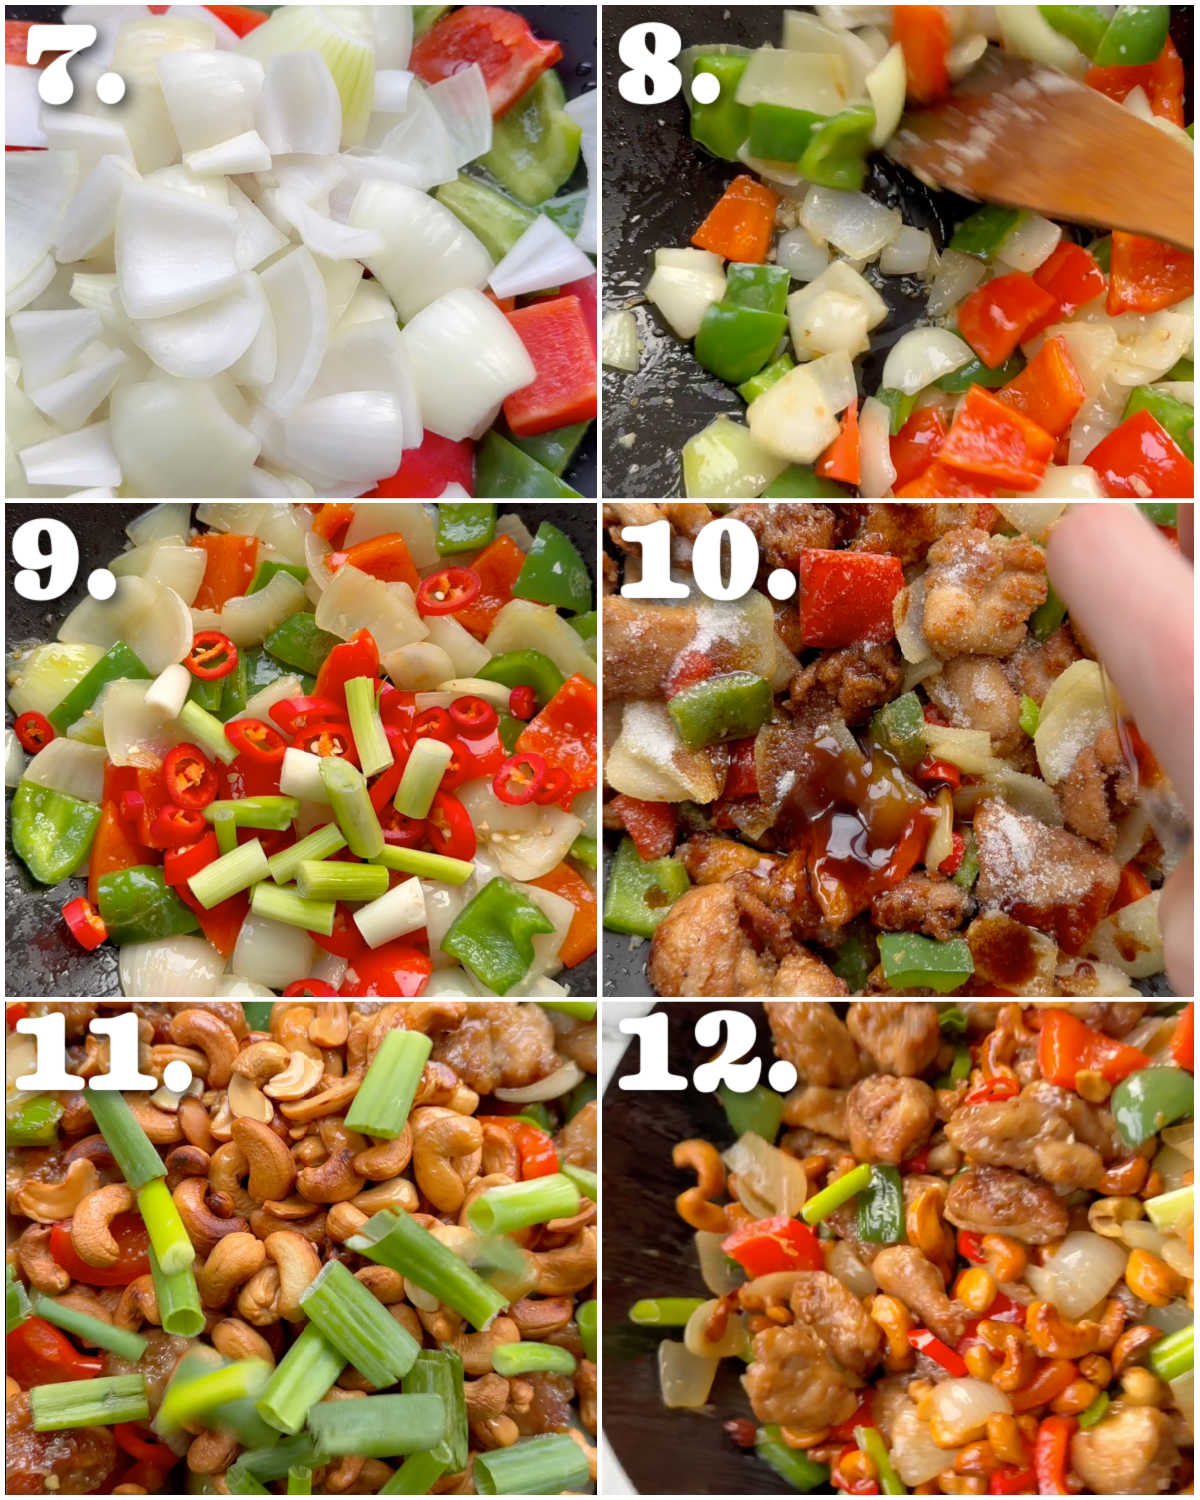
Process shots: fry garlic in butter (photo 1), fry tomato puree (photo 2), add stock and cream (photo 3), add sun dried tomatoes, basil and parmesan (photo 4), stir in spinach (photo 5), toss in pasta and chicken (photo 6).
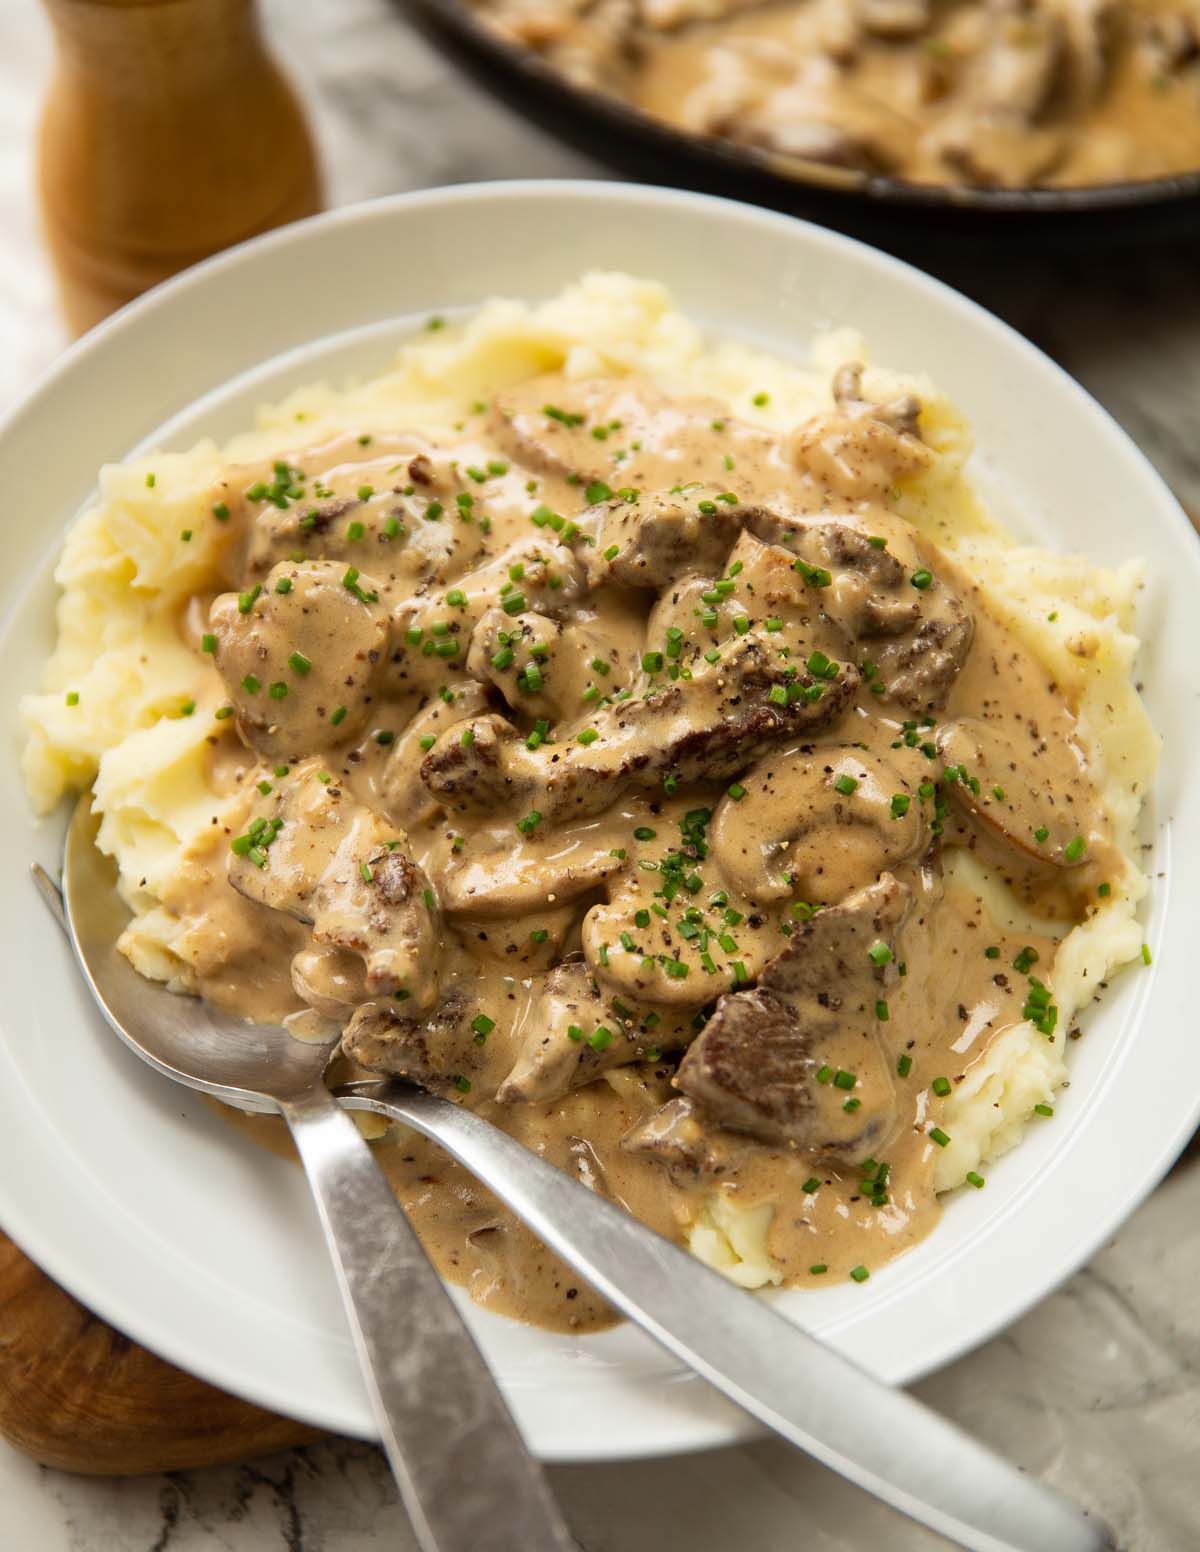
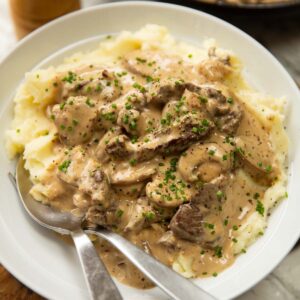
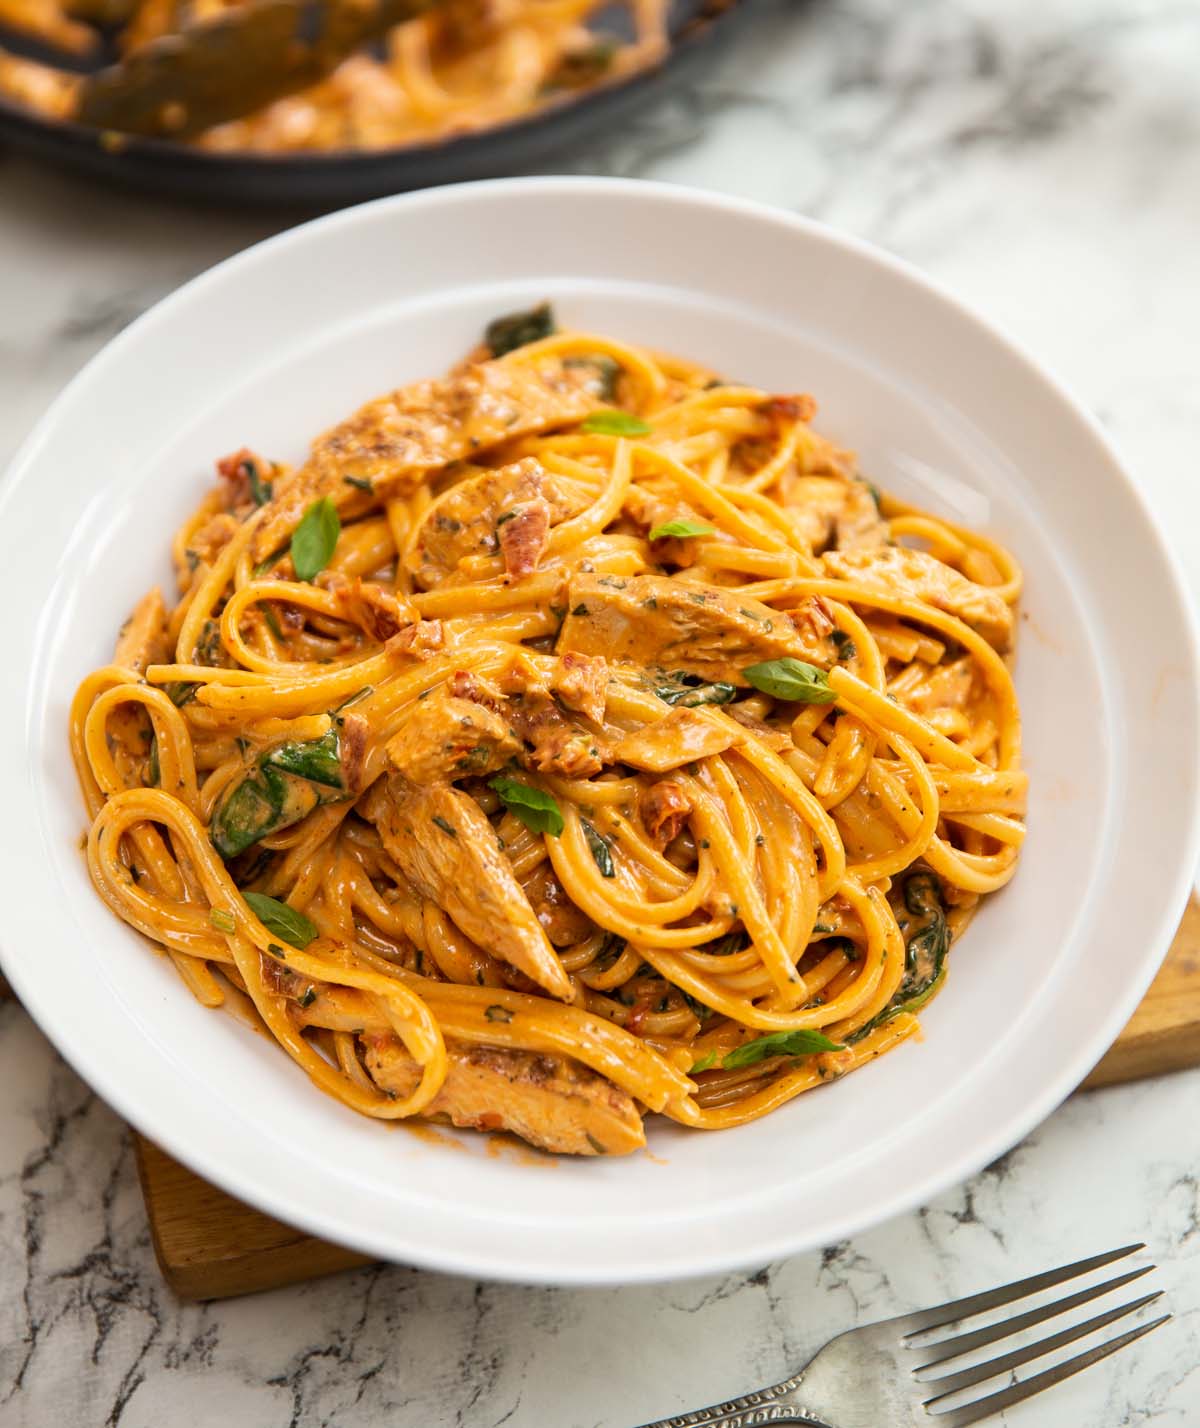
Serving Tuscan Chicken Pasta
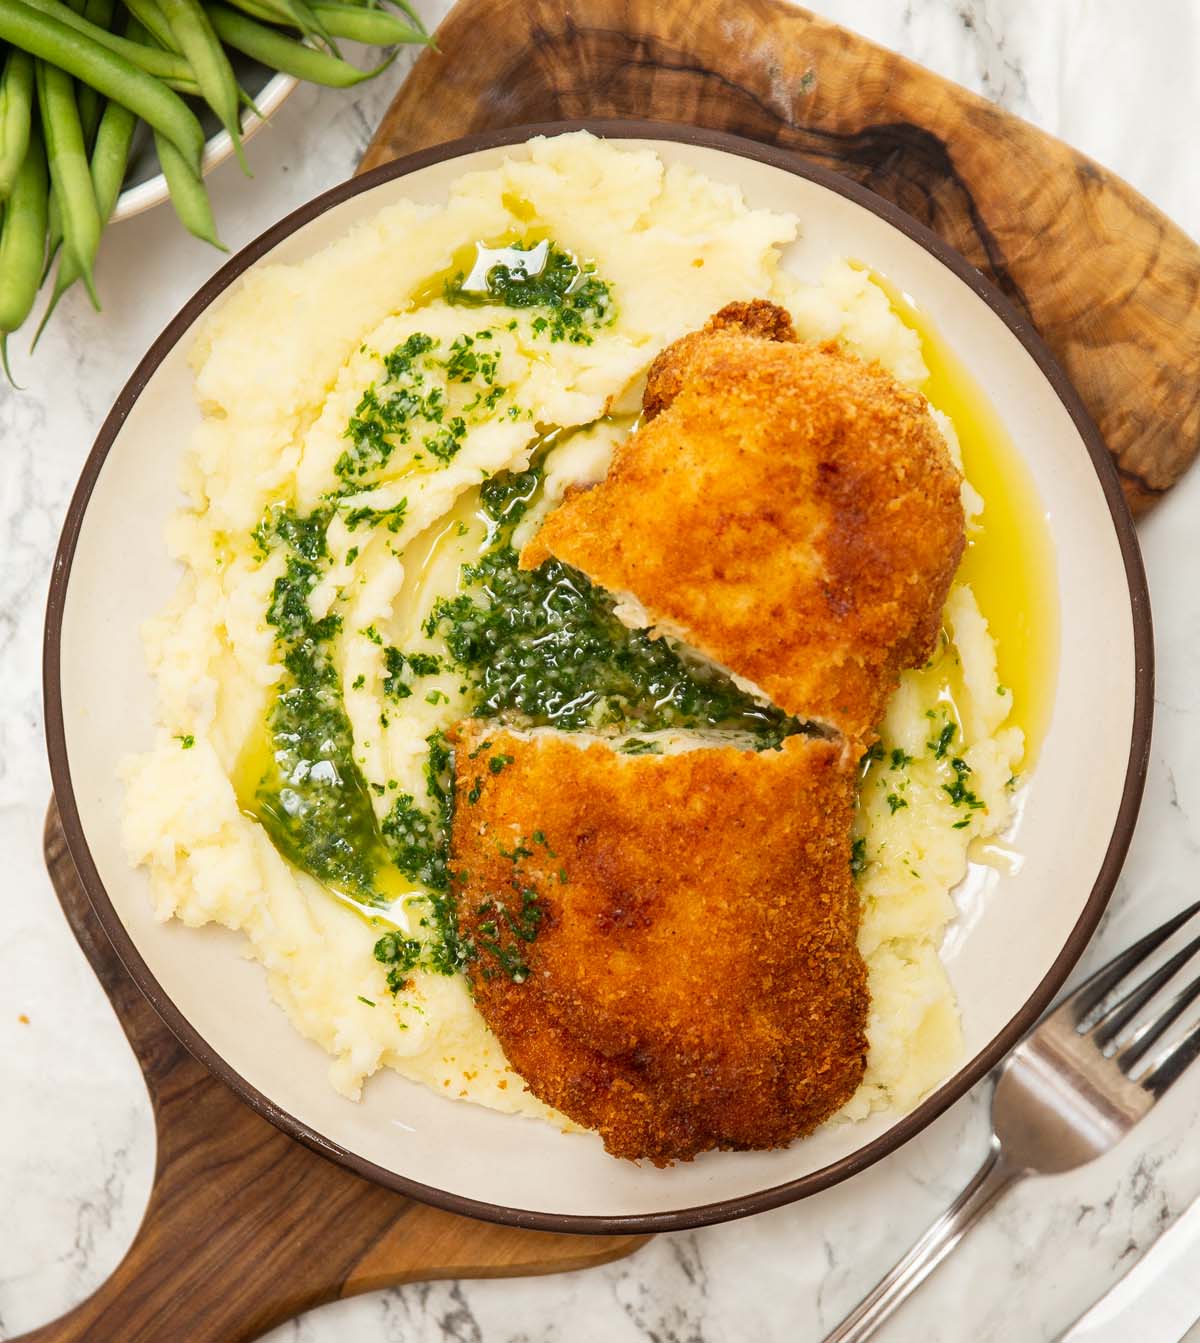
You’ll find the sauce will thicken quite quickly as you toss the pasta. If it over-thickens, you can use some of the leftover pasta water to thin it out as needed. From there, I love finishing with some leftover basil and parmesan.
This will offer two hearty portions, making it the perfect Date Night Dinner. If you’re extra hungry, you could add some Garlic Bread!
For more Tuscan-style recipes check out my Tuscan Prawns and Tuscan Ravioli!
Alrighty, let’s tuck into the full recipe for this creamy tuscan chicken pasta shall we?!
How to make Tuscan Chicken Pasta (Full Recipe & Video)

Creamy Tuscan Chicken Pasta
#wprm-recipe-user-rating-0 .wprm-rating-star.wprm-rating-star-full svg * { fill: #343434; }#wprm-recipe-user-rating-0 .wprm-rating-star.wprm-rating-star-33 svg * { fill: url(#wprm-recipe-user-rating-0-33); }#wprm-recipe-user-rating-0 .wprm-rating-star.wprm-rating-star-50 svg * { fill: url(#wprm-recipe-user-rating-0-50); }#wprm-recipe-user-rating-0 .wprm-rating-star.wprm-rating-star-66 svg * { fill: url(#wprm-recipe-user-rating-0-66); }linearGradient#wprm-recipe-user-rating-0-33 stop { stop-color: #343434; }linearGradient#wprm-recipe-user-rating-0-50 stop { stop-color: #343434; }linearGradient#wprm-recipe-user-rating-0-66 stop { stop-color: #343434; }
Equipment
-
Sharp Knife & Chopping Board
-
Large Pan & Wooden Spoon
-
Large Pot & Tongs (for cooking pasta)
-
Fine Cheese Grater (for parmesan)
Ingredients
Chicken
- 1x 250g/9oz Chicken Breast
- 1/2 tsp EACH: Smoked Paprika, Oregano
- 1/4 tsp EACH: Onion Powder, Salt, Black Pepper
- 1 tbsp Sun Dried Tomato Oil, from the jar (sub olive oil)
Pasta
- 200g / 7oz Long-Cut Pasta (I use Linguine)
- 1 tbsp Butter
- 3 cloves of Garlic, finely diced
- 1 tbsp Tomato Puree (Tomato Paste in US)
- 80ml / 1/3 cup Chicken Stock
- 160ml / 2/3 cup Double/Heavy Cream
- 90g / 3oz Sun Dried Tomatoes, finely diced
- 30g / 1oz freshly grated Parmesan, plus more to serve if desired
- 2 tbsp finely diced Fresh Basil, plus more to serve if desired (~1/2 bunch)
- 2 large handfuls of Baby Spinach (~60g/2oz)
Instructions
-
Horizontally slice the chicken breast right through the centre to create 2 even-sized breasts. Evenly coat each side with the seasoning.
-
Add the oil to a large pan over medium-high heat. Once hot, add the chicken and fry for a few minutes on each side until lightly charred and just about cooked through the centre. Place on a plate to one side and slice into thin strips just before needed.
-
At this point add the pasta to well-salted boiling water and cook until al dente. Don't drain.
-
Lower the pan heat to medium and melt the butter. Add the garlic and fry for 10-20 seconds, then stir in the tomato puree and fry for another minute or so (be careful the garlic doesn't burn). Stir in the stock and cream, then stir in the sun dried tomatoes, basil and parmesan. Bring to a gentle simmer, then lower the heat.
-
Stir in the spinach until it just begins to wilt (keep in mind it will continue wilting). Use tongs to transfer the pasta straight from the pot in the pan and toss until coated in the sauce. Add the chicken + all the resting juices and continue tossing the pasta until the sauce is no longer watery. It should thicken around and cling to the pasta. If the sauce overthickens just toss in a splash of the leftover pasta water.
-
Check for seasoning and adjust with salt and pepper, then serve with extra basil and parmesan if desired.
Video
Notes
b) Sauce – The sauce should be pretty thick from the get go, which is fine, because it thins out as the spinach wilts and when you add the pasta. Just make sure it thickens up properly when you toss the pasta. It should still be saucy, but not watery at all.
c) Stock – As this is a small amount you can use ready-made stock. Or, do as I do, which is use half an Oxo cube + 80ml boiling water (perfect amount).
d) Calories – Whole recipe divided by 2.
Nutrition
For more similar recipes check out these beauties:
Chicken Pasta Recipes
- Spicy Chicken Pasta
- Cajun Chicken Pasta
- Lemon Chicken Pasta
- Chicken and Chorizo Pasta
- Chicken and Sun Dried Tomato Pasta
The post Creamy Tuscan Chicken Pasta appeared first on Don't Go Bacon My Heart.